Archive

Category Archives for "Textile Art"

May Morris


May Morris

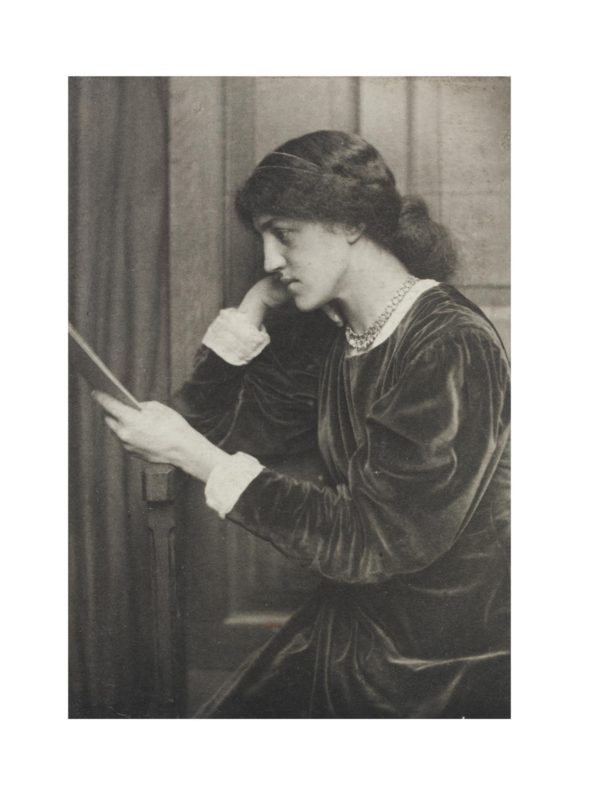
Photo portrait of May Morris

Portrait of May Morris by Frederick Hollyer, circa 1890. Photo via © Victoria and Albert Museum, London
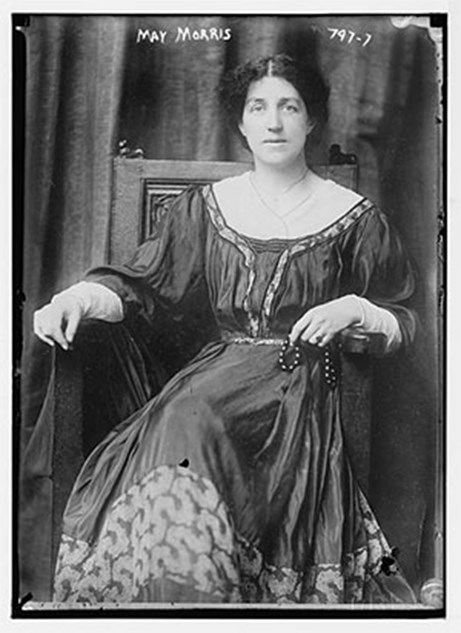
May Morris (1862 - 1938) and her father William Morris (1834 – 1896) were both significant figures of the British Arts and Crafts Movement. While William Morris's place in art history is well established, May's place is less well known. This is changing, thanks to a special exhibition of her work that was organized by the William Morris Gallery, and two recently published books on her life and work.

May was born into a creative family, setting the tone for her life's work. William Morris is known for his involvement in the Arts and Crafts Movement. The Movement was focused on hand-made and hand-crafted items, rejecting the mass produced products of the Victorian period. Morris is widely acknowledged for his masterful designs which feature images of organic growth - of leaves, branches, and flowers. He is also known as a craftsman, designer, poet, printer, socialist, novelist, and environmentalist. His legacy remains important today.

Jane Burden Morris, May's mother, was an embroiderer. She was also a muse and a model to her husband and to Dante Gabriel Rossetti, the English painter, poet, and illustrator who founded the Pre-Raphaelite Brotherhood. Elizabeth Burden, May's aunt, was an embroiderer and teacher.  
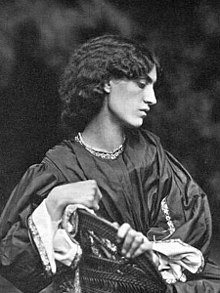
Portrait of Jane Morris by John Robert Parsons, copied by Emery Walker Ltd., July, 1865.
From the series copied by Emery Walker Photo via National Portrait Gallery
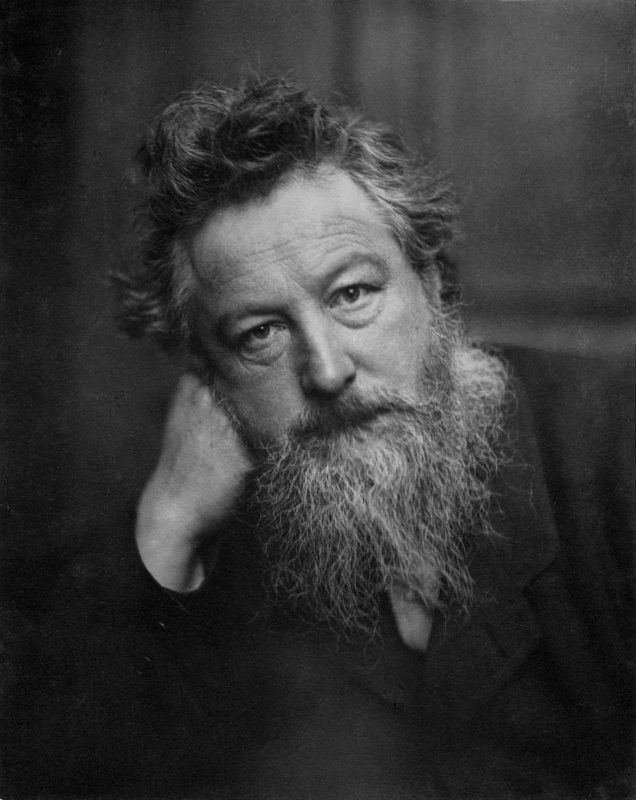
Portrait of William Morris by Frederick Hollyer, 1888

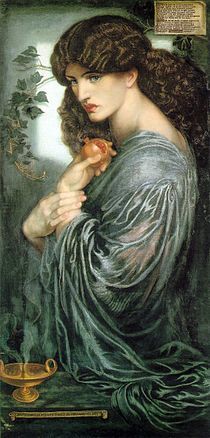
Jane Morris painted by Dante Gabriel Rosetti as Proserpine (1874)

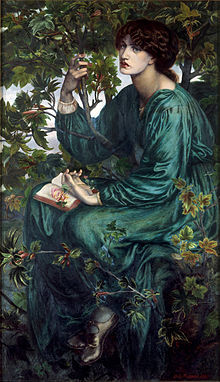
Jane Morris painted by Dante Gabriel Rossetti –The Day Dream (1880)

In 1861, William Morris founded the firm Morris, Marshall, Faulkner & Co., along with the artists Edward Burne-Jones and Dante Gabriel Rossetti, the architect Philip Webb, and others who were responding to the shoddy practices of much of Victorian manufacturing. Morris designed wallpaper, fabrics, tapestries, furniture, and stained glass windows. He assumed total control of the company in 1875, and renamed it Morris & Co.

May Morris was born in 1862. Her mother and aunt taught her to embroider; her father taught her textile design. At age 16, she enrolled at the National Art Training School (NATS) in South Kensington, London - the precursor of the Royal College of Art. She was part of the first generation to study crafts in art schools such as the NATS. Her focus in school was on textiles and embroidery, with a special interest in Opus Anglicanum - a form of fine needlework developed in medieval England that was used primarily for making church vestments.
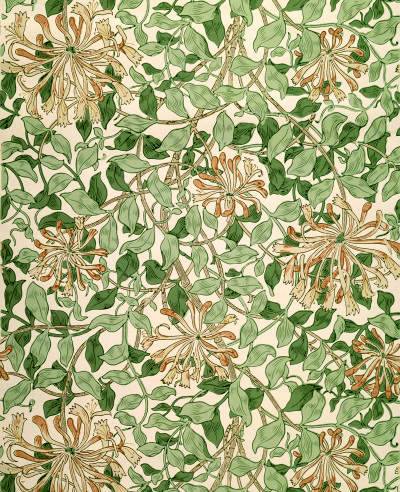
'Honeysuckle' Wallpaper designed by May Morris, 1883. Woodblock print on paper; hand-printed wallpaper decorated with honeysuckle. Printed by Morris & Co., hand-printed by Morris & Co., 1883.  Photo via © Victoria and Albert Museum, London
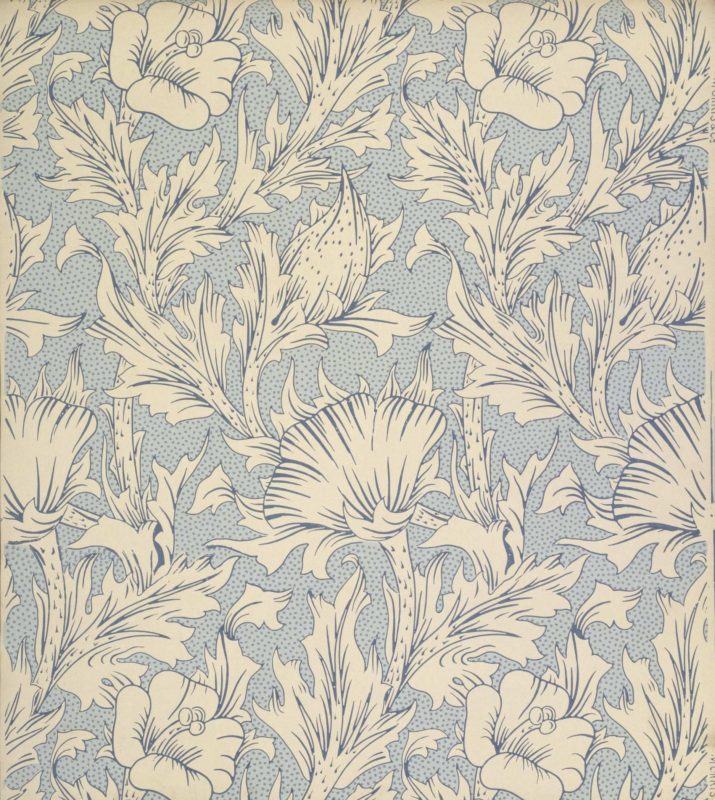
Specimen of 'Horn Poppy' wallpaper, a design of poppy flowers and foliage; Color woodblock print on paper; Designed by Mary (May) Morris; Published by Morris & Co.; Printed by Jeffrey & Co.; Part of a pattern book of Morris & Co. patterns (E.633-858-1915); England; 1885.  Photo via © Victoria and Albert Museum, London
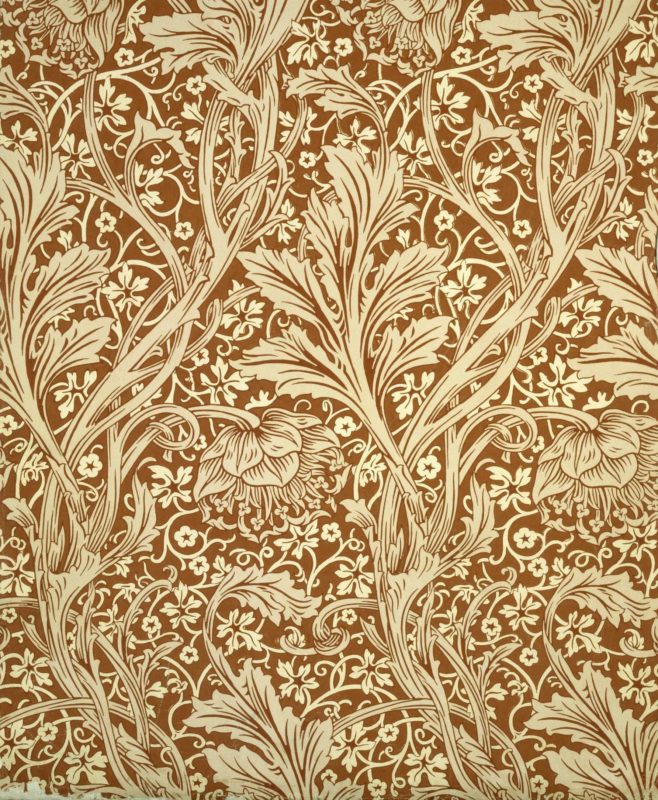
Arcadia wallpaper designed by May Morris

Designed by May Morris: Specimen of 'Arcadia' wallpaper, a pattern of intertwined flowers and foliage, cream and brown; color woodblock print, on paper via Mary (May) Morris; Part of 'Volume 2', a pattern book containing 27 Morris & Co. patterns from 1882-96 (E.530-608-1919); England; ca. 1886. Height: 68.5 cm size of volume, Width: 53.3 cm size of volume.  Photo via © Victoria and Albert Museum, London

Arts and Crafts in the Victorian Age

The Arts and Crafts Movement flourished in Europe and North America between about 1880 and 1920. 

“The Arts and Crafts movement was an international trend in the decorative and fine arts that developed earliest and most fully in the British Isles and subsequently spread across the British Empire and to the rest of Europe and America.

Initiated in reaction against the perceived impoverishment of the decorative arts and the conditions in which they were produced, the movement flourished in Europe and North America between about 1880 and 1920. In Japan it emerged in the 1920s as the Mingei movement. It stood for traditional craftsmanship, and often used medievalromantic, or folk styles of decoration. It advocated economic and social reform and was anti-industrial in its orientation. It had a strong influence on the arts in Europe until it was displaced by Modernism in the 1930s, and its influence continued among craft makers, designers, and town planners long afterwards.

The term was first used by T. J. Cobden-Sanderson at a meeting of the Arts and Crafts Exhibition Society in 1887, although the principles and style on which it was based had been developing in England for at least 20 years. It was inspired by the ideas of architect Augustus Pugin, writer John Ruskin, and designer William Morris. In Scotland it is associated with key figures such as Charles Rennie Mackintosh.”   Wikipedia

In 1878, at age 23, May became the Director of the Embroidery Department of her father’s company. She managed the embroidery division until his death, in 1896. From 1885 until 1896, the Morris & Co. embroidery workshop operated from May Morris's house at Hammersmith Terrace. After 1896, it may have been run out of the Oxford Street shop, using craftspeople to make the orders. As Director of the Embroidery Department, May supervised the production of items commissioned by clients and made in the Morris & Co. style - overseeing the making of altar cloths, portières, fire screens, cushion covers, tablecloths, table runners, wall hangings, card cases, sachets, and bed covers. 

As a designer and embroidered who had studied historical needlework as an art student, May elevated embroidery to an art form. She worked with needlework that emphasized freehand stitching and delicate color shading. Her art embroidery was in sharp contrast to the style of Berlin wool work, which was popular until the 1880s.
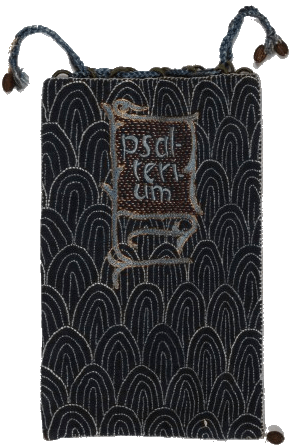
Embroidered book bag by May Morris and Jenny Morris c. 1880s - 1890s. Hand embroidered silks and gold thread on linen. 22.8 x 15.4 cm. "This bag was designed and made by William Morris's two daughters, May and Jenny. It was designed by May to contain a 'Psalter' (a book of psalms), from William Morris's extensive collection of medieval manuscripts. The bag is made of indigo linen and embroidered by Jenny in silk with the word "Psalterium" in Gothic script. Stitches include back stitch, stem stitch, long & short stitch, loop stitch, satin stitch, couching and buttonhole stitch; round edges with words filled in with chain stitch; pomegranate is padded laid work; surface couched in gold thread."  William Morris Gallery  Photo © William Morris Gallery, London Borough of Waltham Forest
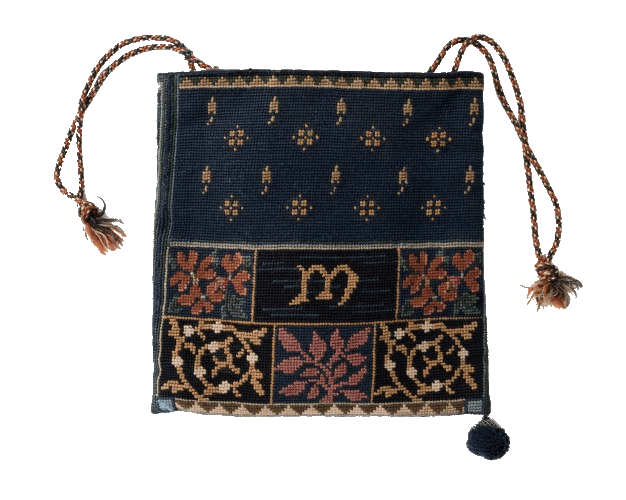
Embroidered bag by May Morris c. 1932. Wool on canvas. Photo © William Morris Gallery, London Borough of Waltham Forest
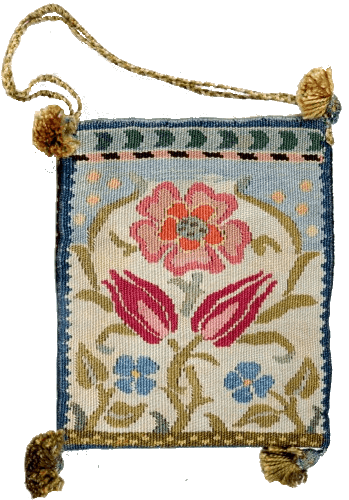
Small Evening Bag designed by May Morris. © William Morris Gallery, London Borough of Waltham Forest
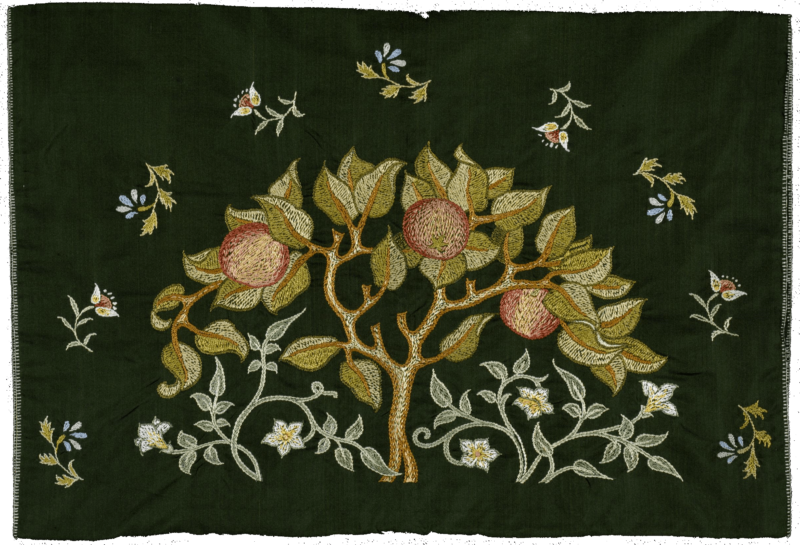
Nightdress sachet embroidered silk, with Apple Tree. Designed by May Morris for Morris & Co. Colored silks on green. Said by donor to have been embroidered by Caroline Phillips, Lady Trevelyan. ca. 1890-1892  Photo via © Victoria and Albert Museum, London
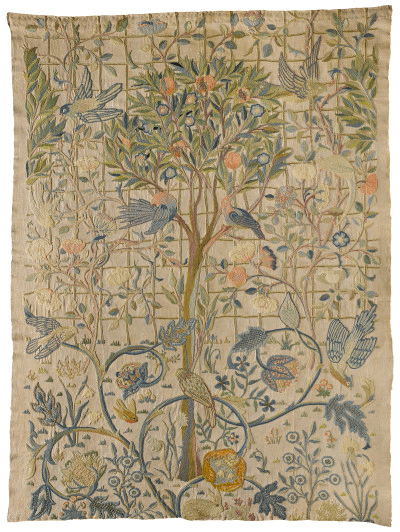
Embroidery design by May Morris; worked by May Morris and Theodosia Middlemore for Melsetter House, Orkney, c.1900

The Importance of Embroidered Textiles for Morris & Co.

“Embroidered textiles were the first furnishings designed and produced by William Morris, enabling him to decorate his homes with the historically inspired textiles he desired, and providing an outlet for his intellectual and physical need to make things by hand. 

After Morris’s interests moved on to designing and manufacturing other products, the Morris & Co. embroidery studio, managed by his daughter May from 1885 to 1896, functioned as one of the most commercial areas of the company, producing kits and finished embroideries, which were popular with the middle classes and wealthy aristocrats and business people.

Embroideries available ranged from cushions and tea cosies to panels for folding screens, and large scale decorative hangings. May Morris introduced many new designs, and was responsible for the success of the embroidery department, as a highly skilled designer and embroiderer, and effective manager."  V & A Museum
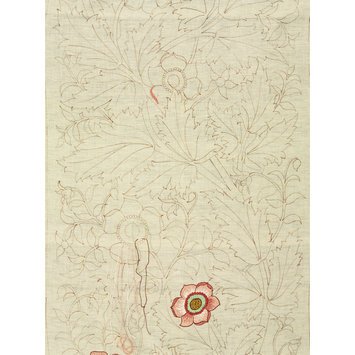
"Embroidery kit, Morris & Co., 'Anemone' design, purchased c.1904. Cotton ground or 'Manchester cloth,' painted with design, partly worked with silk thread. Worked areas with stem stitch, darning stitch, satin stitch and laid work. Ground fabric edged on three sides with a double hem, with tacking stitches. Selvedge at left hand edge."  Image via V&A Museum

William Morris is known mostly for his wallpaper designs today. But the embroidered items and embroidery kits, created under May's guidance, were a significant source of income for the company.

"As a screen panel, 'Anemone' appears nine times in the Morris & Co. embroidery workroom daybook in the NAL collections (MSL/1939/2636), in which May Morris listed all embroidery work commissioned for the years 1892-96. This indicates the continued popularity of the embroidered screen panels and this particular design. This 'started' panel, including the cotton ground, painted design, and coloured silks, with areas completed so that the recommended technique could be followed at home, cost £1 and one shilling in 1896. In this case, the panel was never worked, and the threads were also given to the Museum (T.159-2016 to T.190-2016). The embroidery kit was passed to the donor, Jill Ford, by her mother, Elsie Winifred Couper (1906-1948), the daughter of the Scottish civil engineer Benjamin Blyth II (1849-1917).”  V & A Museum
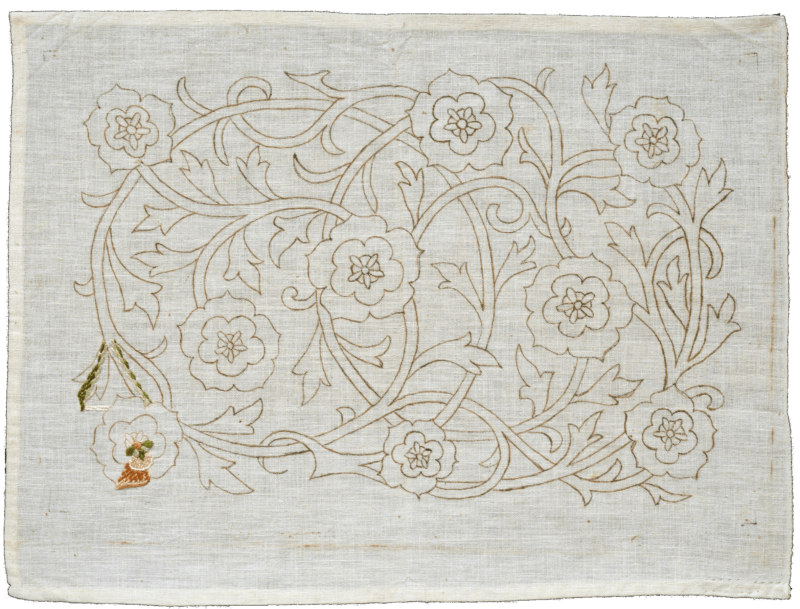
Panel, Small Rose embroidery kit (started) with embroidered cotton in silks, designed by May Morris for Morris & Co., England, ca. 1890. Width: 15 in, Length: 19.5 in. Worked in darning stitch, stem stitch, long and short stitch and satin stitch. Photo via © Victoria and Albert Museum, London
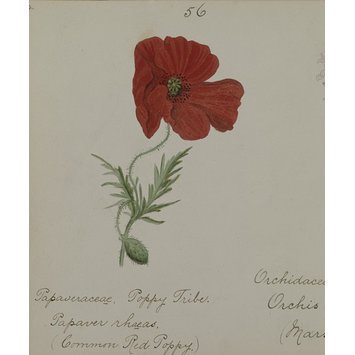
Wild Flowers painted by May Morris

English Wild Flowers gathered near Newbury Berks and painted by Mary Elizabeth Morris (Sketchbook) circa 1890. Watercolor and pencil, on wove paper, bound in half-calf and red cloth, lettered in gold. Photo via © Victoria and Albert Museum, London
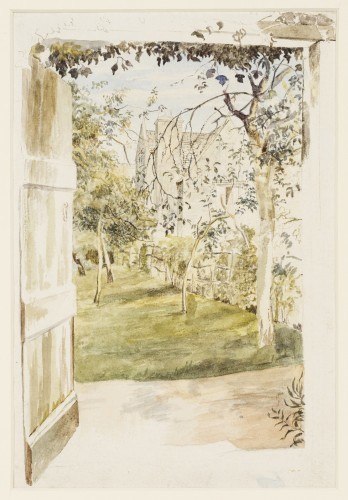
May Morris pencil and watercolor on paper: View of Kelmscott Manor from the Old Barn (c.1880s). Photo © William Morris Gallery, London Borough of Waltham Forest
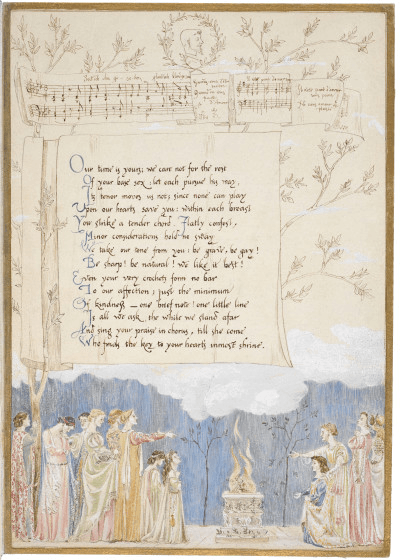
May Morris Valentine to George Bernard Shaw, 1886. Pen and ink, watercolor and body color on board. 26.6 x 18.6 cm. Photo © William Morris Gallery, London Borough of Waltham Forest

May taught at Hammersmith College of Art, Birmingham School of Art, and the Leicester School of Art, and went on a lecture tour in the United States between 1909 and 1910. She was also active in the Royal School of Art Needlework, which was founded in 1872 under the patronage of Princess Helena, a daughter of Queen Victoria. In contrast to government schools of design for women which were teaching through theory, the school, now the Royal School of Needlework (RSAN), was set up to help students learn needlework through practical, hands-on technical training. Students studied collections of ancient embroidery in the South Kensington Museum in order to better understand and learn the techniques used in historical textile works, and got pragmatic experience through structured apprenticeships. 

May’s aunt, Elizabeth Burden, was a chief technical instructor at RSAN. Read more about Elizabeth via the Morris Society

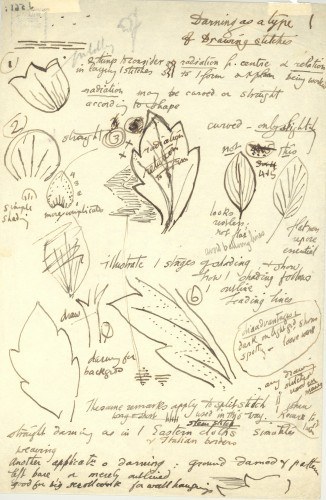
May Morris's notes and sketches for embroidery lectures c. 1899 - 1902. "This lecture note dates from May Morris's time teaching embroidery at Birmingham Municipal School of Art and the Central School of Arts and Crafts in London. The notes and sketches set out her plans for practical lessons, covering design, technique and materials." William Morris Gallery © William Morris Gallery, London Borough of Waltham Forest


Organizing Women Crafts-Makers

London’s Art Workers’ Guild was founded in 1884 by a group of architects and designers, and many of the prominent figures of the Arts and Crafts Movement were among the Guild’s members. The Guild was formed to bring architects, designers, and craftsmen together under the shared idea of the importance of handicraft as machine-driven industry was threatening to replace traditionally hand-crafted pieces made by designer-makers. The movement promoted an aesthetic of high-quality designs inspired by pre-industrial examples, produced by hand.

“The ideas of Pugin, Ruskin and Morris encouraged much questioning of both industrial society and of the state of art and architecture. Men seemed to be separated from the products of their hands; art seemed the product of convention rather than the creative craftsman. One answer was the idea of the Guild, a re-creation of the social organisation of the Middle Ages, those craft societies which, apparently, built the cathedrals.” Art Workers’ Guild History

In 1888 several members of the Guild organized the Arts and Crafts Exhibition Society, which was created to show handicrafts.  According to Walter Crane, one of the Society’s founders, the purpose of the Society was:

“We desired first of all to give opportunity to the designer and craftsman to exhibit their work to the public for its artistic interest and thus to assert the claims of decorative art and handicraft to attention equally with the painter of easel pictures, hitherto almost exclusively associated with the term art in the public mind. Ignoring the artificial distinction between Fine and Decorative art, we felt that the real distinction was what we conceived to be between good and bad art, or false and true taste and methods in handicraft, considering it of little value to endeavour to classify art according to its commercial value or social importance, while everything depended upon the spirit as well as the skill and fidelity with which the conception was expressed, in whatever material, seeing that a worker earned the title of artist by the sympathy with and treatment of his material, by due recognition of its capacity, and its natural limitations, as well as of the relation of the work to use and life” Walter Crane "Of the Arts and Crafts Movement"
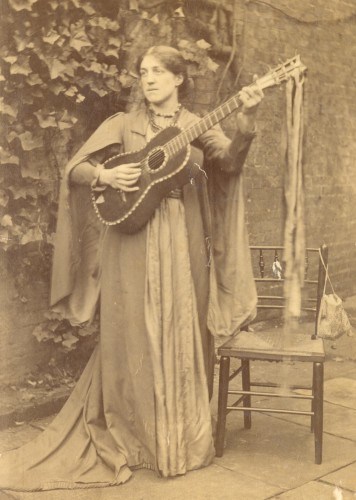
Photo of May Morris (circa 1886).  Photo © William Morris Gallery, London Borough of Waltham Forest
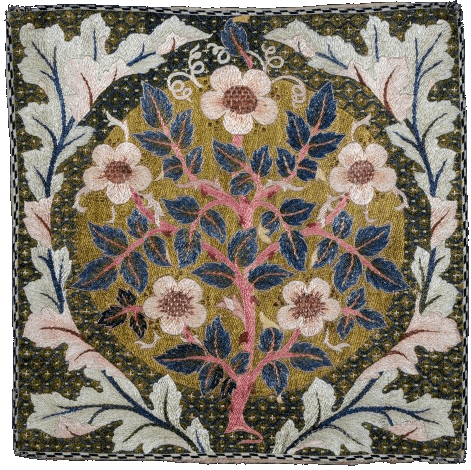
Rose Wreath embroidery (c.1890) 51 x 51 cm "Rose Wreath was designed by William Morris and this example embroidered by May Morris as a cushion cover for her friend Amy Carruthers Tozer. The design was exhibited at the Arts and Crafts Exhibition in 1890." William Morris Gallery

May was involved in the Arts and Crafts Movement throughout the 1890s and 1900s. She exhibited works at the Arts and Crafts Exhibition Society's exhibitions in London in 1893, 1896, 1899, 1903, and 1906, alongside members of craft Guilds - which excluded women.

The male architects, designers, and craftsmen who were involved in the Arts and Crafts Movement had a social network for meeting and sharing ideas in the form of the Art Workers’ Guild. But the the women May worked with were barred from this Guild, which served as a social networking and meeting place. 

In 1907, at the age of 45, in direct response to this exclusion, May co-founded the Women’s Guild of Arts with Mary Elizabeth Turner, creating a supportive network for the professional craftswomen of the period. May wanted “to keep to the highest level the arts by which and for which we live” in an “atmosphere of camaraderie.” Members of this women’s group included some of the most prominent figures in the Arts and Crafts Movement: painter Evelyn De Morgan, jeweler Georgie Gaskin, bookbinder Katherine Adams, sculptor Mabel White, watercolourist and engraver Mary Annie Sloane, Agnes Garrett, Mary Lowndes, Marianne Stokes, Evelyn De Morgan, Mary Seton Watts, and Mary J. Newill.

The Women’s Guild of Arts mission was to “keep to the highest level the arts by which and for which we live, to keep ever fresh and vital the enthusiasm, the belief – all the things which are the impetus of human endeavor.”

The Art Workers’ Guild remained a male-only institution until the 1960s, when it finally welcomed its first female crafts-maker – Joan Hassall, a wood engraver and book illustrator.

May was a designer, an embroiderer, a pioneer of art embroidery, a teacher, a writer, a political activist, an historian, a socialist, and a supporter of Women's Suffrage. Today, many of May’s works are held in museums – including the William Morris Gallery, the National Museums of Scotland and Wales, as well as regional museums and galleries, National Trust properties, and university collections.

In the winter of 2017 – 2018, the William Morris Gallery raised funds for a special exhibition of May’s works, which showcased her contribution as a designer of the Arts and Crafts Movement, and recognized her important role in elevating needlework from a domestic craft to an art form.

The exhibit, May Morris: Art & Life, was one of the highest attended in the Gallery’s history. It marked an advance in placing May in art and design history.
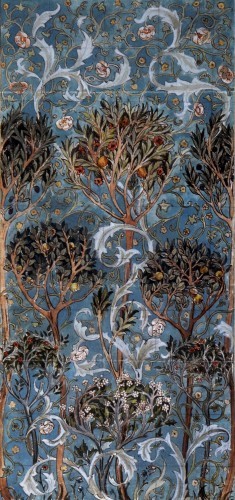
The Orchard - a design for a large embroidered panel. Pencil, watercolor, and ink on paper (c. early 1890s). © William Morris Gallery, London Borough of Waltham Forest
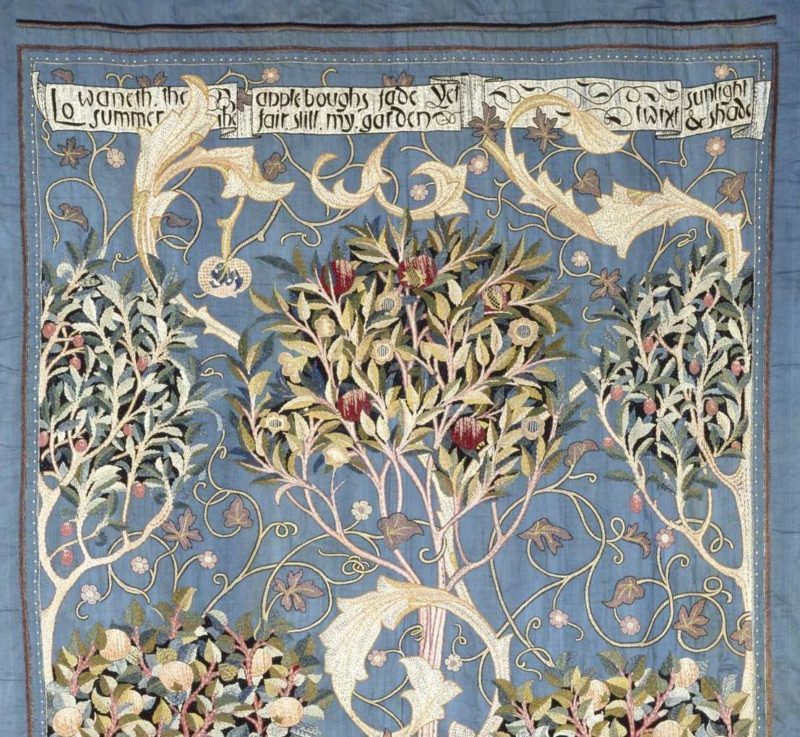
Detail of "The Orchard" or "Fruit Garden" Wall hanging, portière. Silk taffeta in colored silks, and strip of tape, designed by May Morris, embroidered by Theodosia Middlemore, Great Britain, 1894

Embroidered motto: 'Lo waneth the Summer the apple boughs fade Yet fair still my garden twixt sunlight & shade'
signed and dated: 'Theodosia/1894'

Photo via © Victoria and Albert Museum, London
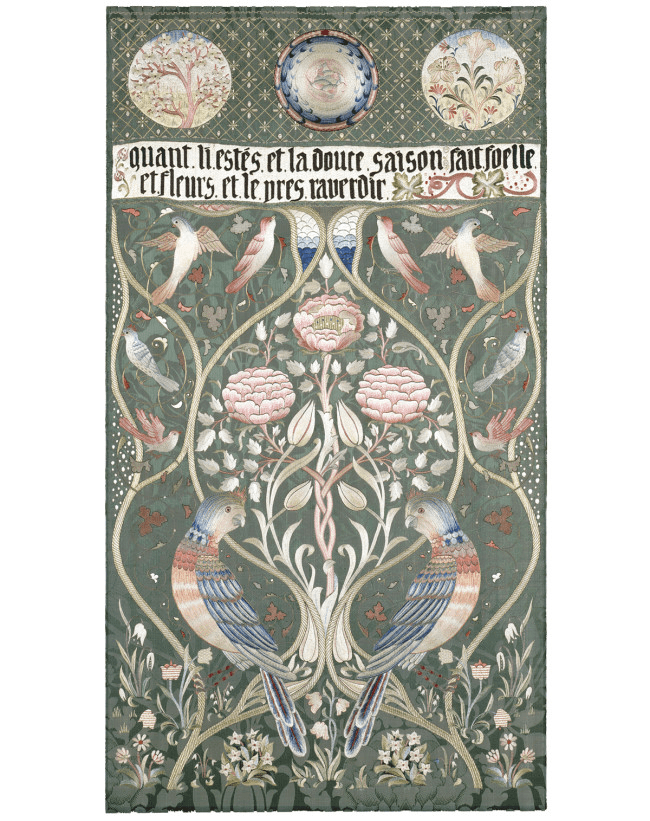
‘Spring and Summer’ panel, designed and probably embroidered by May Morris. c. 1895–1900. Colored silks on silk damask, 130.8 x 71.9 cm. Embroidered motto translates as: “When the summer’s gentle season makes leaves and flowers and field green again."
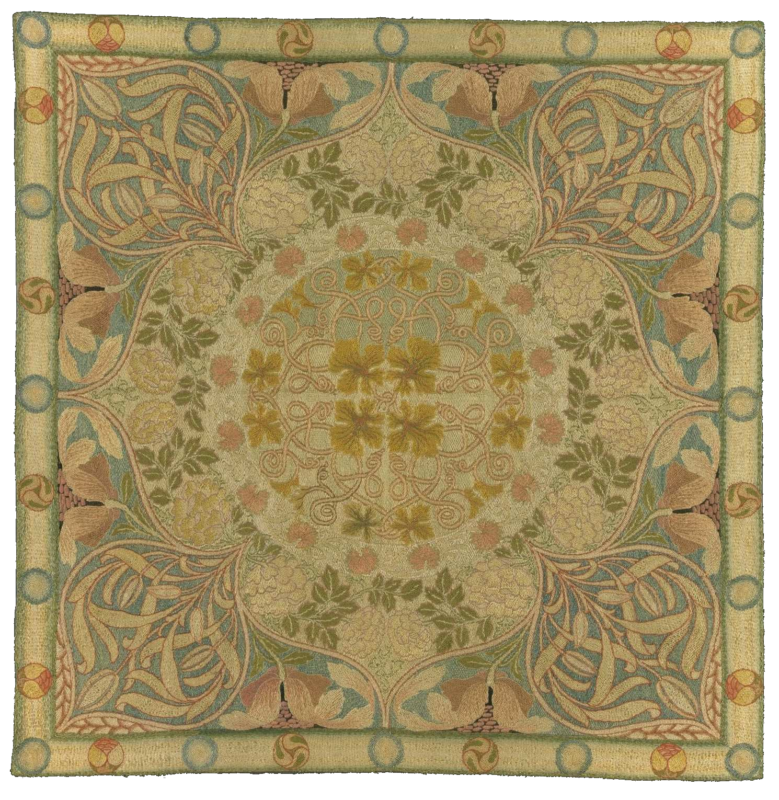
Tablecloth by May Morris

Tablecloth, linen with silk embroidery, probably designed by May Morris, 1896, worked by Mrs Laurence Hodson or in the Morris and Co. workshops, ca.1896, England. Silk thread on linen ground, silk lining.
Worked in darning stitch, stem stitch and satin stitch.
Silk lining attached with running stitch. Height: 108 cm, Width: 108 cm, Weight: 0.58 kg Photo via © Victoria and Albert Museum, London
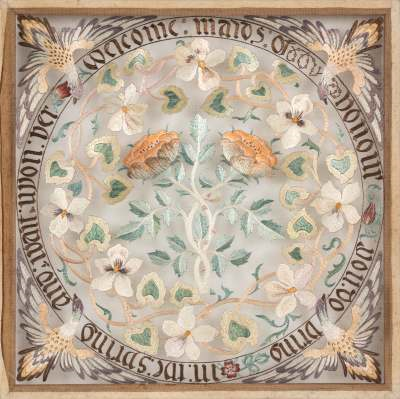
Embroidered wall hanging featuring May Morris’s Maids of Honour design, c.1890s
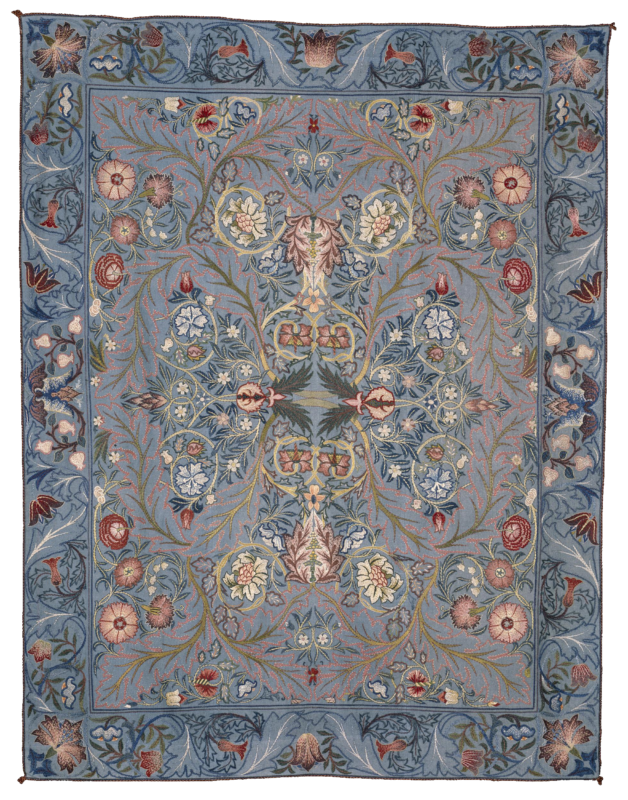
Design by May Morris

Acanthus Wall hanging depicting acanthus designed by William Morris, ca. 1880. Worked by May Morris and others, c. 1900-1910 (probably). Height: 249.5 cm, Width: 169.3 cm, Weight: 2.7 kg
Felted woolen cloth, colored silk thread, silk cord Photo via © Victoria and Albert Museum, London
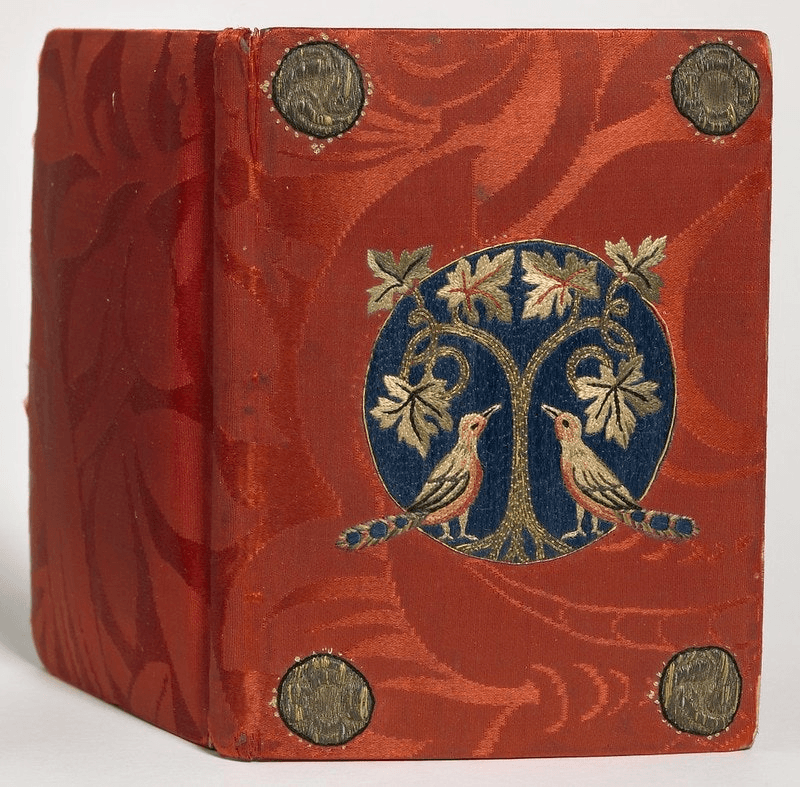
Embroidered book cover to The Tale of King Florus and Fair Jehane, thought to be embroidered by May Morris. Photo © The University of Manchester Library


Resources - Free to Download

In 1893, May Morris wrote a pamphlet, Decorative Needlework. The pamphlet includes a history of decorative needlework, and chapters on different types of stitches and how to make them, with illustrations.

There were originally only 125 copies printed, but the pamphlet is now available for free through the public domain. You can download a copy of it as a .pdf here.

From May's Dedicatory Note:

"These pages are written for and dedicated to those who, without much previous knowledge of the art of embroidery, have a love for it and a wish to devote a little time and patience to its practice. The booklet does not profess in any way exhaustive, but should be useful as a keynote to further study, having been written from practical knowledge of the subject.

I have tried to show that executive skill and the desire of and feeling for beauty, realized in a work of definite utility, are the vital and essential elements of this as of all other branches of art, and that no one of these elements can the embroideress neglect or overlook if her work is to have life and meaning.  If she pursues her craft with due care, and one might even say with enthusiasm, however, she will not only taste that keen pleasure which every one feels in creative work, however unpretending, but the product will be such as others will be careful to preserve: this in itself being an incentive to good work. For work done at the demand of fashion or caprice and that done inevitably, that is, for its own sake, are as widely dissimilar as can be: the first being discarded in a month or so as ridiculous and out of date, and the other remaining with us in all its dignity of beauty and fitness, to be guarded as long as may be against the unavoidable wear and tear of time." May Morris 

May Morris wrote an article on textile art for the Decorator and Furnisher Magazine, Volume 21, published in 1893. In it, she describes: tapestry stitch, chain stitch, applique, couching, patchwork, and darning. Click here to download a .pdf of her article. The .pdf includes an article on working with color by Alexander D. Grant.

Listen to an interview from BBC SOUNDS In Our Time: William Morris

Produced by Simon Tillotson with: Ingrid Hanson, Lecturer in 18th and 19th Century Literature at the University of Manchester; Marcus Waithe, University Senior Lecturer in English Literature at the University of Cambridge and Fellow of Magdalene College; and Jane Thomas, Professor of Victorian and Early 20th Century Literature at the University of Hull

"Melvyn Bragg and guests discuss the ideas of William Morris, known in his lifetime for his poetry and then his contribution to the Arts and Crafts movement, and increasingly for his political activism. He felt the world had given in to drudgery and ugliness and he found inspiration in the time before industrialisation, in the medieval life which was about fellowship and association and ways of working which resisted the division of labour and allowed the worker to exercise his or her imagination. Seeing a disconnection between art and society, his solution was revolution which in his view was the only way to reset their relationship."


Explore More Textile Art


For Your Library

Below are some books about May Morris, William Morris, and embroidery. Click on the buttons to see more and to purchase on Amazon. Please note that as an Amazon Associate I earn from qualifying purchases (at no extra cost to you).

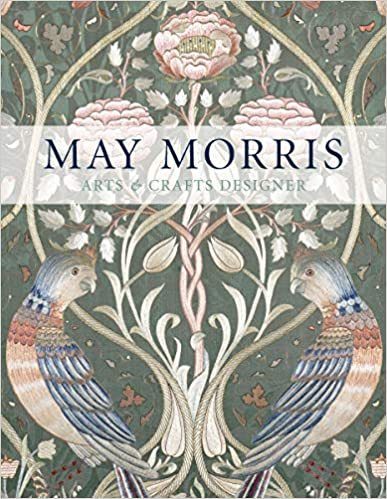
May Morris: Arts & Crafts Designer by Jenny Lister, Jan Marsh, and Anna Mason


Written by curators of the Victoria & Albert and the William Morris Gallery, this is the go-to book for illustrations of May Morris's work. The book is divided into five chapters―Sketches and Watercolors, Wallpapers and Embroidery, Book Covers and Designs, May Morris and the Art of Dress, and Jewelry and Metalwork―each of which opens with an introductory text, followed by catalog entries with extended captions. Interspersed within the chronological arrangement of objects are feature spreads highlighting particular aspects of May Morris’s work. 


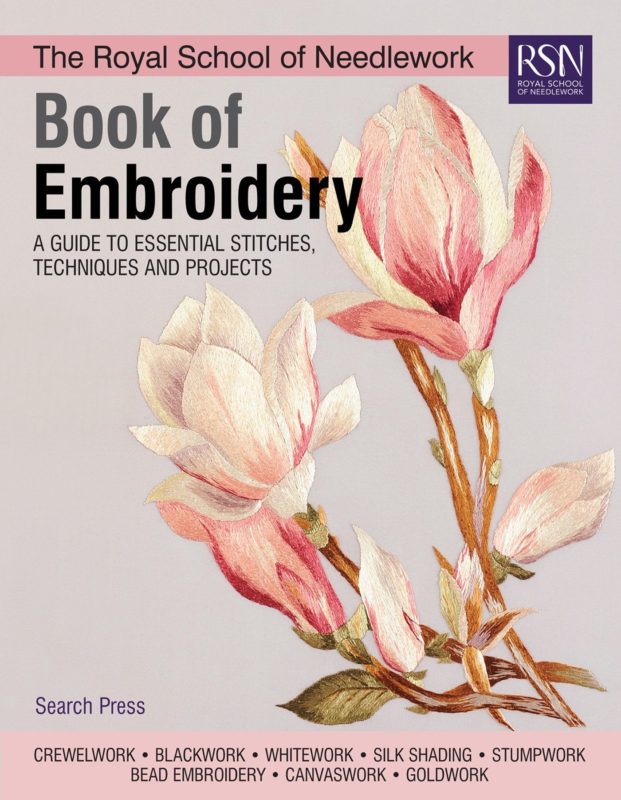
Book of Embroidery: A Guide to Essential Stitches, Techniques and Projects by the Royal School of Needlework


From London's world-renowned Royal School of Needlework, this book is a rich source of embroidery techniques, stitches, and projects. Techniques covered include crewelwork, bead embroidery, stumpwork, canvaswork, goldwork, whitework, blackwork,and silk shading. Contains all the trusted, best-selling content from the RSN Essential Stitch Guide series, plus a new section on mounting your finished work.


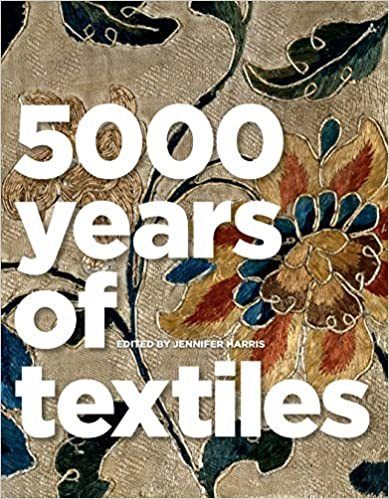
5000 Years of Textiles by Jennifer Harris


5,000 Years of Textiles is an authoritative reference book, with examples from the Far East to the Americas, from Africa to Scandinavia, and from Egyptian artifacts dating from 3000 BC to the most up-to-date modern craftwork and furnishings. The book includes an expert guide to nine fundamental textile techniques, from rug weaving and tapestry to felt and bark cloth. Each is clearly explained, using line drawings and close-up color details from actual textiles, to show how people from many different traditions have made and decorated cloth through the centuries. Illustrations are drawn from major collections all over the world and include costumes, period interiors, archival photographs, and a vast range of fabrics.


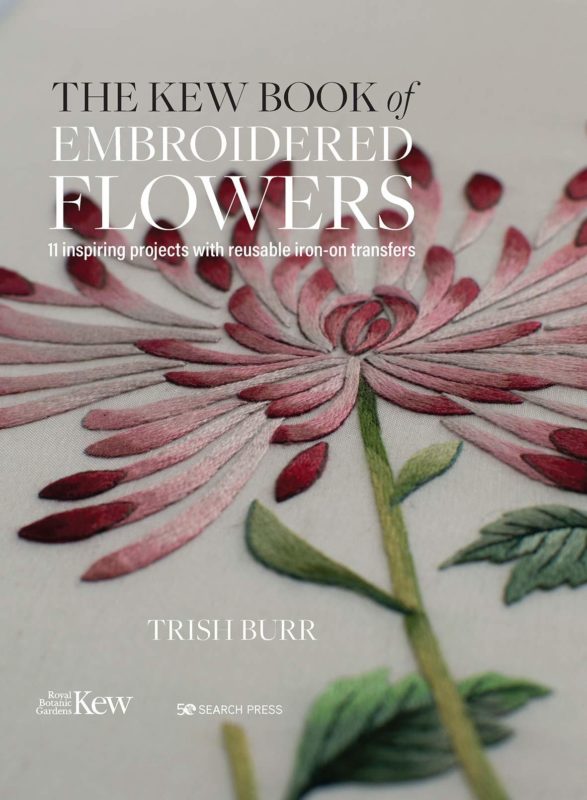
The Kew Book of Embroidered Flowers: 11 Inspiring Projects with Reusable Iron-on Transfers by Trish Burr


Needlework expert Trish Burr's new book contains resuable iron-on transfer papers for embroidery work - just iron onto fabric in preparation to your embroidery project. The embroideries are reworkings of botanical artworks from Kew's Art Collection. There is one 'starter' project to encourage readers to try out the techniques, one large sampler containing eighteen small elements that can be worked individually or as a group, and nine further projects, including a striking spider chrysanthemum, an elegant waterlily and an opulent magnolia. All the projects are shown step by step, with an order of work diagram given where appropriate. The templates are included at full size at the back of the book.


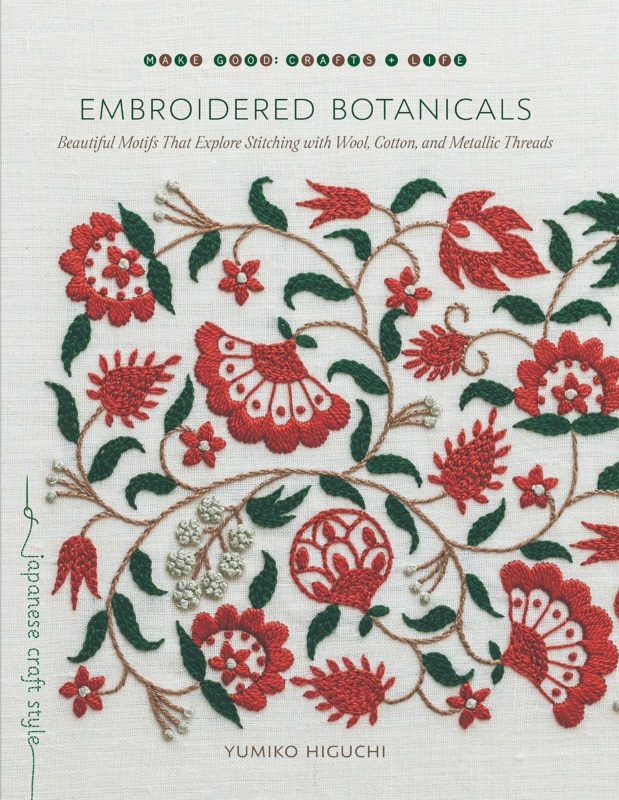
 Embroidered Botanicals: Beautiful Motifs that Explore Stitching with Wool, Cotton, and Metallic Threads by Yumiko Higuchi


Japanese artist Yumiko Higuchi is celebrated for her embroidery designs with a Scandinavian flair. In Embroidered Botanicals, Higuchi offers 39 embroidery projects highlighting the distinctive qualities of different threads - wool, cotton, pearl cotton, and metallic. With beautiful photographs, clear step-by-step instructions, and detailed diagrams, this book will be an inspiring guide for those new to embroidery and a fresh and unique offering for more experienced needle-crafters.


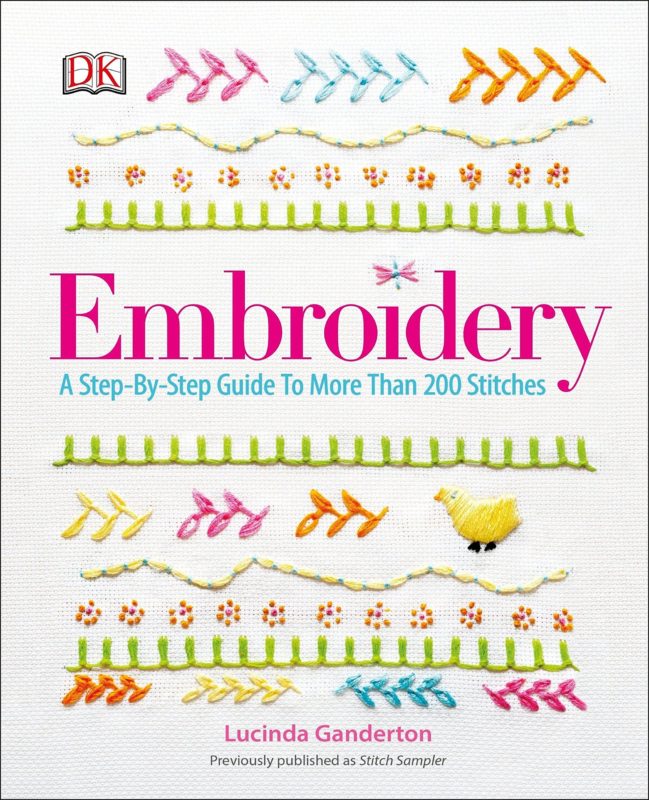
Embroidery: A Step-By-Step Guide to More Than 200 Stitches by Lucinda Ganderton/DK


The perfect reference guide to needlework, Embroidery is a comprehensive guide to inspire and inform sewers of all levels. Find advice on which thread, needles, or fabrics work with which techniques, and take a look at an incredible 200 stitches — with levels of difficulty, step-by-step instructions, and ideas on where and how to use them. This practical guide covers sewing tips for dressmaking, needlepoint, and embroidery stitches, with detailed information simply presented in illustration-rich pages. 


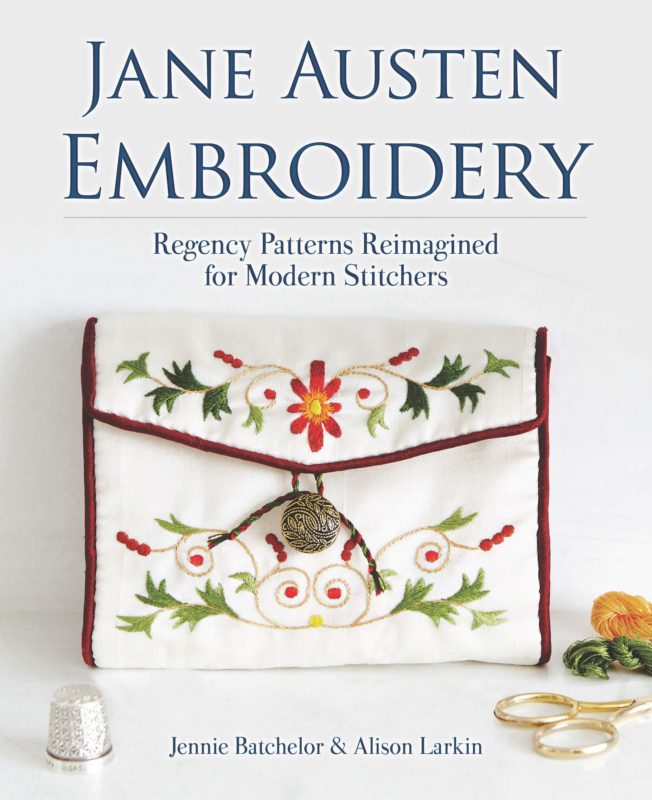
Jane Austen Embroidery: Regency Patterns Reimagined for Modern Stitches by Jennie Batchelor and Alison Larkin


Jane Austen was as skillful with a needle as she was with a pen, and this unique book showcases rare and beautiful embroidery patterns from her era, repurposed into 15 modern sewing projects. Derived from Lady's Magazine (1770–1832), a popular monthly periodical of fashion, fiction, and gossip, the projects consist of embroidered clothes, accessories, and housewares. Designs include an evening bag, a muslin shawl, an apron, a floral napkin set and tablecloth, and other pretty and practical items with timeless appeal.
These authentic patterns — many of which have not been reprinted in more than 200 years—are enlivened by vivid glimpses into the world of Regency women and their domestic lives. A must-have for every Jane Austen fan, this book is suitable for needleworkers at every level of experience.


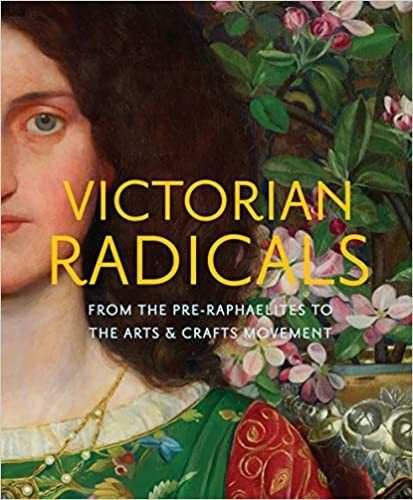
Victorian Radicals: From the Pre-Raphaelites to the Arts & Crafts Movement by Martin Ellis, Timothy Barringer, and Victoria Osborne


Although the word "Victorian" connotes a kind of dry propriety, the artists working in the Victorian era were anything but. Starting with the Pre-Raphaelite Brotherhood and lasting through the dawn of the 20th century, the era's painters, writers, and designers challenged every prevailing belief about art and its purpose. The full spectrum of the Victorian avant-garde is in magnificent display in this book that features nearly 150 works drawn from the city of Birmingham's unparalleled collection. Characterized by attention to detail, vibrant colors, and engagement with literary themes and daily life, the paintings, works on paper, and decorative objects featured reveal the myriad ways Victorian artists and artisans made sense of a rapidly changing world. 


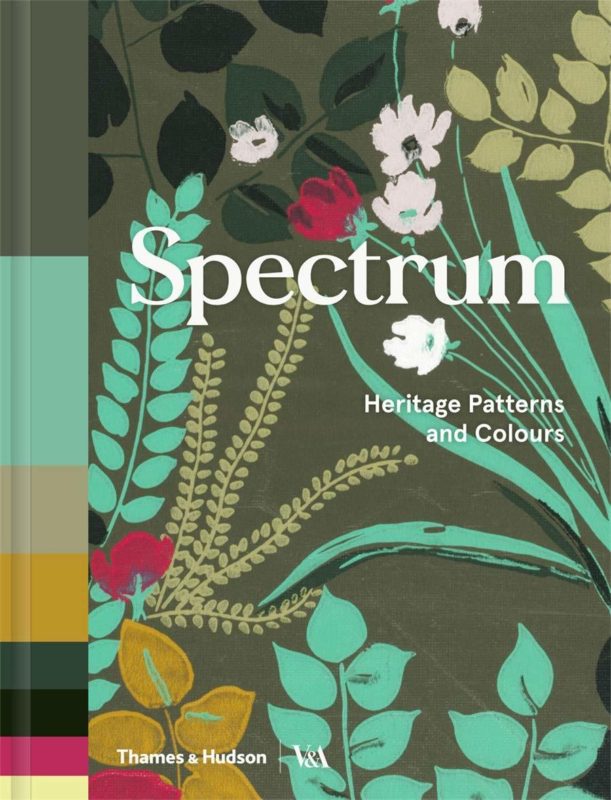
Spectrum: Heritage Patterns and Colours by V&A, Ros Byam Shaw, and Caz Hildebrand


Color palettes from the fifteenth century onward are analyzed and explained by interior design specialist Ros Byam Shaw. Each wallpaper and fabric, carefully selected by Here Design from the V&A’s collection, is arranged chronologically with its own double-page spread, with extended captions that explain the significance of the palette. A color grid is shown beside each pattern, in which the colors in the original piece are shown in proportion to their use, and with their CMYK references to enable designers to replicate these colors in their own work. 


Having fun with new and traditional crafts, art, design, DIY, and freebies.

TRENDING & POPULAR

FREE ART BOOKS ONLINE  Start your own free collection of art books from three major museums.

DISCOVER SASHIKO STITCHING  Learn how to make traditional Japanese decorative stitches for quilting, mending, and upcycling.

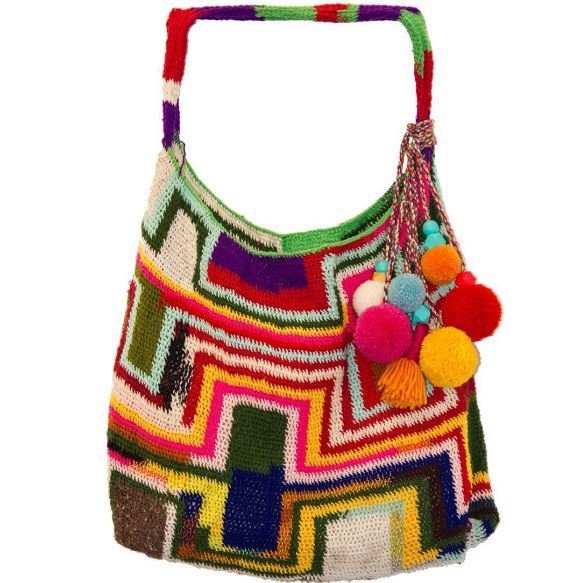
BILUM  Discover a fabric-making technique used in Papua New Guinea that can be used to make bags and dresses.

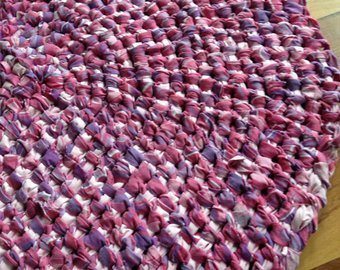
HOW TO MAKE AN AMISH RAG RUG  There's no sewing required to make this traditional homemade crafted item.

35,000 FREE KNITTING & CROCHETING PATTERNS Use our easily searchable list to find free patterns by Rowan, Vogue, Lion Brand, Berroco, and more.
HOW TO MAKE A LINOLEUM BLOCK PRINT  Watch how-to videos for beginners explaining the basic step-by-step process of making a linoleum block print.

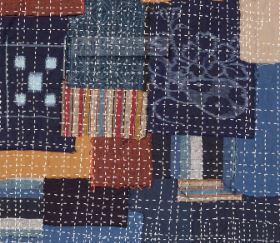
HOW TO MAKE A BORO BAG  Learn how to make a stand-out bag using a Japanese patchwork technique and Sashiko stitching. 

'KNIT' LIKE THE VIKINGS  Discover an ancient fabric-making technique that's still done today, pre-dates knitting, and doesn't unravel.
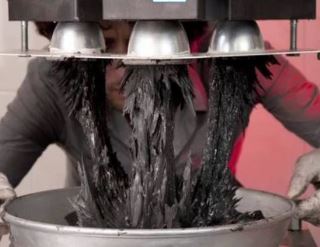
MAGNETIC CLAY CERAMICS Ceramic artists working with magnetic clay can play with the forces of nature to create fantastical structures.

Hygge Life Decor

Hygge: Cozy and Comfy 

Hygge is all about comfort. From the Danish concept of coziness, It's a way of reclaiming time and space for yourself and your family - time to relax, reflect, and enjoy life.

The essence of Hygge as a part of living well encourages you to take the time to read a good book, binge watch a TV show, knit, plan your next holiday, play board games with your kids, or curl up with a cup of tea. It's about carving out some time and space to relax and step back from your daily routine to rekindle, think, and daydream - to get a new perspective, or to remember what you set out to do before distractions were thrown your way.

We strongly believe that Hygge is helpful to thinking creatively. Gather your comfiest blanket, some magazines, a journal, and settle in. Take some time to reflect on your past and future wishes, hopes, dreams, plans, and goals.

Gifting Hygge-Inspired Comfy Items

Looking for items to give yourself or others that encourage Hygge? Everyone can use some added comfort in their lives​. 

We've imagined what we'd want to surround ourselves with for a day away from it all - comfy blankets, Moroccan Babouche slippers, felted slippers, hot chocolate with marshmallows, a sweater that invokes Norway, scented candles, patchwork quilts, classic Marimekko Finnish designs, and art books from Taschen.

We've put together some Hygge-inspiring items below.

Please note that this page contains affiliate links. As an Amazon Associate I earn from qualifying purchases (at no extra cost to you). Please read our Disclosure page for more information.

For the younger ones in your life, explore our Hygge for Kids page.

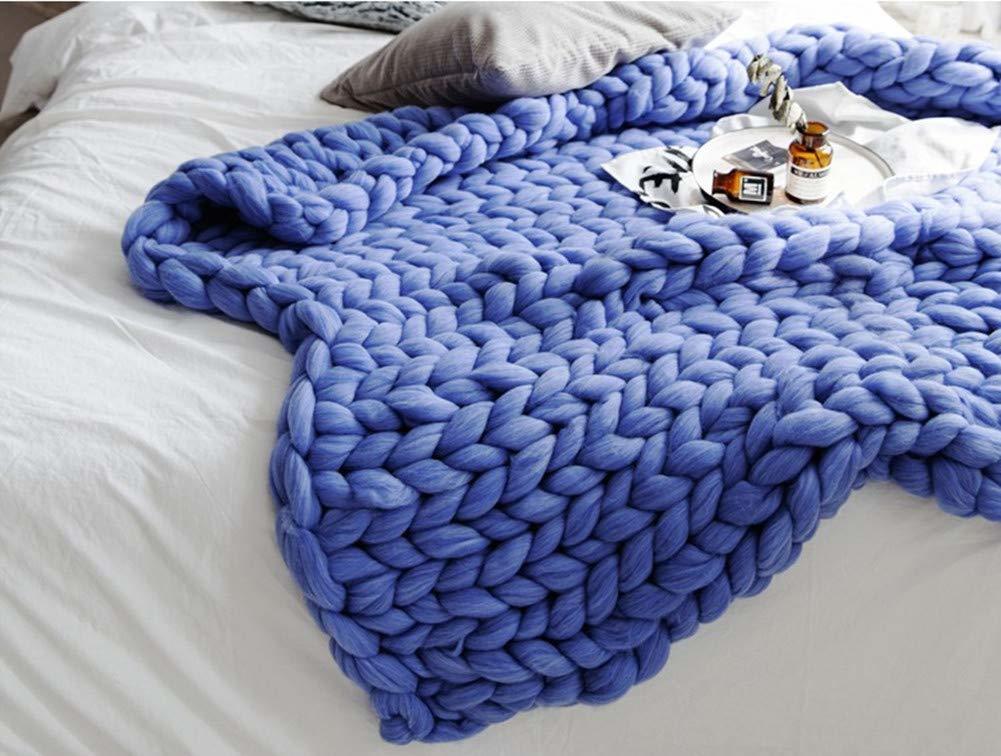
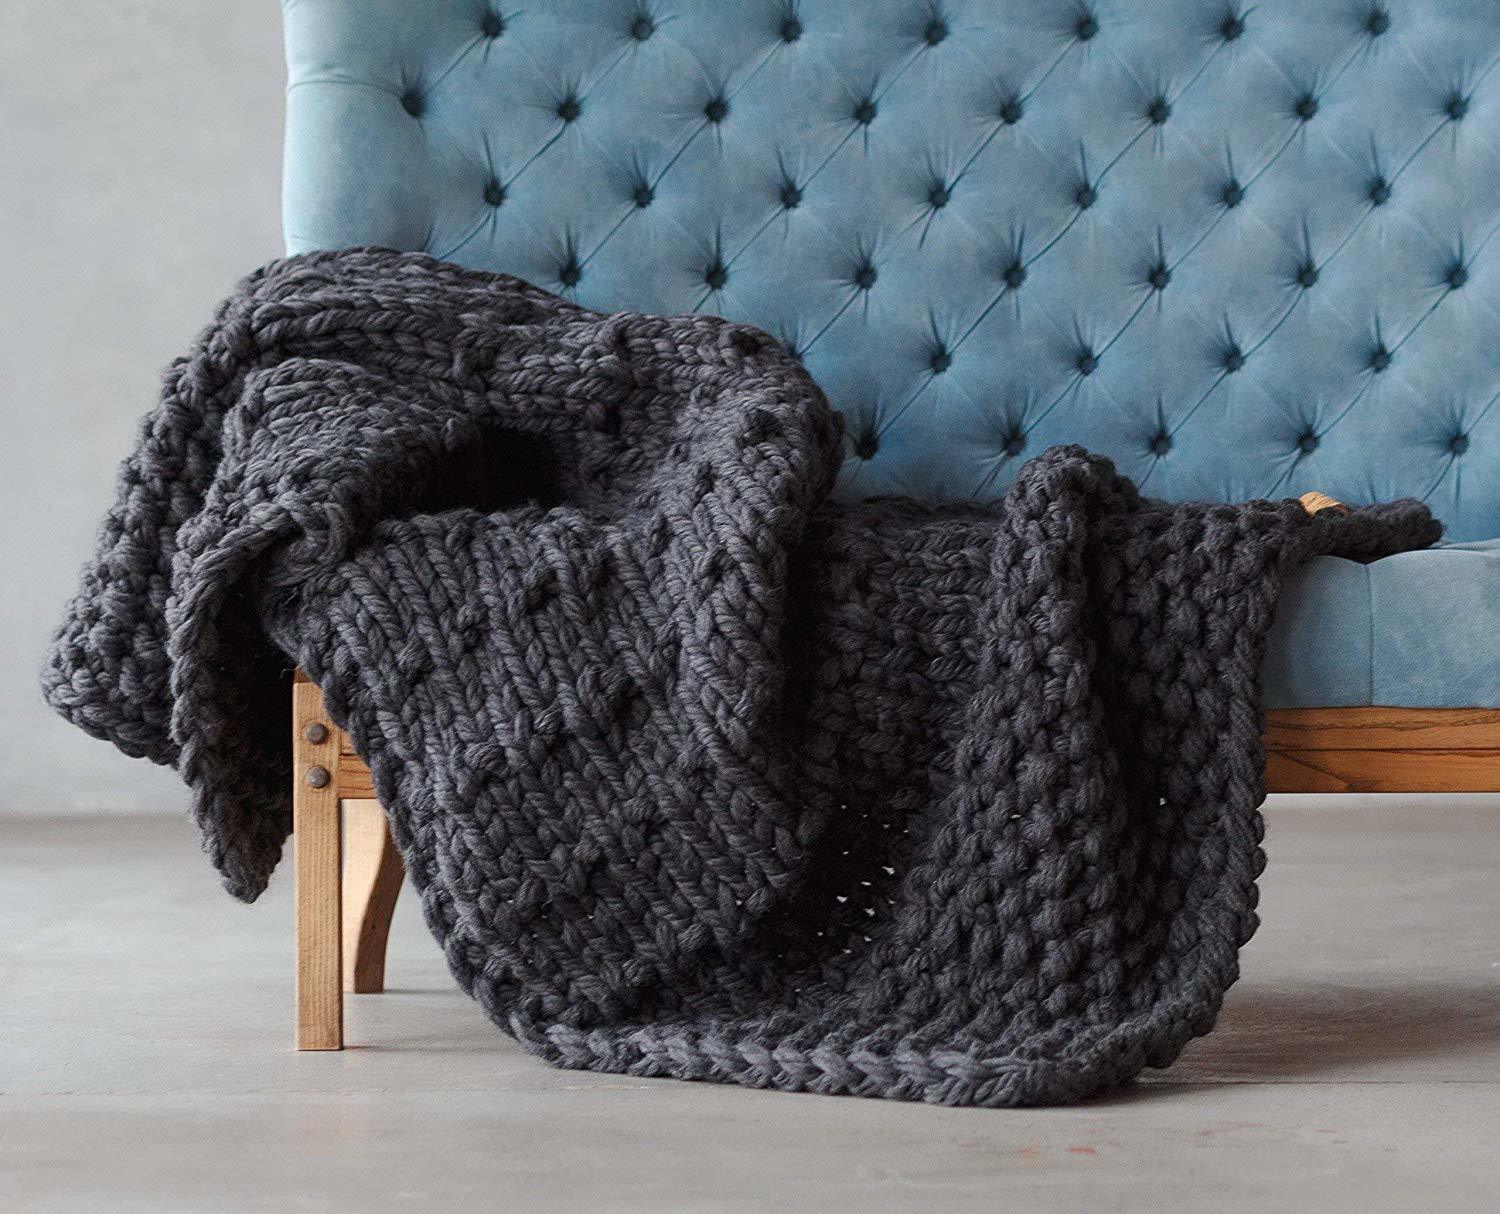
Hand Knit Chunky Throw

Thick Wool Chunky Knit Throw

Luxurious arm-knitted chunky knit blanket/throw made of super soft and comfy 2 cm thick wool yarn. Warm and cozy - perfect for curling up and reading. Comes in 4 sizes. Under $94.

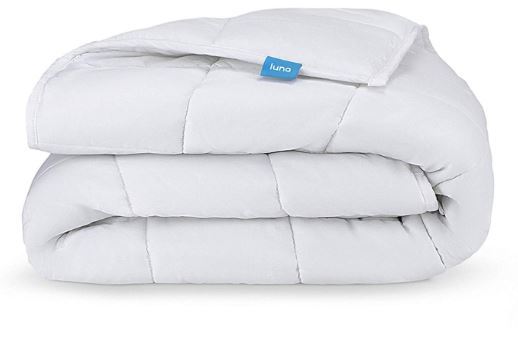
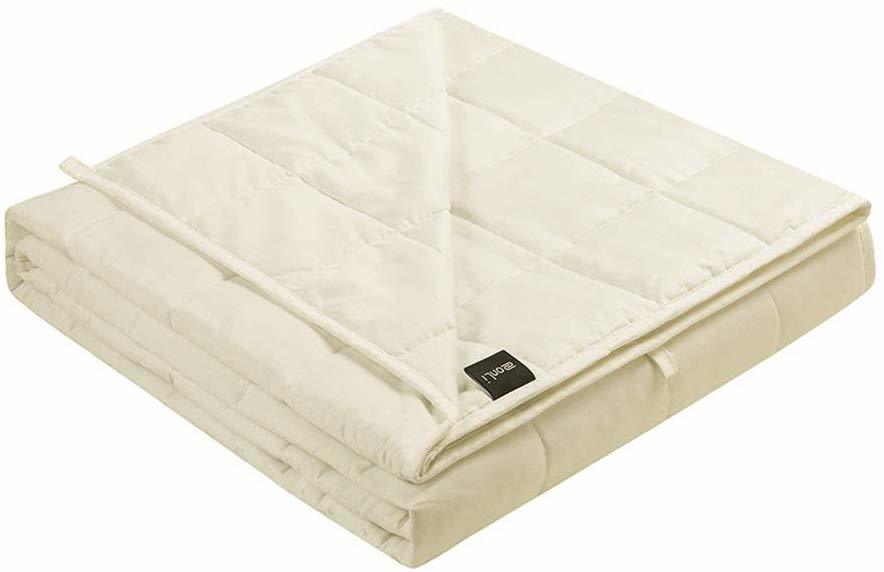
Luna weighted blanket

LUNA Weighted Blanket

Weighted blankets can help give you a good night's sleep. They are especially helpful for people with anxiety - giving a sense of calm. Made of 100% organic cotton and glass beads. Under $63.

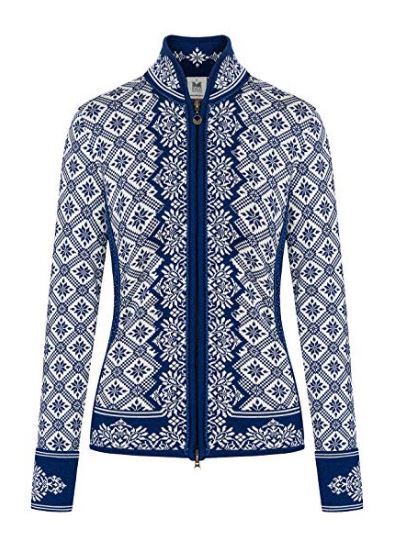
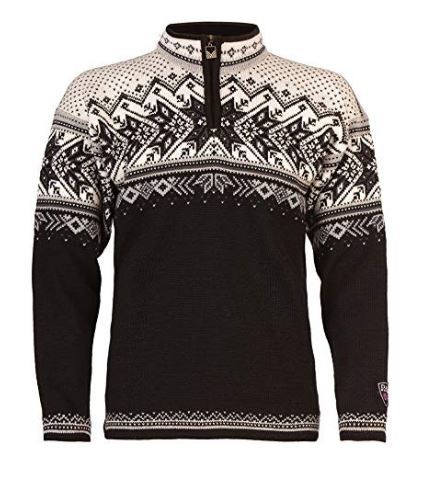
Dale of Norway Sweater

Christiania Jacket

This women's Dale of Norway sweater jacket in navy and white is made of 1 ply, 21-Micron combed Merino wool. Features a two-way zipper, braided trim, multi-layered knit edging, patterned rib on hem and sleeves, and folded cuffs with intarsia knitting technique. 11 color combinations to choose from. Price: $380.+

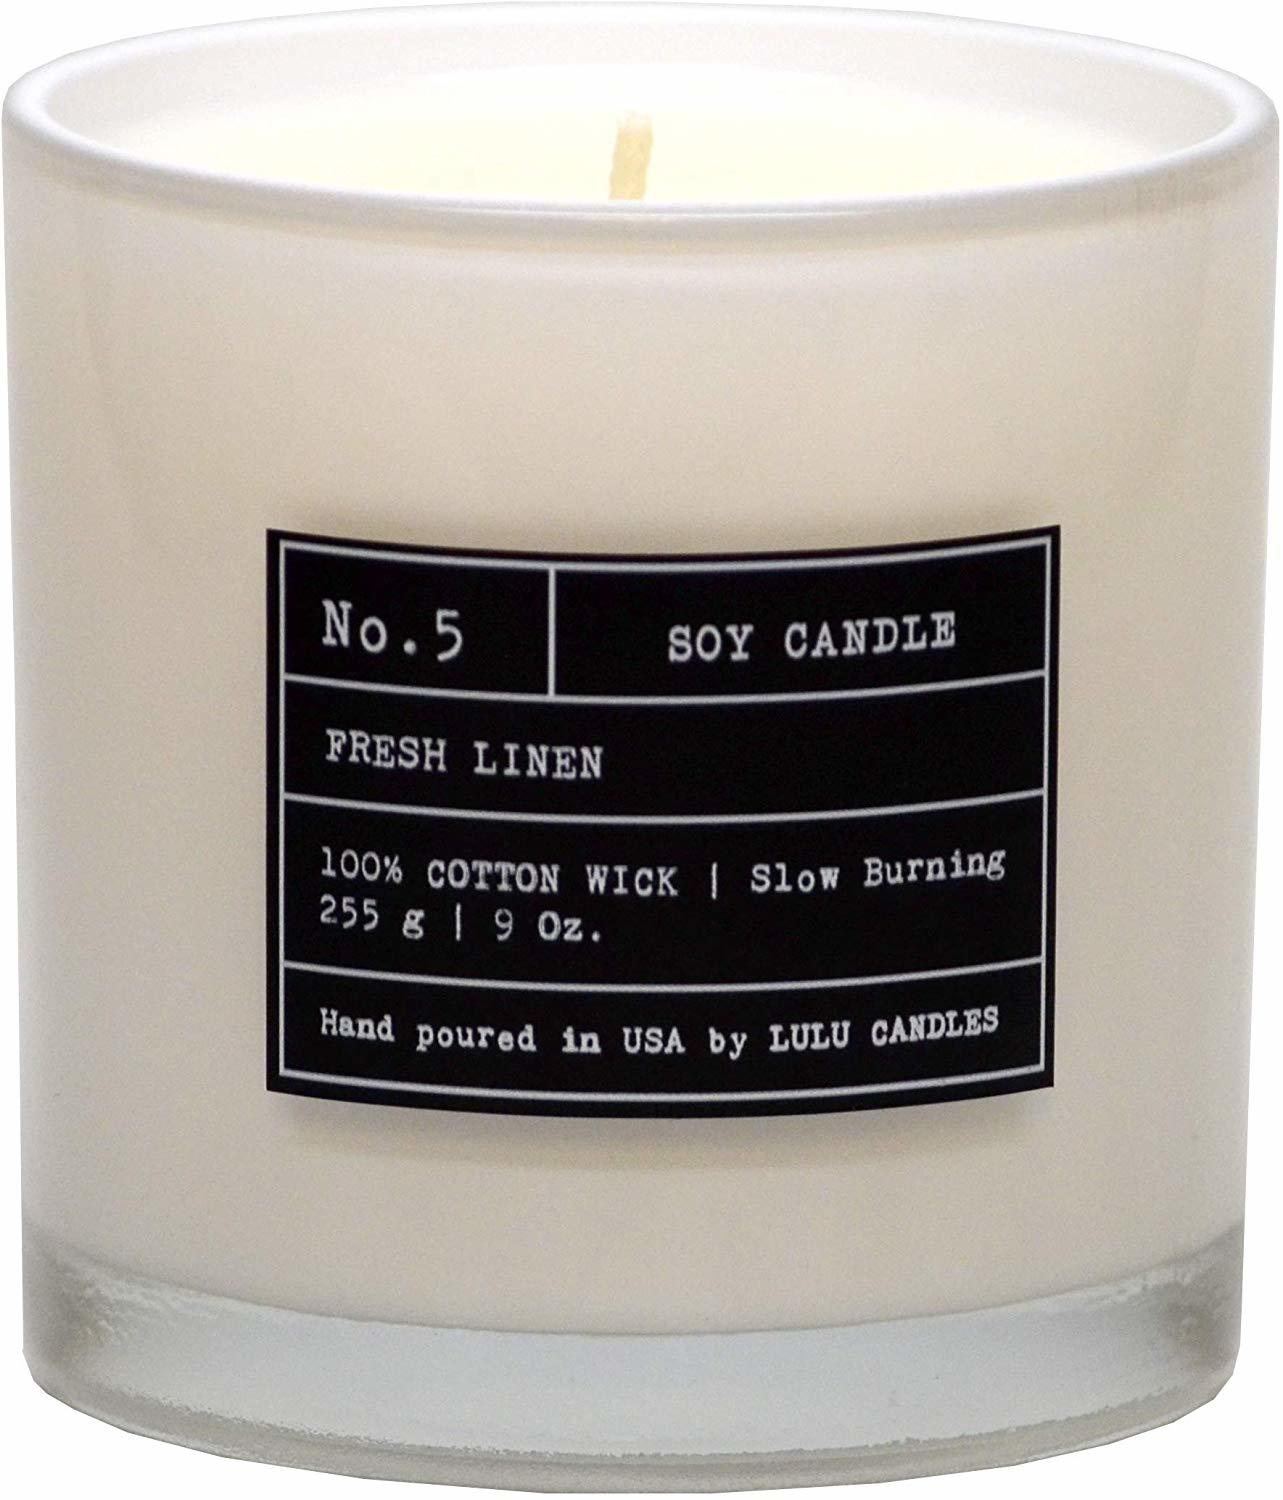
Luxury Soy Candle

Luxury Scented Soy Candles

9 ounce soy candles are hand poured and made in the USA by Lulu Candles. Made with eco-friendly soy wax; vegan; paraben-free. Long burning time. Many fragrant choices! Under $20.

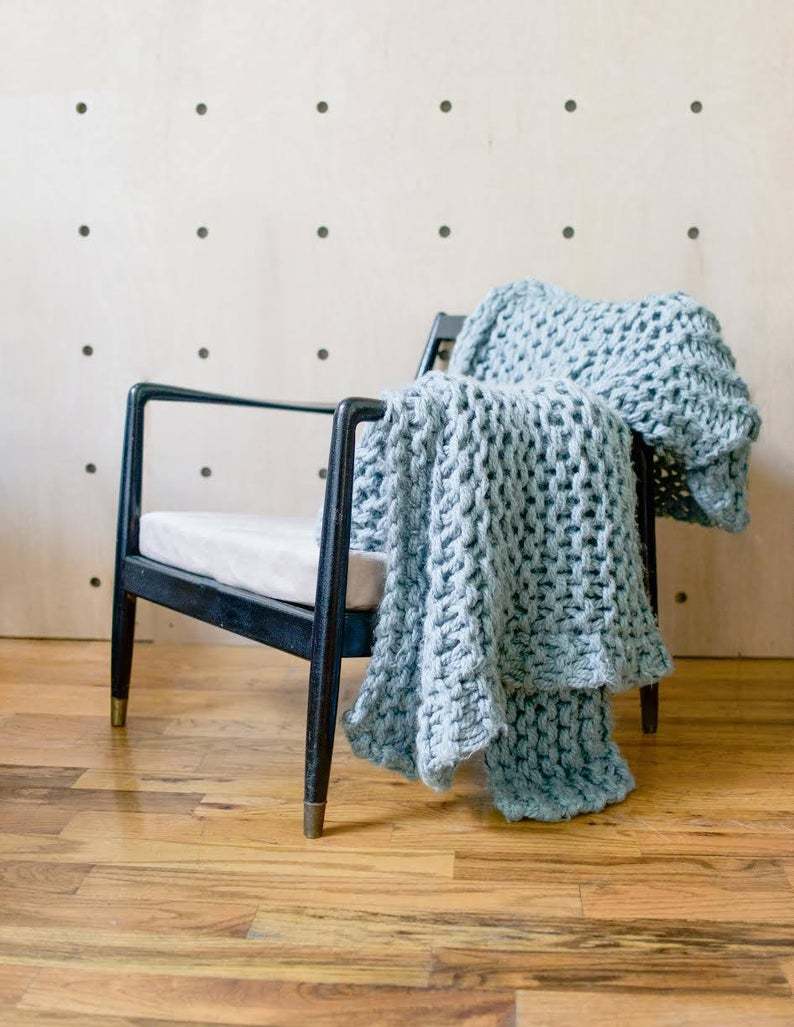
CCustom Chunky Knit Blanket

Custom Made Jumbo Throw Blanket

Choose from 9 different colors for this hand knit, custom made 55" x 55" blanket. Made of a wool blend yarn and is warm, soft and washer-friendly. $175.

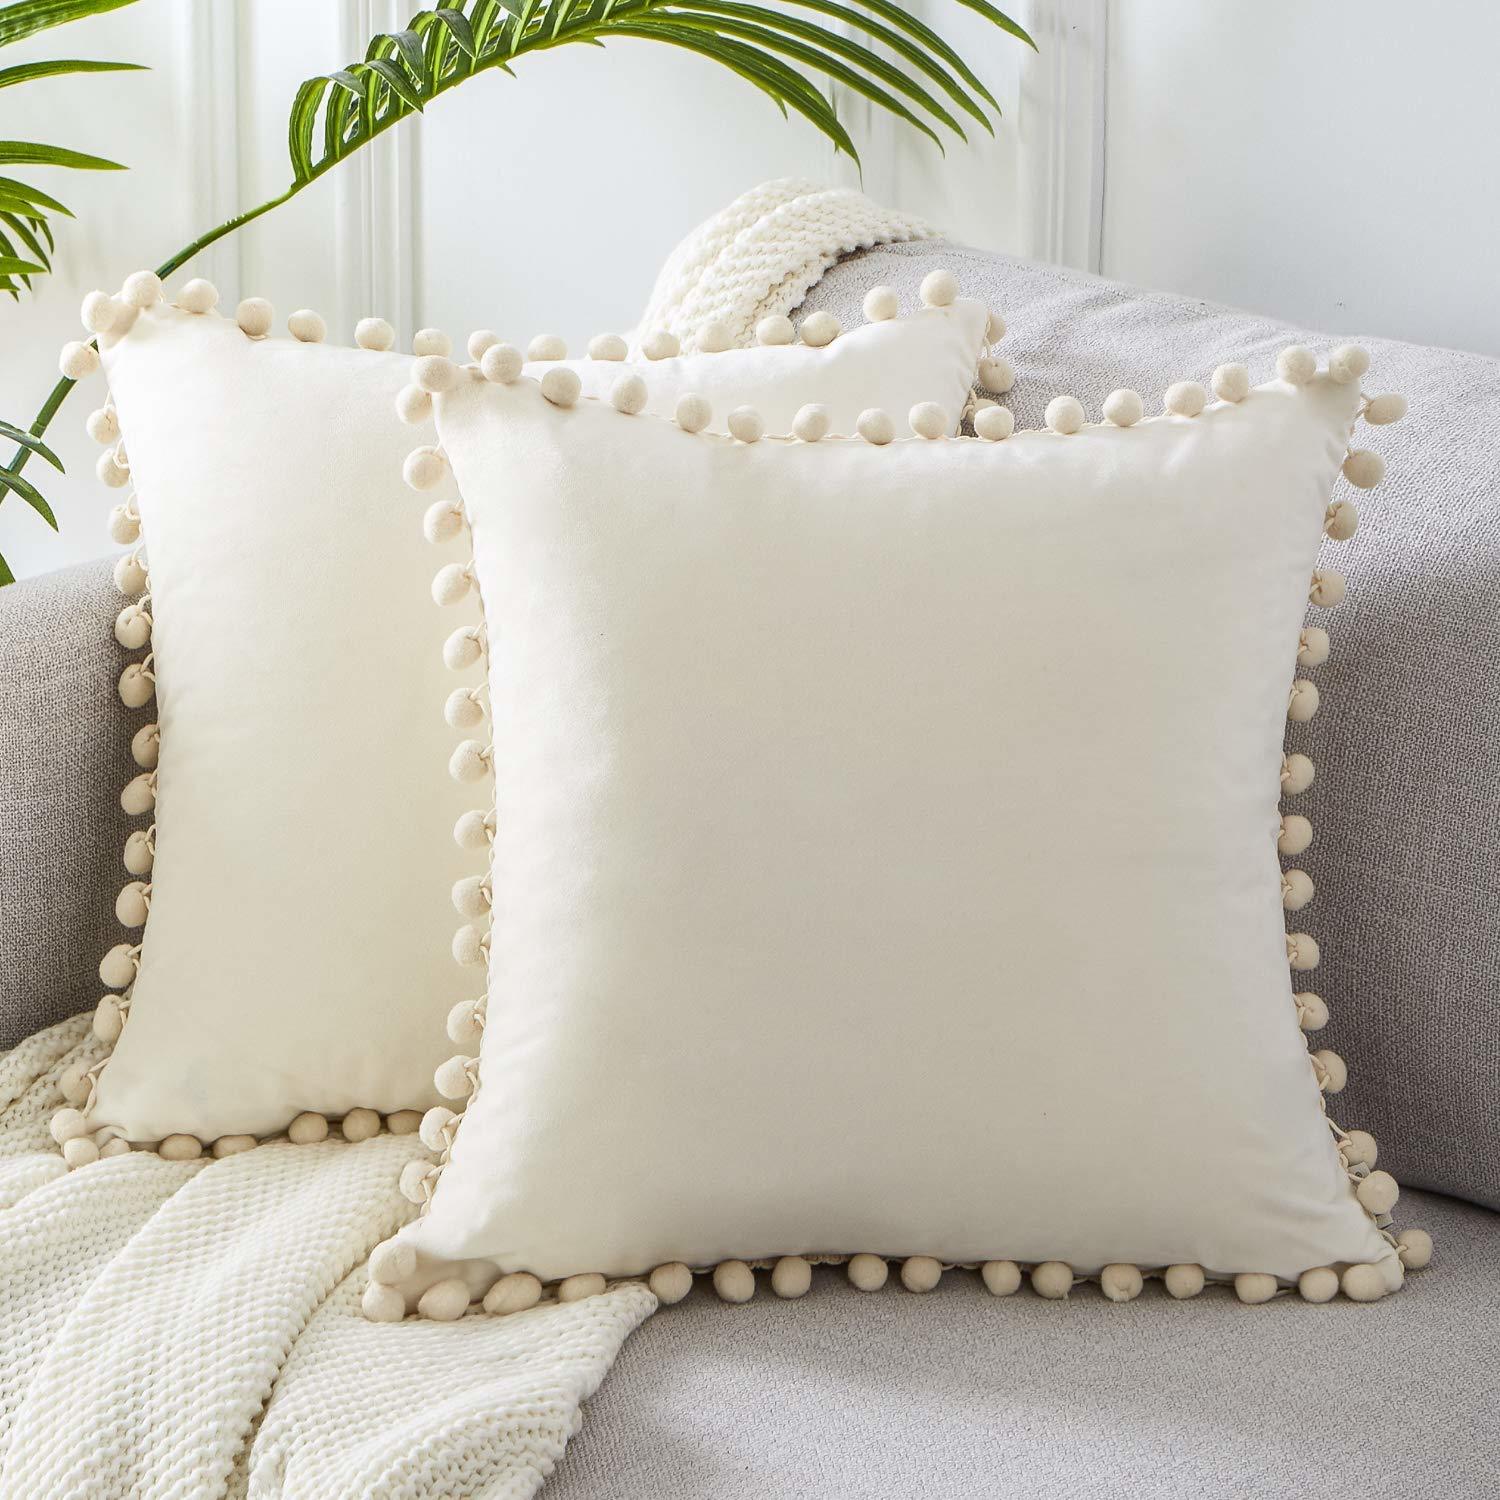
Velvet Plush Pillow Covers

Velvet Pillow Covers with Pom Pom Fringe

Plush velvet pillow covers with zipper closure. Soft, boho-style for comfort. 20 color choices. 2 - 20" x 20" Under $16.

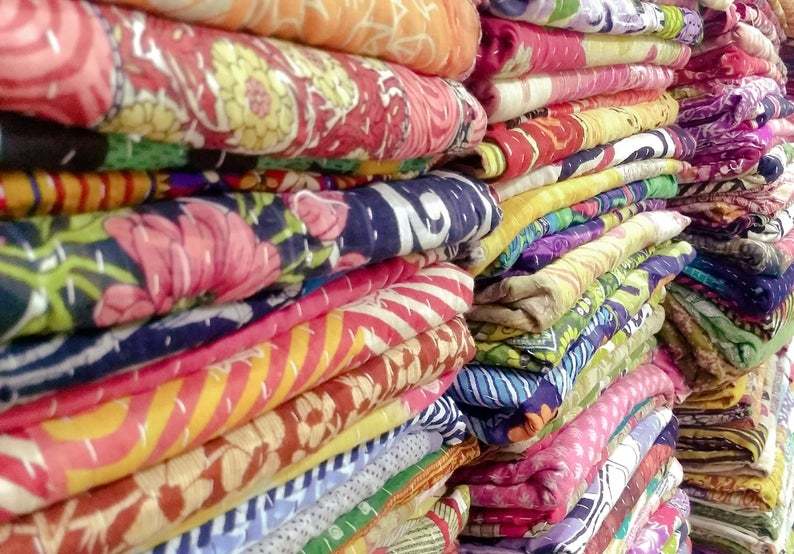
Kantha Quilts

Kantha Quilts

Various sizes of Indian Kantha quilts, which are handmade and pieced together from cotton, silk, and satin fabric. Three layers are held together by long stitches. $23.99

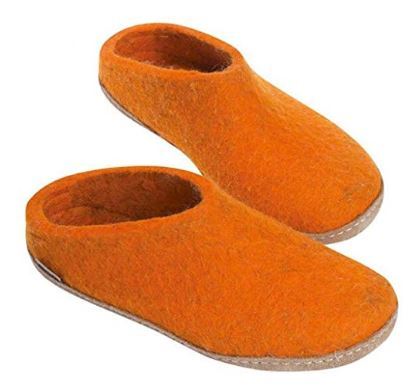
Short Felted Wool Slippers

Danish Felted Wool Low Slippers

These cozy, warm Danish slippers are made of 100% pure wool upper with a soft calf skin leather sole. Choose from 11 colors. $89. - $100.

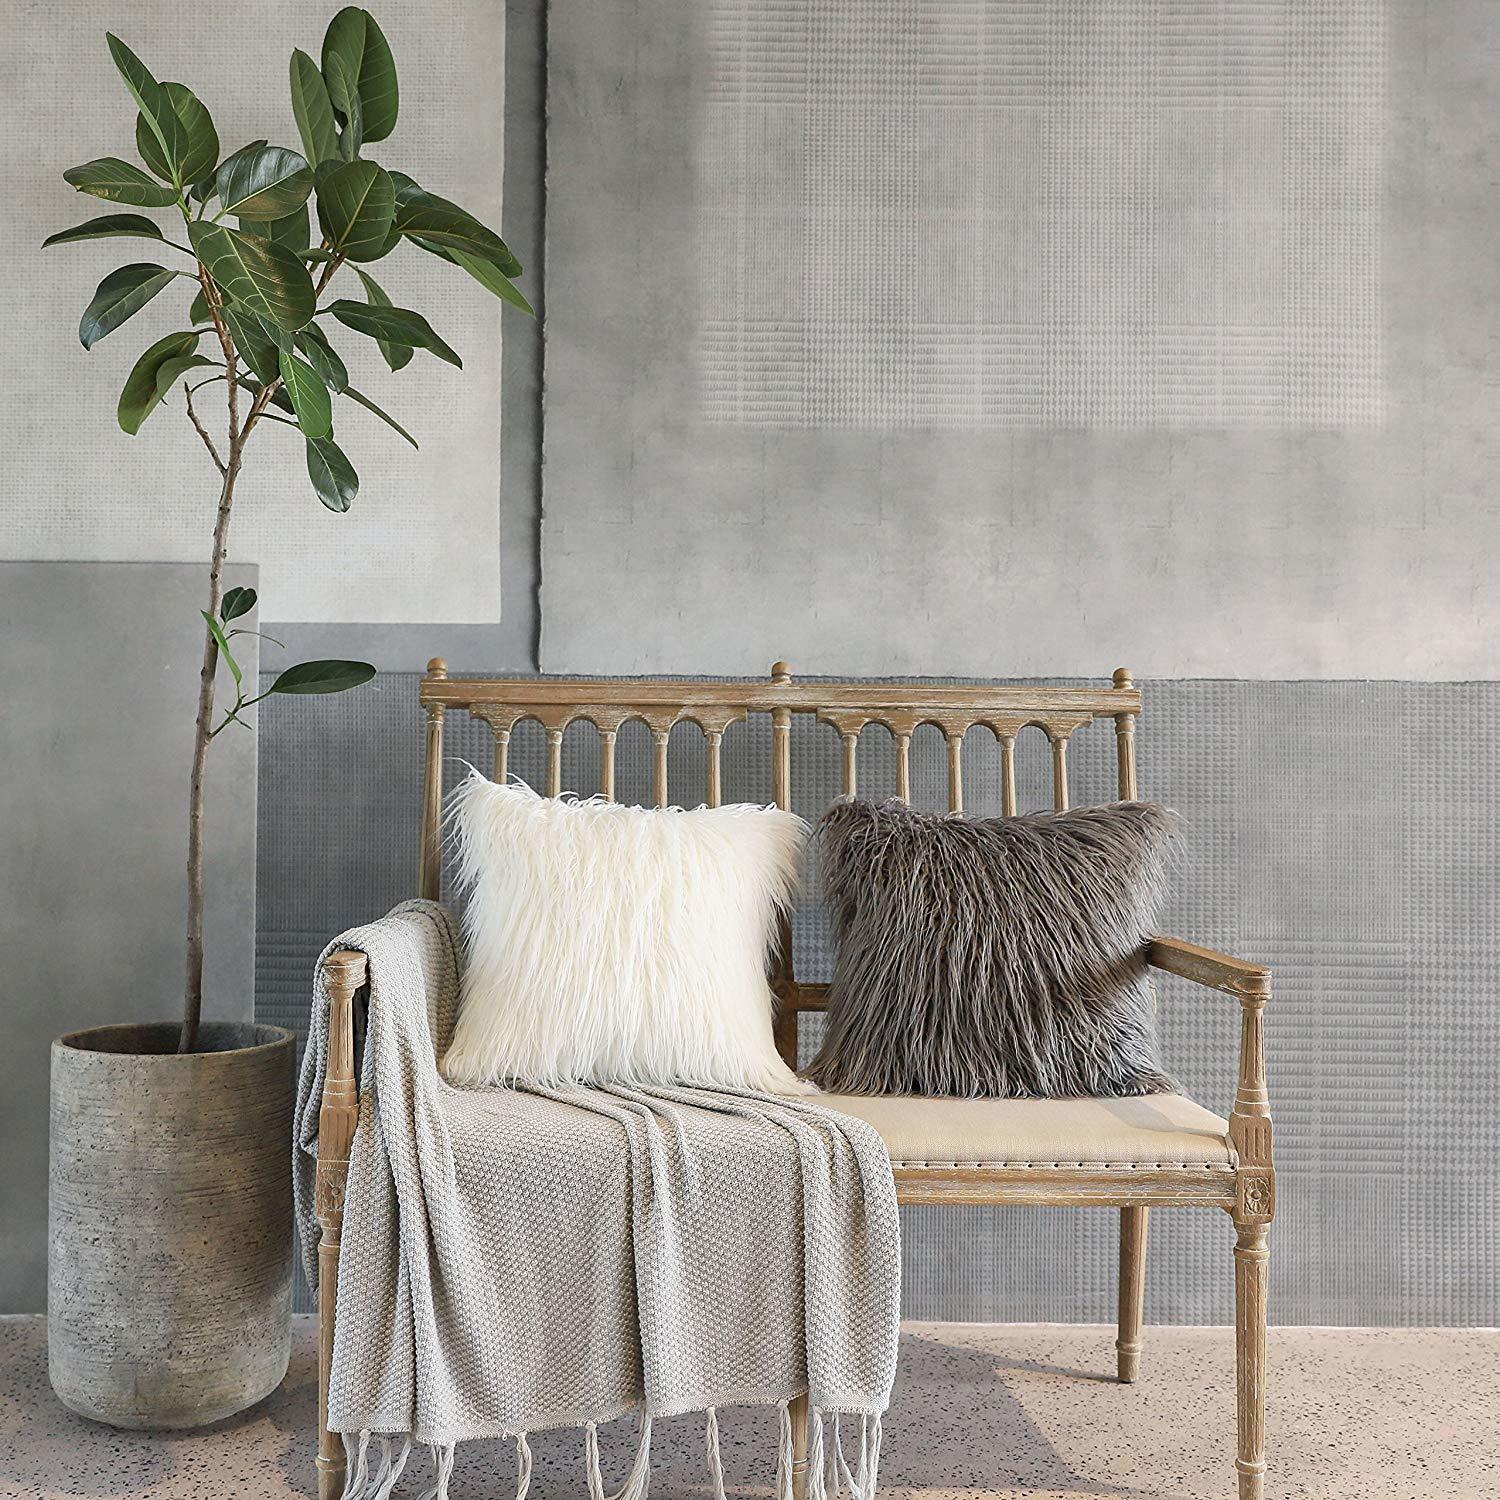
Merino Plush Pillow Covers

Long Plush Comfy Throw Pillows

Super cuddly and cozy Merino-style throw pillow covers for chairs, couches, or bed. 2 - 18" x 18" covers. 7 color choices. Under $18.

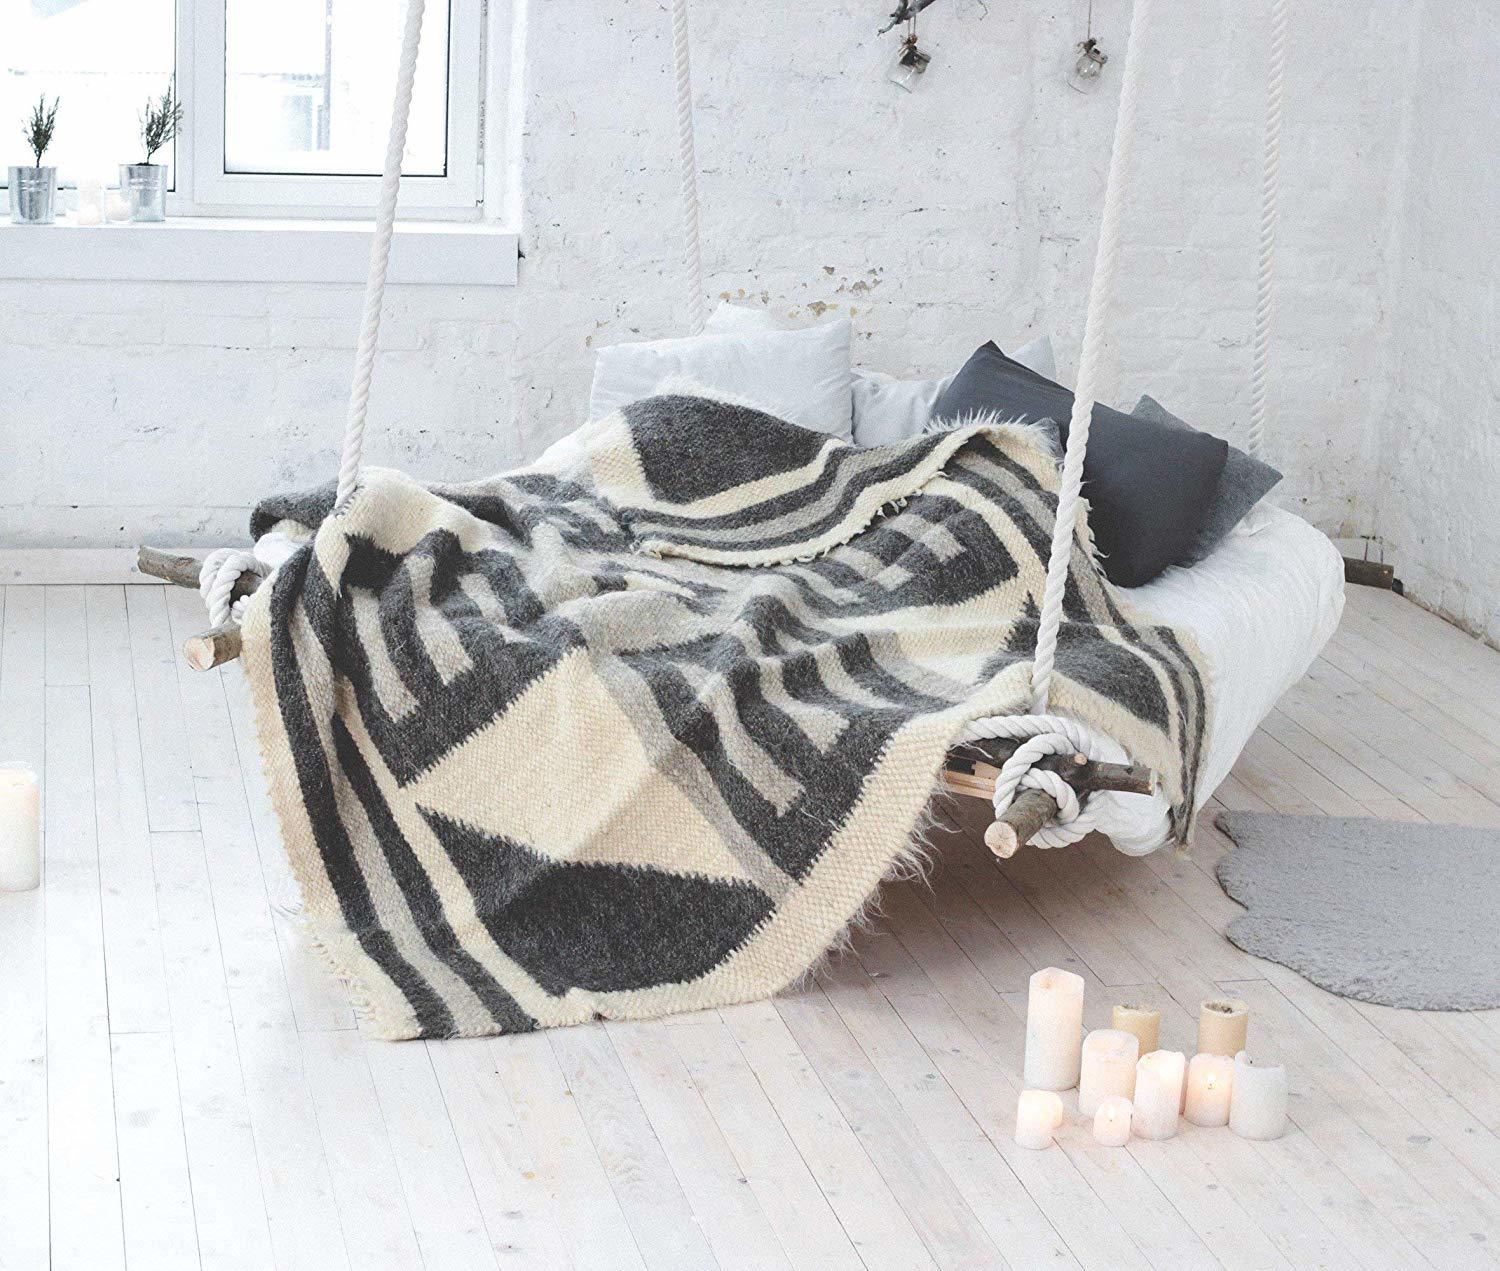
Scandinavian style grey blanket

Grey Wool Handmade Throw Blanket

This handmade grey and white wool blanket is made by Maria Zolia. Maria makes traditional Ukranian wool blankets  made of pure sheep wool. Maria is a craftsperson who sells through Amazon's Handmade Store. Price: $190.

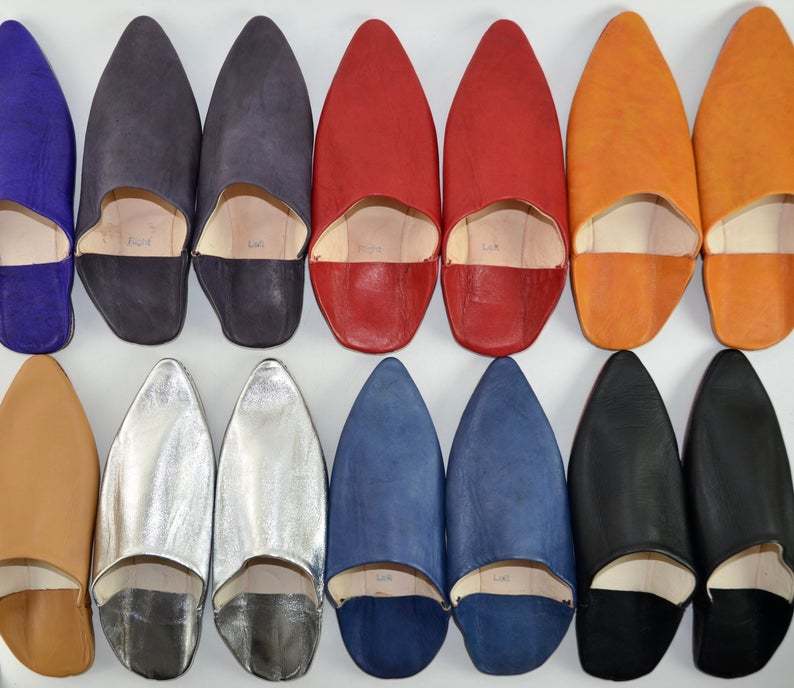
Babouche Slippers

Moroccan Babouche Slippers

Pointy leather Moroccan slippers in gorgeous colors. Organic leather upper; camel leather sole. Handmade, super soft and comfy. $38.86

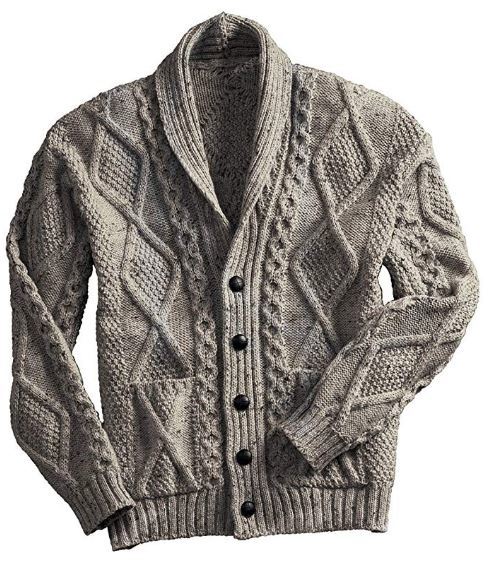
Aran Sweater

Handknit Irish Aran Sweater for Men

This men's shawl neck cardigan sweater is made of extra soft 100% Irish Merino wool. Warm, cozy, stylish, with 2 pockets to keep hands warm. Made in Ireland by West End Knitwear. Price: Under $70.

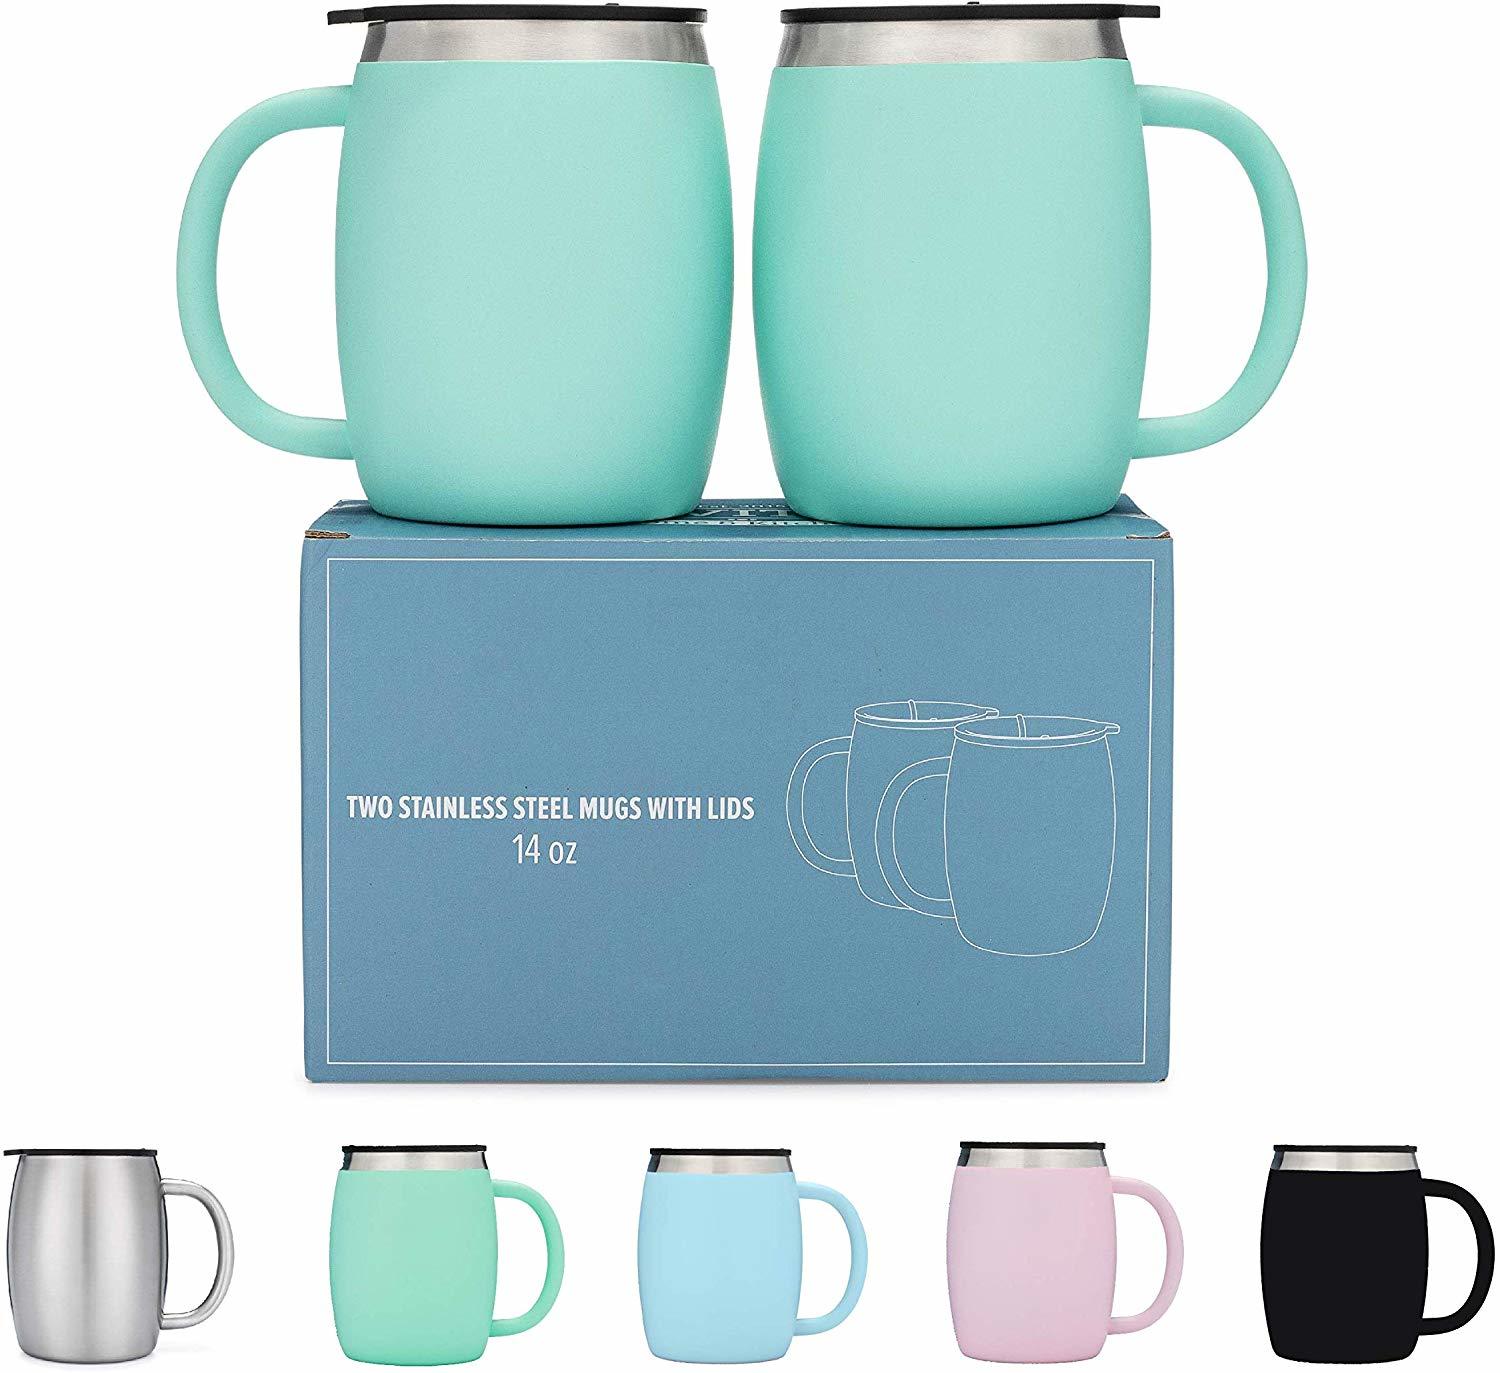
Stainless Steel Insulated Coffee Mugs

Stainless Steel Mugs with Lids

Set of 2 14 Oz. double-walled stainless steel coffee/tea mugs with lids. Beautiful modern design. BPA-free. Maintains heat/chill. Under $20.

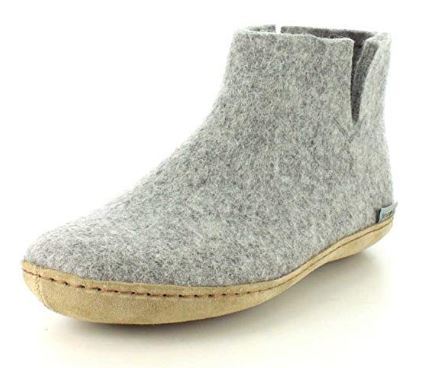
Felted Wool Slippers

Danish Felted Wool Ankle Slippers

These cozy, warm Danish ankle booties slippers are made of 100% pure wool upper with a soft calf skin leather sole. Choose from 10 colors. Under $125.

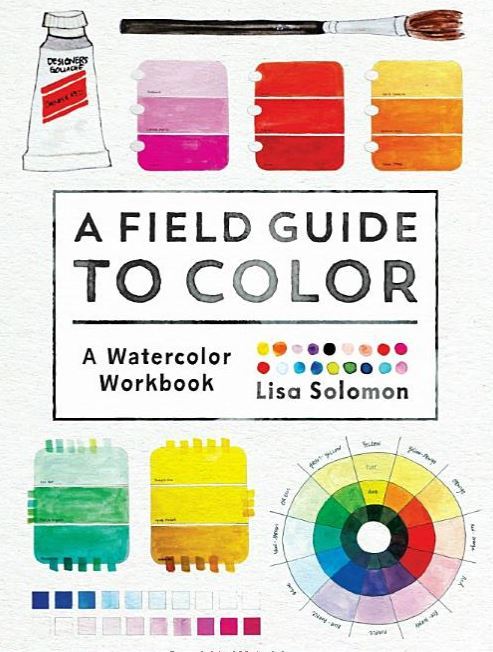
Watercolor Book

A Field Guide to Color: A Watercolor Workbook

Lisa Solomon guides you through how color works, and how to use watercolors. Need a hobby to relax? Watercoloring is a great choice! It's a fun and forgiving medium. Under $26.

Chunky Knit Blanket

Chunky Hand Knit Blanket

This grey chunky knit blanket is  is made of a high-quality, 4-twisted strands yarn of Australian wool, which makes it soft and is very pleasant to touch. Hand made in Ukraine by Modern Wool Style. Price: $359.

Cooling Weighted Blanket

Cooling Weighted Blanket

Weighted blanket of 100% breathable cotton and glass beads. 12 choices of colors/patterns and different sizes/weights. Choose weighted blanket based on your weight. Under $73.

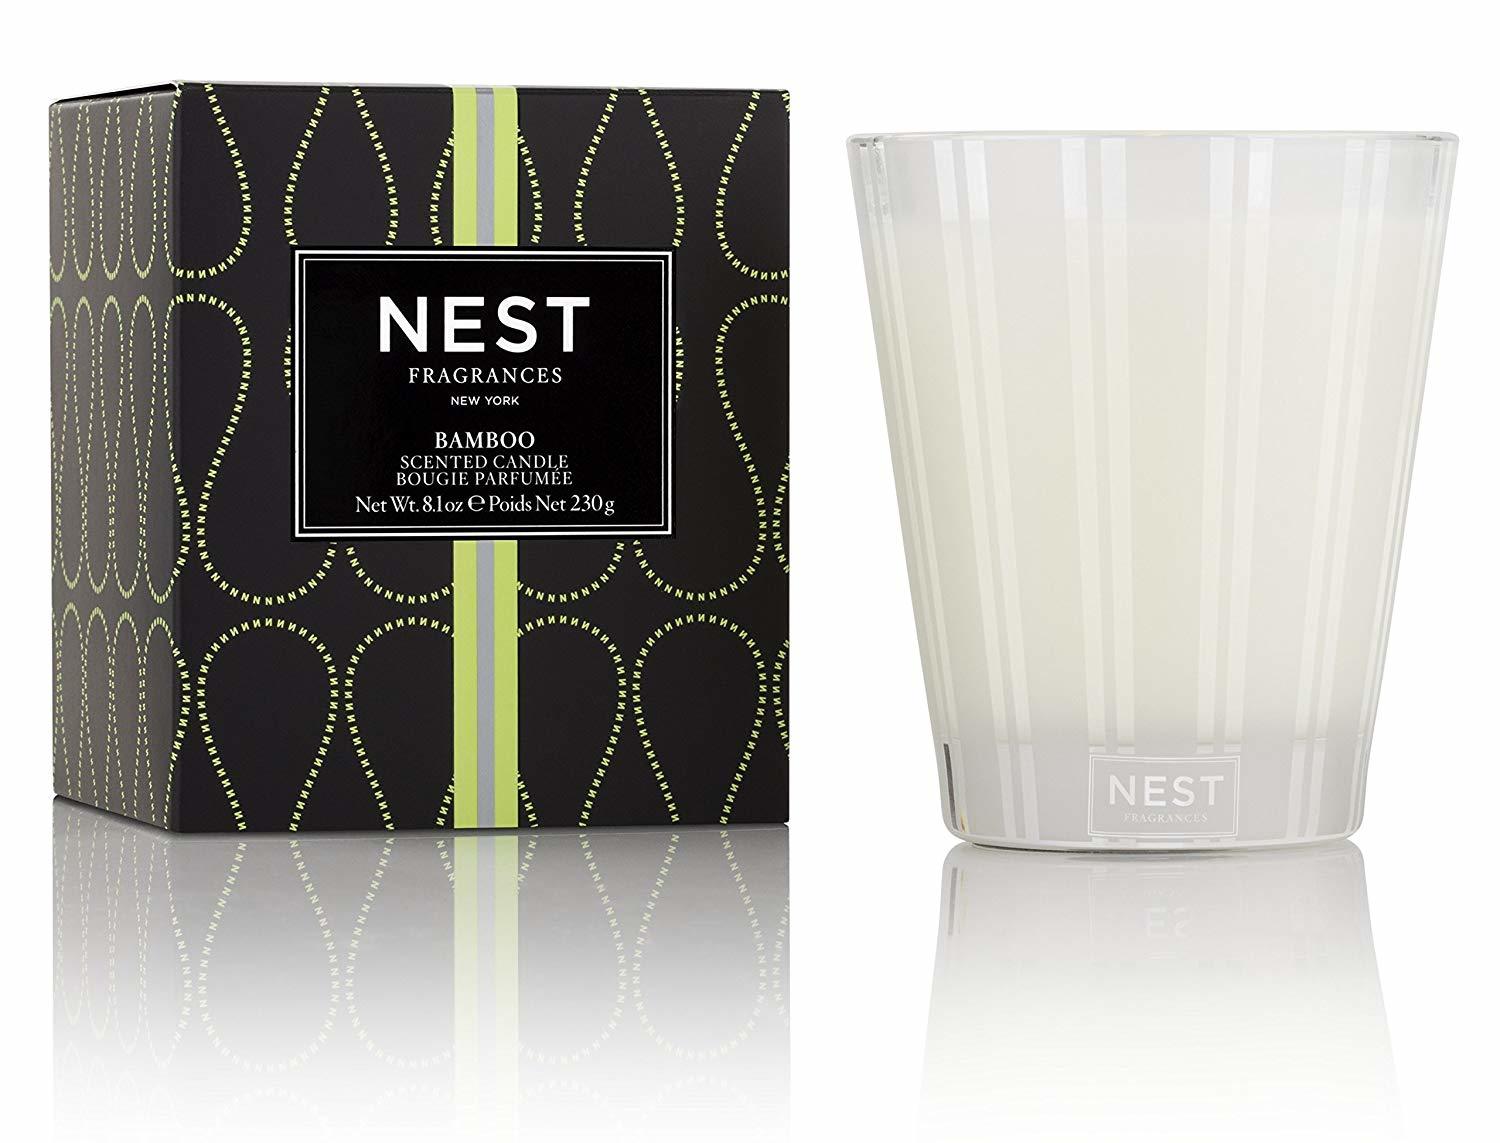
Nest Scented Candles

NEST Fragrant Candles

8.1 ounce luxury candle made with a premium, soft, highly refined, cosmetic-grade wax. 24 different fragrant choices, from Apricot Tea to White Camellia.

Under $43.

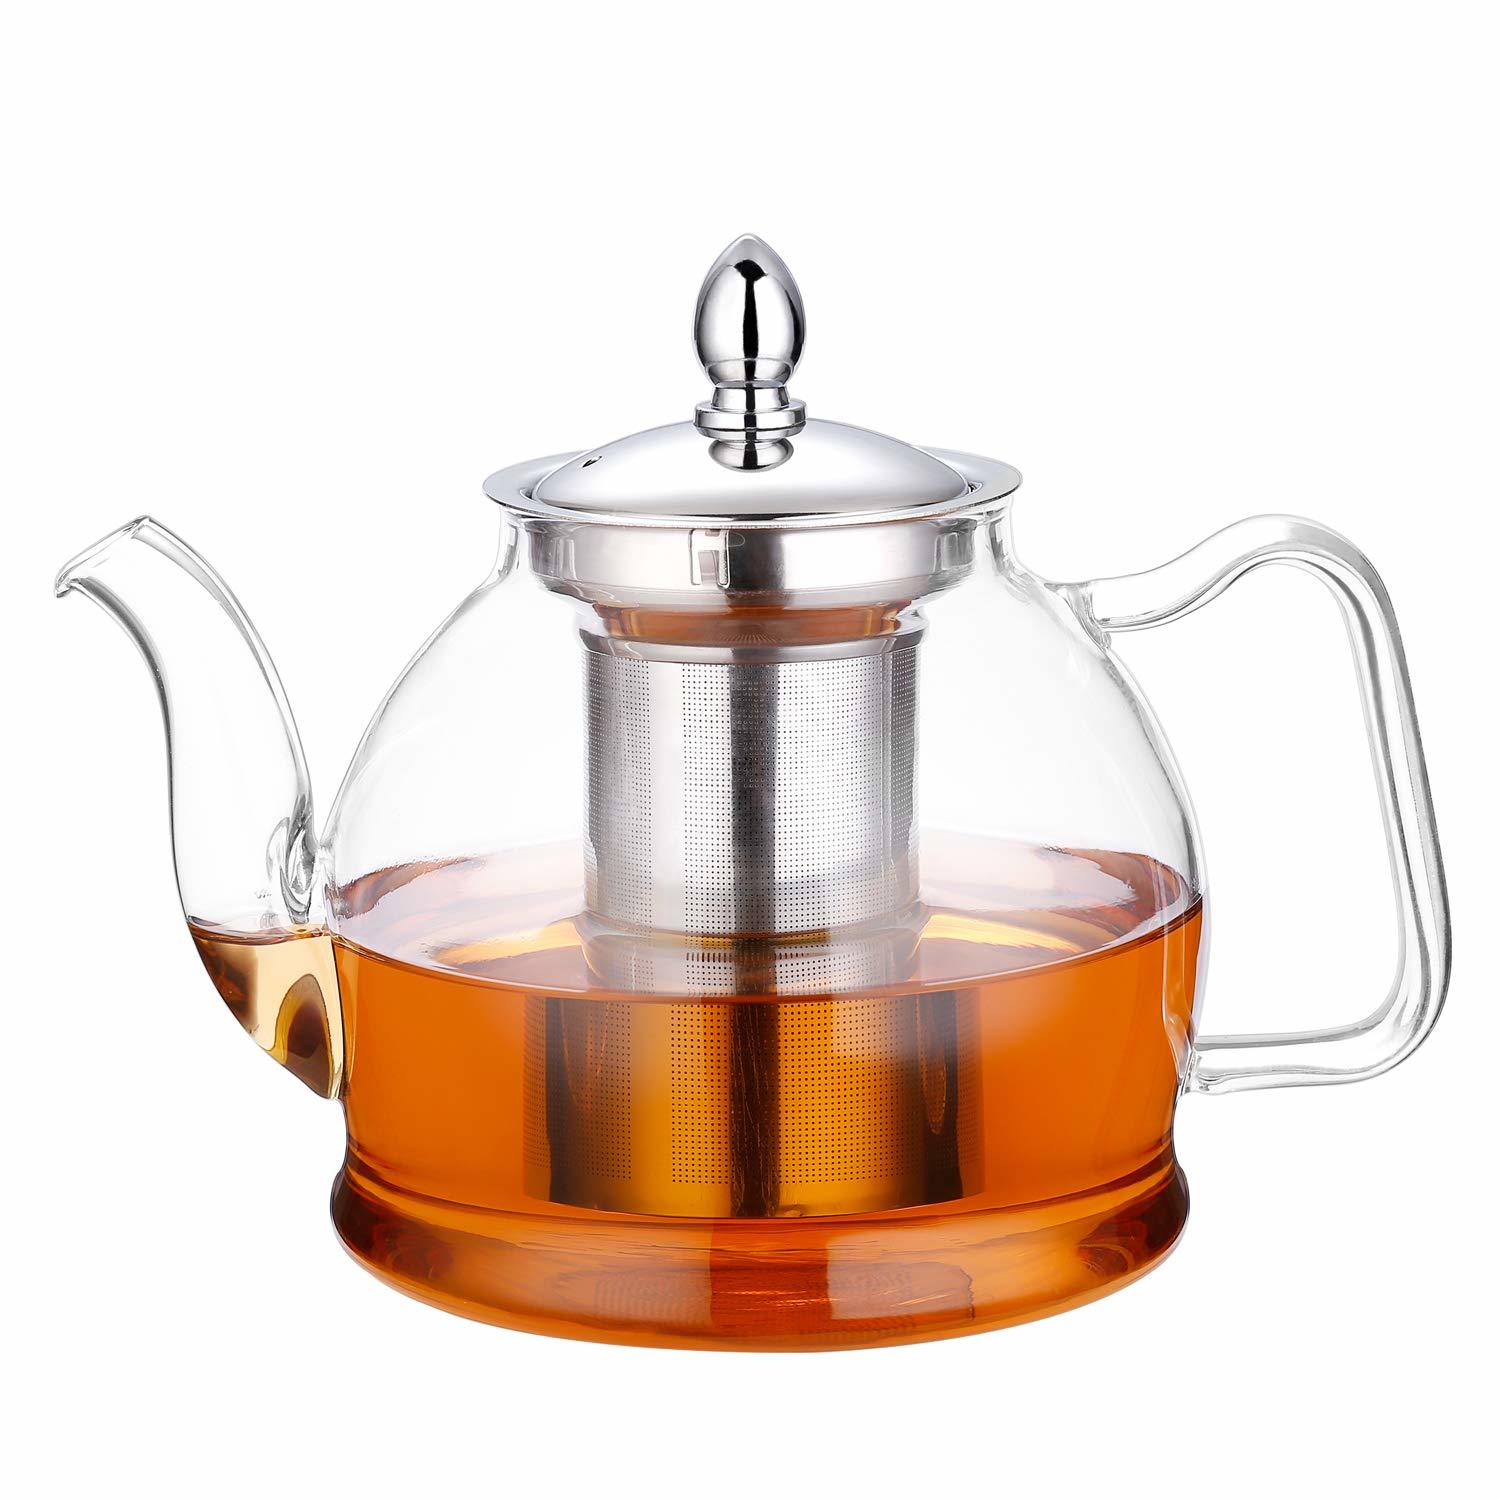
Glass Teapot

Glass Teapot with Removable Infuser

This hand-crafted teapot is made from heat-resistant glass. It features a high-grade stainless stell mesh infuser filter for loose or blooming teas. Can be placed directly in the microwave oven, and on gas and electric stove tops. Price: Under $24.

Men's Norwegian Sweater

Men's Vail Sweater

This Men's sweater from Dale of Norway is made of 3-ply 33-micron combed 100% Norwegian wool. It features a classic Norwegian design, with traditional eight-petal rose-patterned shoulders, a draw cord at the hem,  and a quarter zipper.  Price: $299.+

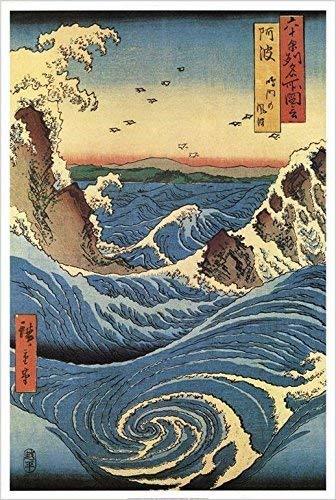
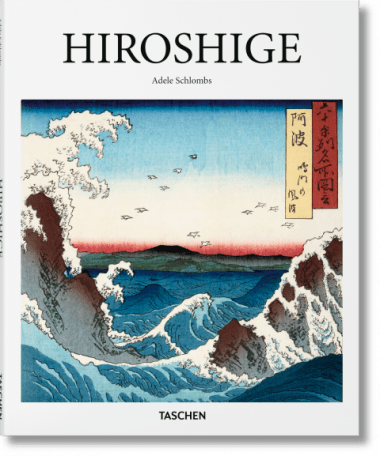
Hiroshige wave woodblock print

Classic Art Books by Taschen

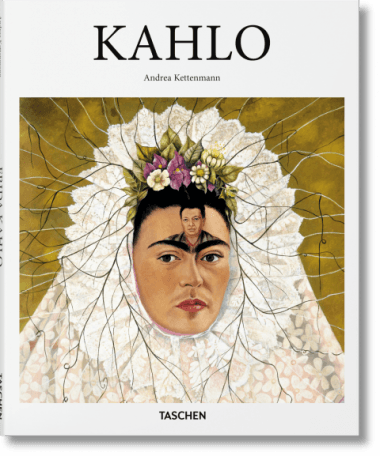
Taschen's Basic Art Series features 121 books about individual artists and art movements. A perfect day - relax, get cozy, and explore favorite artists and art periods, including Frida Kahlo, Hokusai, Keith Haring, Marcel Duchamp, Magritte, Manet, Basquiat, and more. Price: $15.+

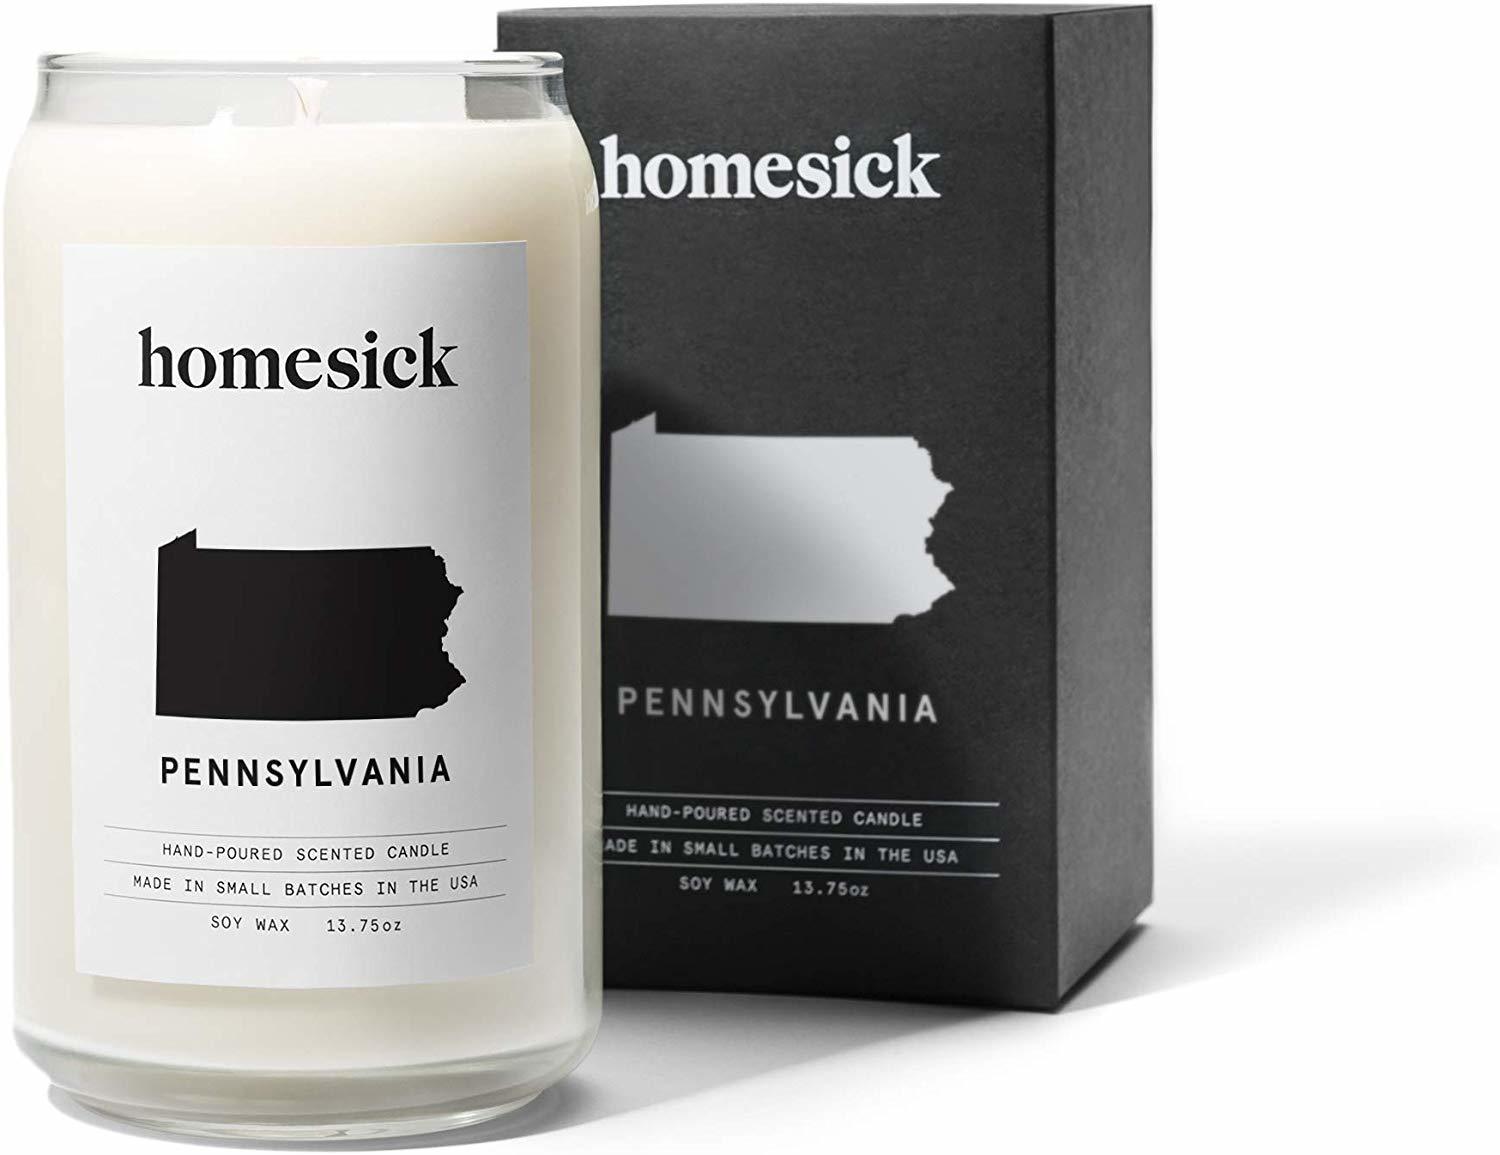
Homesick brand candles

Homesick Small Batch Soy Candles

Homesick Candles are hand poured and come in mixed custom scents for for all US States, iconic cities, vibrant countries, and memorable experiences. Made with all natural soy wax; 60-80 hour burn time. Under $30.

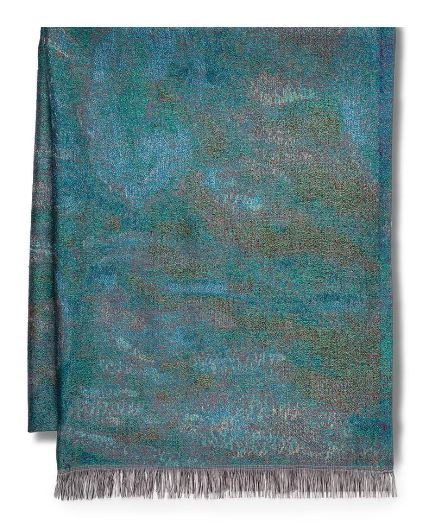
Shawl

Monet Water Lilies Shawl

This shawl from The Met Museum Shop features a detail from Claude Monet's Water Lilies painting in the Met Museum collection. It measures 75" x 28", and is made of a viscose, silk, and wool blended fabric. Super soft and cozy! Price: $75.

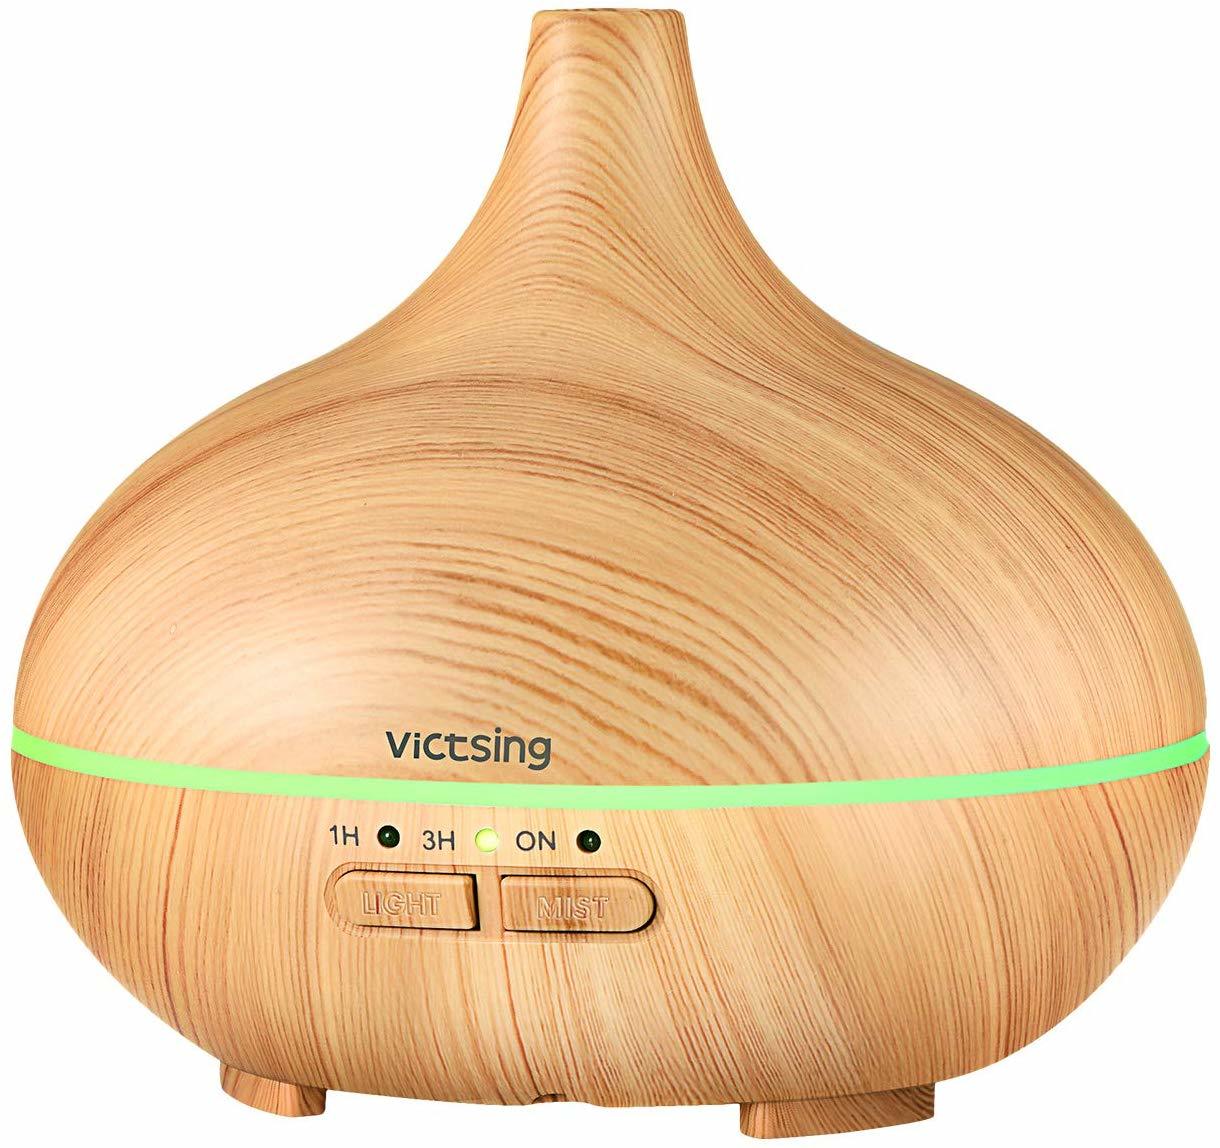
Mini Essential Oil Diffuser

VicTsing Mini Oil Diffuser

This wood-grained ultrasonic mini aromatherapy essential oil diffuser is super quiet and produces a powerful mist. BPA-free; has an auto shut-off when water runs out. Under $21.

Books by Taschen Publications

Taschen has published books about classical art, modern art, music, fashion, film, and photography. Discover books that you'd like to read over and over.

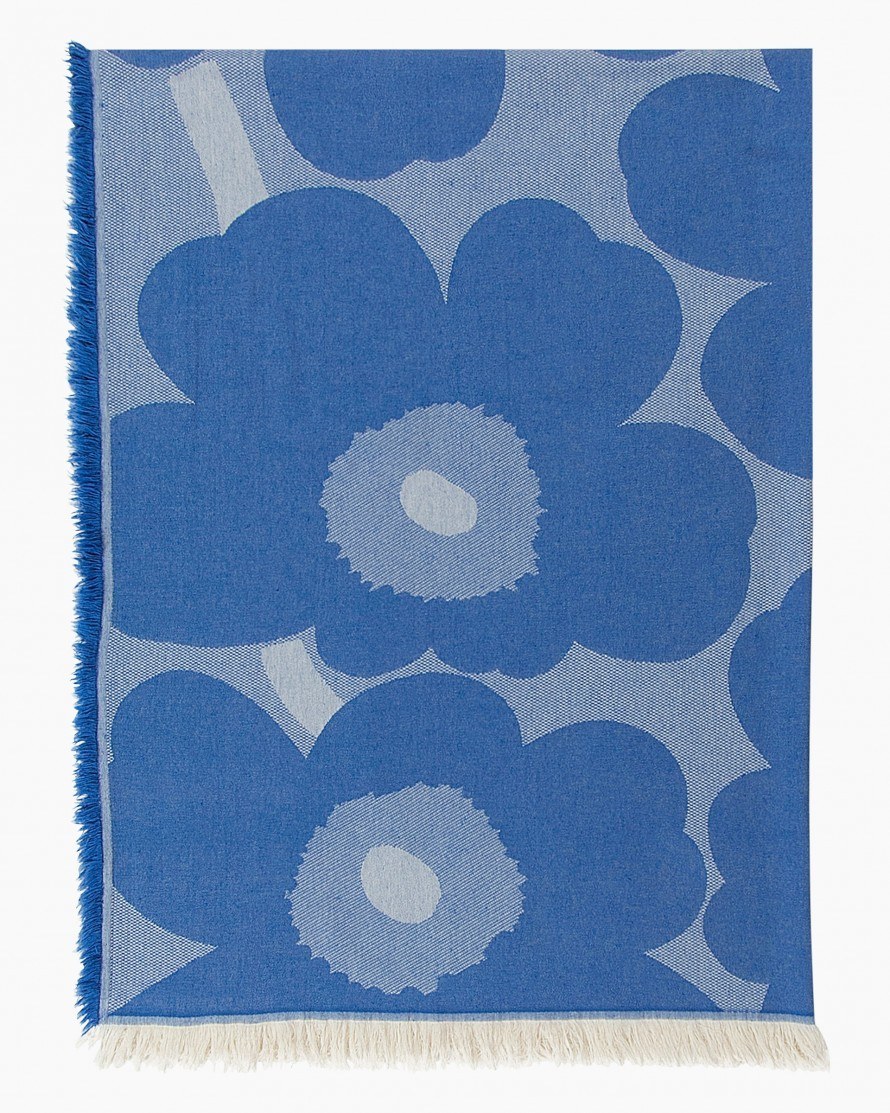
Cotton blanket

Lightweight Cotton Blanket

This blue and off white lightweight woven cotton blanket features a classic floral design by Marimekko. This Unikko pattern is part of celebrated Finnish designer  Maija ja Kristina Isola's popular bold floral patterns.

Price: $180.

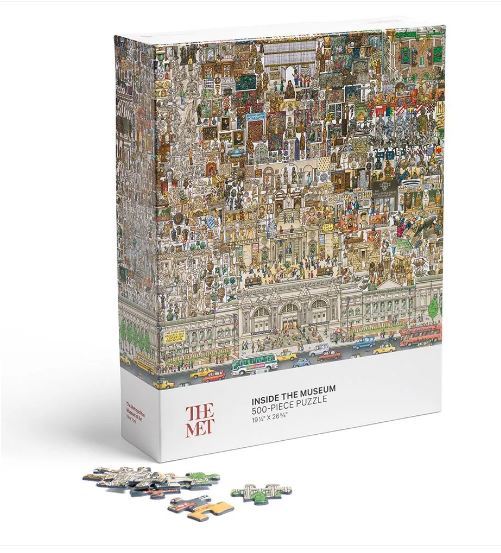
Inside the Museum Puzzle

Settle in, get cozy, and discover the Met Museum's galleries and treasures as you put together this beautifully drawn, detailed 500 piece puzzle. $19.95

Dandies Marshmallows

Dandies All Natural Vegan Marshmallows

Pack of 2 - 10 ounce all natural, plant-based and vegan-friendly marshmallows. Great for topping in hot chocolate. Under $13.

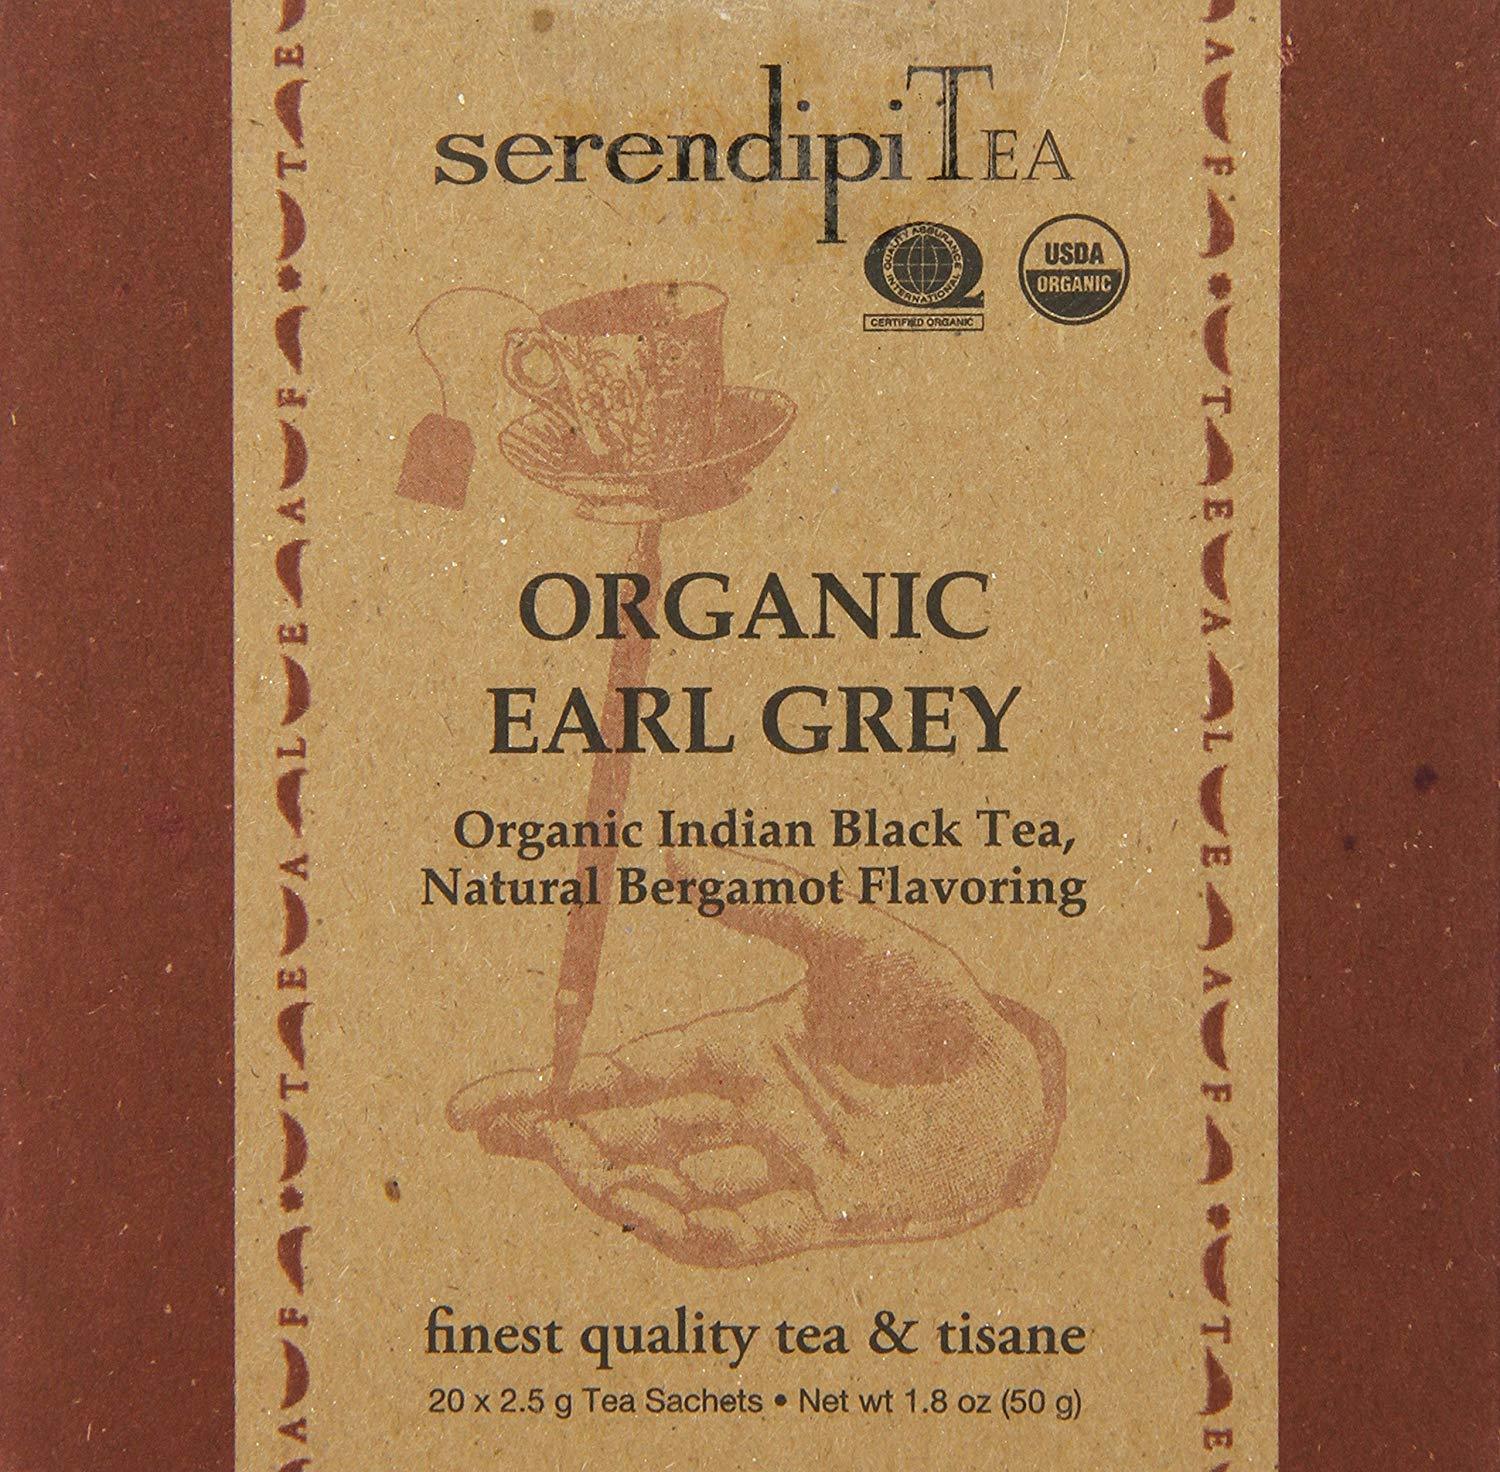
Serendipitea

SerendipiTea Organic Tea

Wonderful organic brand SerendipiTea offers many blends - choose your favorite to get cozy and curl up with a good book: Earl Grey, Peppermint, Green, Fiji, Cheeky Peach, Winter Solstice, and more. Priced from $10. - $76.

Zojirushi Stainless Steel Mug

Zojirushi Stainless Steel Vacuum Insulation Mug

This gorgeous Japanese-designed container will keep your liquids hot or cold for hours. Has a tightly-fitted flip lid and safety lock. Comes in 12 or 16 oz./8 colors. Under $26.

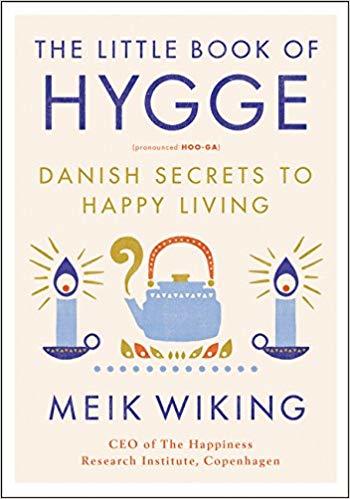
The Little Book of Hygge: Danish Secrets to Happy Living

The Little Book of Hygge by Meik Wiking introduces you to this cornerstone of Danish life, and offers advice and ideas on incorporating it into your own life. From picking the right lighting to organizing a Hygge get-together to dressing hygge, Wiking shows you how to experience more joy and contentment the Danish way.

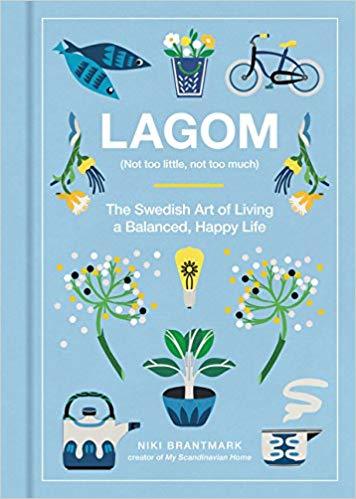
Lagom: Not Too Little, Not Too Much: The Swedish Art of Living a Balanced, Happy Life

Sweden is ranked in the top three of the world’s happiest places to live, and lagom, which means “not too much and not too little—just right,” is the Swedish philosophy for enjoying balance in every aspect of life—from work and leisure to family and food, and everything in between. 

Having fun with new and traditional crafts, art, design, DIY, and freebies.

TRENDING & POPULAR

FREE ART BOOKS ONLINE  Start your own free collection of art books from three major museums.

DISCOVER SASHIKO STITCHING  Learn how to make traditional Japanese decorative stitches for quilting, mending, and upcycling.

BILUM  Discover a fabric-making technique used in Papua New Guinea that can be used to make bags and dresses.

HOW TO MAKE AN AMISH RAG RUG  There's no sewing required to make this traditional homemade crafted item.

35,000 FREE KNITTING & CROCHETING PATTERNS Use our easily searchable list to find free patterns by Rowan, Vogue, Lion Brand, Berroco, and more.

HOW TO MAKE A LINOLEUM BLOCK PRINT  Watch how-to videos for beginners explaining the basic step-by-step process of making a linoleum block print.

HOW TO MAKE A BORO BAG  Learn how to make a stand-out bag using a Japanese patchwork technique and Sashiko stitching. 

'KNIT' LIKE THE VIKINGS  Discover an ancient fabric-making technique that's still done today, pre-dates knitting, and doesn't unravel.

MAGNETIC CLAY CERAMICS Ceramic artists working with magnetic clay can play with the forces of nature to create fantastical structures.

Chiharu Shiota Installations

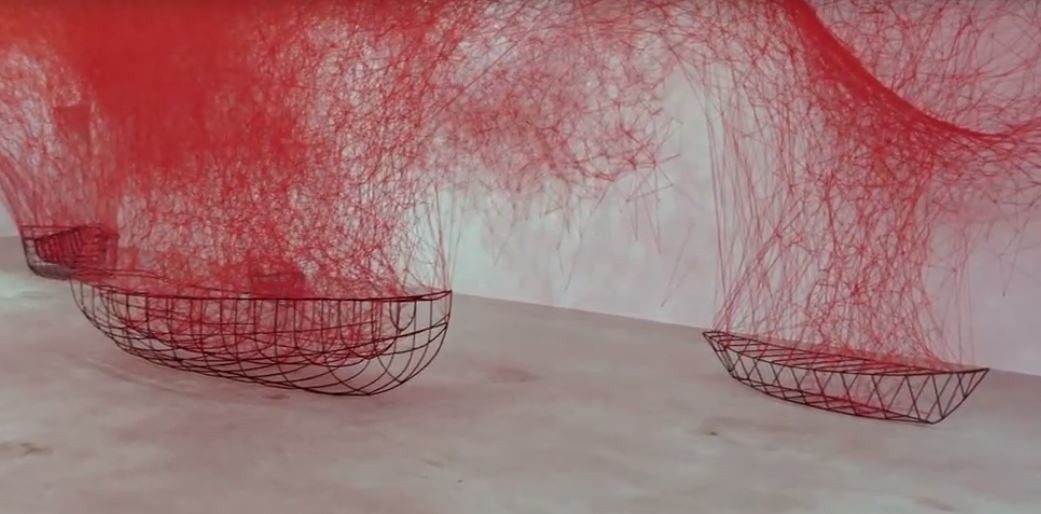
Art installation with red string

Chiharu Shiota Installations

"I live in my imagination. As long as I have an imagination, I'll keep creating. I keep creating and keep dreaming."

Chiharu Shiota is a Japanese artist who frequently uses string, yarn, and wool to create eerie, evocative art installations. 

After trying her hand at painting, she made a move from making images on flat surfaces to creating three dimensional works, using yarn as a drawing tool. 

Chiharu weaves her string and yarn in, around, and through objects, evoking neural networks and clouds. Her installations are so jam-packed with string making connections between objects and the walls, ceilings, and floors that it's hard to know where to start to unravel the stories and the connections of the items she uses - keys, dresses, boat shapes, and suitcases.

Using everyday string and yarn, Chiharu can make long or short visual connections between objects, or create an impenetrable web. Is that a safe cocoon, or are you trapped in a spider's web?

Her pieces are such dreamy, magical realism-type landscapes that they bypass the logical part of your brain and go straight to that place where you try to sort out what that dream or nightmare you just had was trying to tell you.

It's amazing how she creates such deep feelings of unease and apprehension with yarn and string.

Some of her pieces have all the hallmarks of a horror movie. I can't help but wonder about the people these objects belonged to, their stories, and their fates.


"All string is connected. When I was using keys, it's connecting humans with (other) humans - it's a relationship...If this line is cut, the relationship is cut. Or (if) the line is tangled, the relationship is tangled, or the relationship is loose. Everything I can explain with my string."


Click on the image below to hear Chiharu talk about her installation Uncertain Journey, from 2016, and to watch the creation of this masterful installation.

Art installation with red string

For a longer examination of her work and her process, watch the video below.

Want to watch more artists/crafts-persons at work? Spend 3.5 minutes watching a time-lapse video of Canadian textile artist Laurie Swim creating a landscape quilt.

Or, see how Jacqui Fink transforms wool into large-scale projects.

And, see what sisters Lorna and Jill Watt do with yarn in public spaces.

Having fun with new and traditional crafts, art, design, DIY, and freebies.

TRENDING & POPULAR

FREE ART BOOKS ONLINE  Start your own free collection of art books from three major museums.

DISCOVER SASHIKO STITCHING  Learn how to make traditional Japanese decorative stitches for quilting, mending, and upcycling.

BILUM  Discover a fabric-making technique used in Papua New Guinea that can be used to make bags and dresses.

HOW TO MAKE AN AMISH RAG RUG  There's no sewing required to make this traditional homemade crafted item.

35,000 FREE KNITTING & CROCHETING PATTERNS Use our easily searchable list to find free patterns by Rowan, Vogue, Lion Brand, Berroco, and more.

HOW TO MAKE A LINOLEUM BLOCK PRINT  Watch how-to videos for beginners explaining the basic step-by-step process of making a linoleum block print.

HOW TO MAKE A BORO BAG  Learn how to make a stand-out bag using a Japanese patchwork technique and Sashiko stitching. 

'KNIT' LIKE THE VIKINGS  Discover an ancient fabric-making technique that's still done today, pre-dates knitting, and doesn't unravel.

MAGNETIC CLAY CERAMICS Ceramic artists working with magnetic clay can play with the forces of nature to create fantastical structures.
How to Make an 8 Bit Video Game Cross Stitch

cross stitch needel and thread

How to Make an 8 Bit Video Game Cross Stitch

8 bit cross stitch

Photo via Pixelkin's Make Your Own Video Game Cross-Stitch!

Making a cross-stitch picture based on an 8-bit video game character or setting is a perfect project for those who are nostalgic for early video games. 

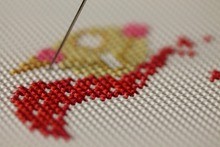
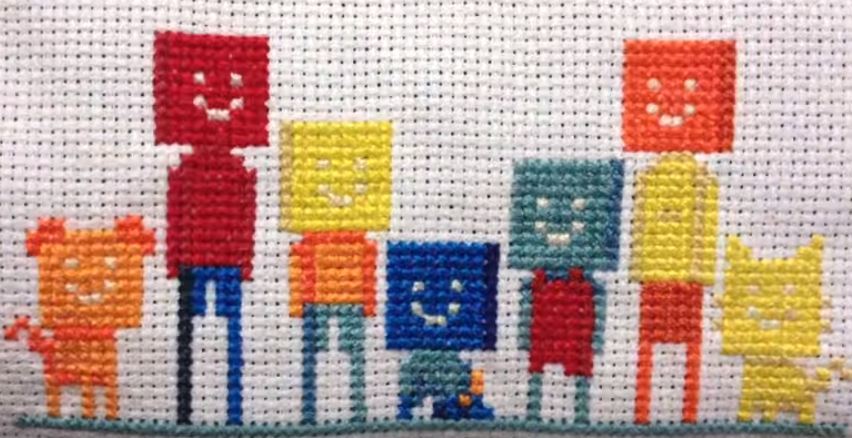
Imagine a picture made up of little x’s, all the same size, with a color palette that’s as simple or as complex as it needs to be to make the image. A cross stitch picture is made up of a series squares formed by one stitch crossing another stitch. The little ‘x’ squares are stitched with a needle and thread on a piece of woven fabric, which has vertical and horizontal threads – a grid. The weave has obvious openings between the threads, with enough room for the needle and thread to pass through.

8-bit images from early video games are made up of pixelswhich look like little squares. The word 'pixel' was invented from "picture element," and is defined as the basic unit of programmable color on a computer display or in a computer image. 

In the video below, Courtney Holmes of Pixelkin walks us through the process of creating cross-stitch artwork based on your favorite 8-bit game character.

The Steps

Choose a Character – There are so many great characters to choose from! But, you might want to consider a character with few colors and shading for your first project. Keep it simple when you're starting out. With practice, you'll be able to tackle your favorite characters, no matter how complex their designs are. 

Make the Pattern – Print out a character in color. You’re going to create a grid pattern that will translate into your cross stitch. To do that, use a pen or pencil and a ruler, and draw right on your printout. Draw vertical and horizontal lines which map out the edges of the pixel boxes. Then, number the grid boxes, both at the top and on the left hand side.

Assemble your Supplies and Materials - Below is a list of items to get you started (links below are to Amazon. As an Amazon Associate I earn from qualifying purchases - at no extra cost to you):

Embroidery needles or Cross Stitch needles – these needles have bigger eyes to accommodate the embroidery thread thickness.

Embroidery floss – cotton floss is the most commonly used embroidery and cross stitch thread. They are made up of 6 strands that are easily separable and loosely twisted together. It’s easiest to use lengths that are 12 – 14” to prevent knotting. Two companies that have been manufacturing floss since the 1800s, and are considered the best to use, are DMC and Anchor. You can also use silk and metallic thread (for accents, shading, embellishments, and overall sparkly goodness), or hand dyed threads which can create variegated patterns.

Cross stitch fabric – this fabric is stiffer than most fabrics, and has spaces, or holes, between the vertical and horizontal woven threads, allowing for easy and even stitching. Tip: you don’t need to use white fabric. You can choose a color that’s a good contrast for your character. Recommended: 14 count cotton fabric by Aida (Aida cross stitch fabrics are woven with the threads grouped together into bundles – which creates obvious holes for your needle work).

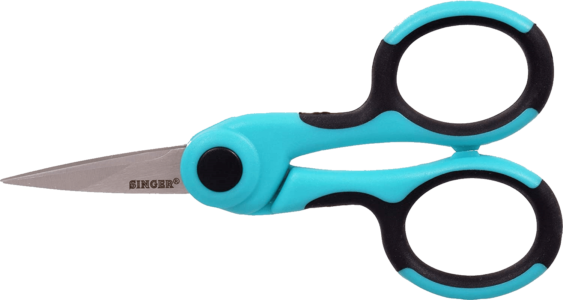
Scissors - you'll want to work with small, precise scissors meant for clipping details, with handles designed for comfort.

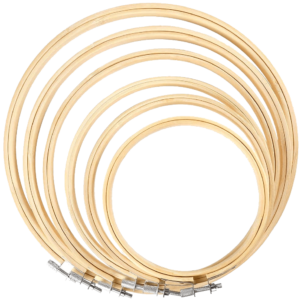
Embroidery hoop - polished bamboo hoops are easy to use, and come in several sizes. It's good to have several sizes on hand if you like to create different sized cross stitch pieces, based on the image you're making.

Below is a video from MadeByMarzipan which details everything you need to know about Cross Stitching for Beginners. 

If you prefer beginner instructions in text and illustrations, click over to Stitched Modern's 'A Beginner's Guide to Cross Stitch' for a great tutorial.

Helpful Tips and Links


For a guide of different cross-stitch pattern-making computer programs, check out Lord Libidan's review page

&

Looking for free online cross stitch generators? Check out patternsforyou.com, myphotostitch.com, and craftdesignonline.com

+

Make Magazine has a tutorial for creating cross-stitch patterns from images using myphotostitch.com

?

Check out Lord Libidan's 500+ free cross stitch patterns, including Video Game characters, TV and Film characters, and Anime Characters.   

!

Use the free-to-use make8bitart to draw your own pixel art, and use to design embroidery or cross stitch patterns. 

&

Use step-by-step pictorial tutorials for embroidery and cross stitching from Shanon Downey.

For your library...

Do you collect crafting books? Check out a page of various cross stitching bookshow-to's, classic designs, subversive designs, feminist-based patterns, miniature designs, and trendy and traditional designs.

Did You Know?

“Cross-stitch is the oldest form of embroidery and can be found all over the world since the middle ages. Many folk museums show examples of clothing decorated with cross-stitch, especially from continental Europe, Asia, and Eastern and Central Europe.

The cross-stitch sampler is called that because it was generally stitched by a young girl to learn how to stitch and to record alphabet and other patterns to be used in her household sewing. These samples of her stitching could be referred back to over the years. Often, motifs and initials were stitched on household items to identify their owner, or simply to decorate the otherwise-plain cloth. The earliest known cross stitch sampler made in the United States is currently housed at Pilgrim Hall in Plymouth, Massachusetts. The sampler was created by Loara Standish, daughter of Captain Myles Standish and pioneer of the Leviathan stitch, circa 1653.

Traditionally, cross-stitch was used to embellish items like household linens, tablecloths, dishcloths, and doilies (only a small portion of which would actually be embroidered, such as a border). Although there are many cross-stitchers who still employ it in this fashion, it is now increasingly popular to work the pattern on pieces of fabric and hang them on the wall for decoration. Cross-stitch is also often used to make greeting cards, pillowtops, or as inserts for box tops, coasters and trivets.

Multicoloured, shaded, painting-like patterns as we know them today are a fairly modern development, deriving from similar shaded patterns of Berlin wool work of the mid-nineteenth century. Besides designs created expressly for cross-stitch, there are software programs that convert a photograph or a fine art image into a chart suitable for stitching. One example of this is in the cross-stitched reproduction of the Sistine Chapel charted and stitched by Joanna Lopianowski-Roberts.

There are many cross-stitching "guilds" and groups across the United States and Europe which offer classes, collaborate on large projects, stitch for charity, and provide other ways for local cross-stitchers to get to know one another. Individually owned local needlework shops (LNS) often have stitching nights at their shops, or host weekend stitching retreats."

Source: Cross Stitch Wiki

Having fun with new and traditional crafts, art, design, DIY, and freebies.

TRENDING & POPULAR

FREE ART BOOKS ONLINE  Start your own free collection of art books from three major museums.

DISCOVER SASHIKO STITCHING  Learn how to make traditional Japanese decorative stitches for quilting, mending, and upcycling.

BILUM  Discover a fabric-making technique used in Papua New Guinea that can be used to make bags and dresses.

HOW TO MAKE AN AMISH RAG RUG  There's no sewing required to make this traditional homemade crafted item.

35,000 FREE KNITTING & CROCHETING PATTERNS Use our easily searchable list to find free patterns by Rowan, Vogue, Lion Brand, Berroco, and more.

HOW TO MAKE A LINOLEUM BLOCK PRINT  Watch how-to videos for beginners explaining the basic step-by-step process of making a linoleum block print.

HOW TO MAKE A BORO BAG  Learn how to make a stand-out bag using a Japanese patchwork technique and Sashiko stitching. 

'KNIT' LIKE THE VIKINGS  Discover an ancient fabric-making technique that's still done today, pre-dates knitting, and doesn't unravel.

MAGNETIC CLAY CERAMICS Ceramic artists working with magnetic clay can play with the forces of nature to create fantastical structures.
Maria Shell’s Quilt-Making Process

Maria Shell Stripes quilt

Maria Shell's Quilt-Making Process

Making vibrant patterns from little bits of fabric.

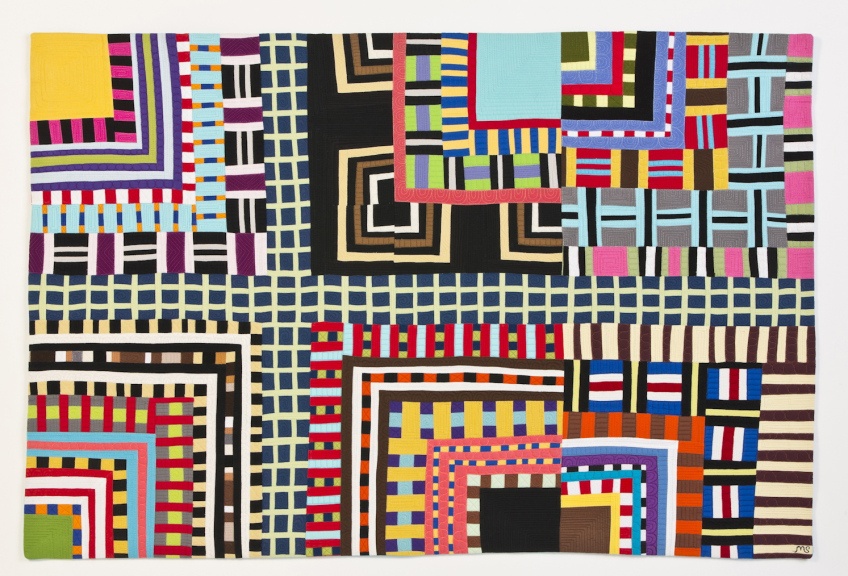
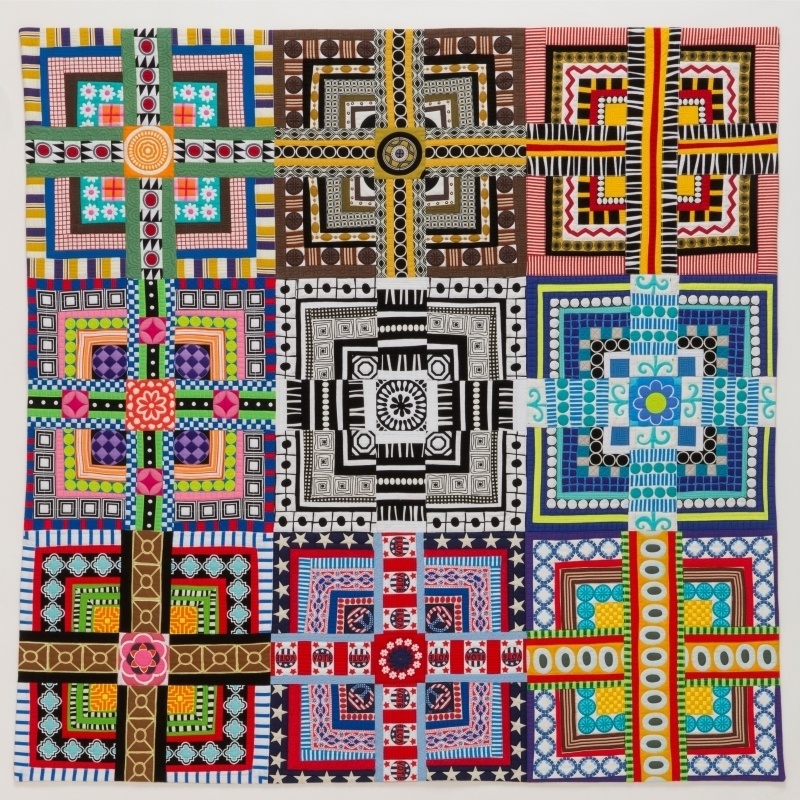
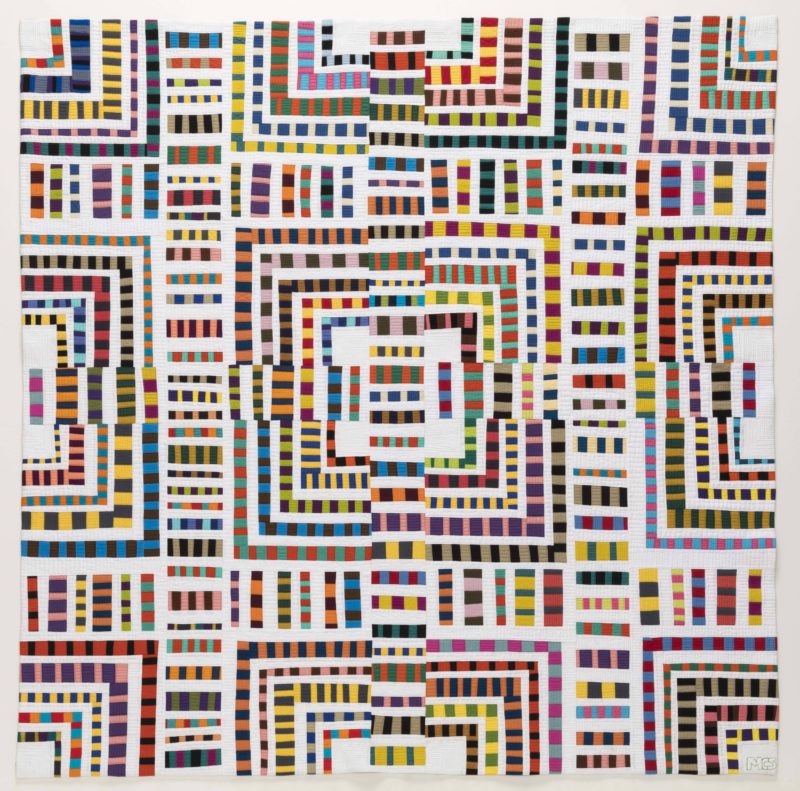
Maria Shell’s quilts are visually stunning. She’s a true color-work genius, creating patterns that pulsate and excite the eye. Her patterns are vibrant, dense, and complex. She accomplishes this by creating various sizes of repeating patterns, themes, and mirrored or symmetrical sections of stripes, which can then be cut up and stitched back together.

She has been widely recognized for her work. In addition to showing quilts in solo and group exhibitions, she has gained significant acknowledgement for her immense talent: “Maria is the recipient of a Sustainable Arts Foundation 2011 Winter Award, a Rasmuson Foundation Project Award, and two Rasmuson Fellowships. In 2012, Maria was one of 44 artists from the Northwest invited to participate in the Bellevue Arts Museum's Biennial High Fiber Diet. She was a featured artist for the 2013 Surface Design Association's International Conference held in San Antonio, Texas." 

A statement from her website explains the philosophy and artistry behind her process:


"I have always been interested in pattern and how complex pattern can also create complex figure ground composition. In 2011, I began to wonder what would happen if I selected a particular pattern–in this case the grid–and continued to play with it over the course of a series. What I discovered is that limiting the pattern but manipulating the line, color, and shape, can produce dynamic results that not only stand alone as compelling individual compositions, but also are intriguing to look at as a group.

Limiting the structure of my work to a grid has allowed me to more fully explore my love of color. How to make color vibrate on the wall? That is the question for me. Most often the answer lies in proportion of line and shape in relation to color. Color is dynamic, fickle, explosive, solemn, mysterious, and beautiful. All colors possess these characteristics, and it is my daily work to explore how color is capable of being all these things for the viewer." 


How does she plan and create her gorgeous, complex quilts? Maria is a self-proclaimed “bit-maker." She lets us in on her process of working with small pieces of fabric in the two videos below.

In The Quilt Show interview video, Maria talks about her transition from making quilts based on traditional designs to creating modern quilts, inspired by studying with Nancy Crow.

In the video Creating Stripes with Solids Demo, from C and T Publishing, Maria explains two ways to make stripes - the basis for creating complex, repeating patterns. 

First, she explains how to cut strips using a clear ruler and cutting mat. Then, she explains her technique for cutting strips without a ruler, making pieces with wavering widths that create the undulating effect in her quilts.

More From a Master Designer

You can read about Maria's process and see images of her work on her website Maria Shell: Tales of a Stitcher

You can order her book Improv Patchwork: Dynamic Quilts Made with Line & Shape through her website, and order her patchwork quilted oven mitt kits here.

Interested in having Marie lead a workshop or give a lecture to your group? Contact her here. Click through to her classes page to read descriptions of workshops that include "exploring color theory, composing abstract design, improvisation-ally cutting and piecing fabric, working with prints, and trouble shooting patchwork construction issues...."

Her lectures cover: the tradition of American patchwork quilting, while "connecting to both the modern and art quilt" movements; her experience of working with a group to create a quilt based on shared experience; her personal journey "in and about the traditional, art, and modern quilt movements"; and, how to turn your quilt-making into a business -exhibiting work and becoming a professional quilt maker.


You Might Like...

Having fun with new and traditional crafts, art, design, DIY, and freebies.

TRENDING & POPULAR

FREE ART BOOKS ONLINE  Start your own free collection of art books from three major museums.

DISCOVER SASHIKO STITCHING  Learn how to make traditional Japanese decorative stitches for quilting, mending, and upcycling.

BILUM  Discover a fabric-making technique used in Papua New Guinea that can be used to make bags and dresses.

HOW TO MAKE AN AMISH RAG RUG  There's no sewing required to make this traditional homemade crafted item.

35,000 FREE KNITTING & CROCHETING PATTERNS Use our easily searchable list to find free patterns by Rowan, Vogue, Lion Brand, Berroco, and more.

HOW TO MAKE A LINOLEUM BLOCK PRINT  Watch how-to videos for beginners explaining the basic step-by-step process of making a linoleum block print.

HOW TO MAKE A BORO BAG  Learn how to make a stand-out bag using a Japanese patchwork technique and Sashiko stitching. 

'KNIT' LIKE THE VIKINGS  Discover an ancient fabric-making technique that's still done today, pre-dates knitting, and doesn't unravel.

MAGNETIC CLAY CERAMICS Ceramic artists working with magnetic clay can play with the forces of nature to create fantastical structures.

Extreme Knitting with Jacqui Fink

Jacqui Fink's extreme knitting large sized knitting needles

Extreme Knitting with Jacqui Fink


Jacqui Fink is an extreme knitter. She works with large scale needles and merino wool from her home country, Australia. Her super-sized stitches can become the extreme knitting she’s known for - large scale textiles, installations, and wall hangings.

She began working on large scale projects using wool that’s unspun, called Merino Tops - or roving (the type of wool used in needle felting). But roving is fragile, and not durable.

To create projects that have a lasting durability similar to regular knitting yarn, Jacqui found a mill that helped her develop a process of twisting and felting roving wool. Her resulting large-scale yarn can be worked like regular wool yarn.

Since switching from roving to working with her company’s felted K1S1 yarn, she’s created textile art projects for interior and exterior site-specific pieces, using hand knitting and knotting techniques. Jacqui’s K1S1 opens up possibilities for textile artists, knitters, designers, and crafters to take quantum leaps in what can be crafted from wool.

    · Don't miss: Our list of 25 Best Selling Knitting Books.

Watch Jacqui’s videos below for casting on and getting started, dealing with the weight and bulk of large yarn, and finishing off a project. Then, for clarity, watch Wool and the Gang’s regular-sized yarn tutorials for casting off and knitting a garter stitch (at the bottom of this page).

·You might like our blog posts: How to Knit, Yarn and Knitting Basics, and Knitting Videos.

Feeling inspired by Jacqui's work? Check out her commissioned pieces on her website’s Gallery page.  You can find her yarn for sale at Little Dandelion, and explore more videos and projects on her Online Tutorial page.

POPULAR POSTS

Make a Boro Bag

Follow a tutorial for making a patchworked bag with Sashiko topstitching.

Sashiko Videos

Follow tutorials for how to create traditional Japanese embroidery stitching.

Vintage Maps

Explore a library's digitized vintage maps, which you can download for free. 

How to Care for Quilts

Learn from a museum textile curator how to best care for your quilts.

Photo of a sewing foot and fabric

Make a Scappy Quilt

Learn to make a basket weave pattern quilt from scraps of fabric.

yarn bombed bike

Yarn Bombing Sisters

Sisters Lorna and Jill Watt create amazing yarn bomb installations .

Magnetic Ceramics

Ceramic artists create fantastical structures using magnetic clay.

Knit Like the Vikings

Learn about a Viking fabric-making technique which pre-dates knitting.

Make a Bilum Bag

Follow a tutorial for making a bilum bag - PNG's traditional fabric.

Home made DIY Pinhole camera

Make a Pinhole Camera

Learn to make a pinhole camera; develop paper film with common items.

What is Nalbinding?

Learn about a stretchy fabric made with connected loops.

Cartoon drawing of a Woman knitting

Digitized Knitting Magazines

Free digitized knitting magazines 1800 - now.

The Brooklyn Refinery Header Logo

Kaffe Fassett’s Design Process

Kaffe Fassett Knitting design with Bold Colors

Kaffe Fassett's Design Process

If you want to work with a bolder and denser palette in your projects, Kaffe Fassett is a designer to study.

Kaffe loves working with complex combinations of colors and patterns. He began as a painter, but found a more engaging outlet for his creative drive in coming up with projects for textiles – quilting, knitting, and needlepoint.

In the video below, Kaffe talks about his process for creating knitting patterns. He shares the story of learning to knit after a chance encounter on a train, and how he uses inspiration from tartans, Fair Isle patterns, and carpets to come up with designs that are chock full of intricate color combinations and repeating patterns. 

Kaffe has a vision that combines a Californian’s appreciation of intense light and color with a British regard for pattern and texture.

“There is something about knitting that is incredibly magical, though the activity of knitting is a wonderful thing to do. You’re rubbing two sticks together and out comes this kind of grid or net of color. And you can wear it. And you can make a combination of colors that are heartbreakingly beautiful. So, it’s sort of surreptitious art.” Kaffee Fassett

   · Don't miss: Our blog posts How to Knit, How to Knit Like the Vikings, and How to Sew a Simple Quilt.

In another video, below, Design Indaba showcases Kaffe Fassett and Brandon Mably, who describe their process of coming up with color palettes for knitting and quilting projects, emphasizing that they like to inspire others with their work. 

“It’s one thing working with your hands but color is psychological…when you break it down into units it’s very small, and simple structures, and once you learn the basic techniques you can fly.”

   · Kaffe Fassett's inspiring books can be found here.

Head over to Kaffee's website to watch more videos about his work and process.

The Brooklyn Refinery is reader-supported. When you buy through links on our site, we may earn an affiliate commission. Learn more

POPULAR POSTS

Make a Boro Bag

Follow a tutorial for making a patchworked bag with Sashiko topstitching.

Sashiko Videos

Follow tutorials for how to create traditional Japanese embroidery stitching.

Vintage Maps

Explore a library's digitized vintage maps, which you can download for free. 

How to Care for Quilts

Learn from a museum textile curator how to best care for your quilts.

Photo of a sewing foot and fabric

Make a Scappy Quilt

Learn to make a basket weave pattern quilt from scraps of fabric.

yarn bombed bike

Yarn Bombing Sisters

Sisters Lorna and Jill Watt create amazing yarn bomb installations .

Magnetic Ceramics

Ceramic artists create fantastical structures using magnetic clay.

Knit Like the Vikings

Learn about a Viking fabric-making technique which pre-dates knitting.

Make a Bilum Bag

Follow a tutorial for making a bilum bag - PNG's traditional fabric.

Home made DIY Pinhole camera

Make a Pinhole Camera

Learn to make a pinhole camera; develop paper film with common items.

What is Nalbinding?

Learn about a stretchy fabric made with connected loops.

Cartoon drawing of a Woman knitting

Digitized Knitting Magazines

Free digitized knitting magazines 1800 - now.

The Brooklyn Refinery Header Logo

For the Love of Cross Stitch

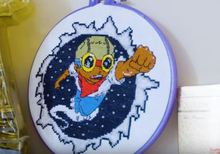
Cross-stitching project of a rocket boy super hero by Emma McKee

Redefining Cross-Stitching

“Cross stitch for rappers? Are you joking? I’m an anomaly in this scene, for sure…I create custom, one-of-a-kind cross-stitch jackets for Chicago’s creative class.”   Emma McKee

After making a cross stitch present for her mother, Emma McKee was drawn to the technique and compelled to do more. So, she taught herself the cross-stitch process, including how to create a pattern from an idea and sketches.

Emma has made her mark on the art and craft of cross-stitching, putting her own spin on pieces which incorporate what gives her inspiration - art, poetry, and music.

In a span of four years of focusing on creating cross-stitch items, she’s worked with a team of 7 – 14 Chicago-based artists, and has created close to 135 pieces, spending anywhere from 50 – 60 hours on making each item.

“My inspiration usually will come complete, finished, everything - from a person. It arrives fully formed in my head, and that’s it. I have no idea how we get there. I don’t sit around and think about it for somebody....To see something that you’ve made effect somebody in what seems to be a meaningful way is a pretty emotional thing.”

Watch the video below from Great Big Story to see what happened when she tweeted a photo of a jacket she cross-stitched, getting her start into making a living doing what she loves.

· Don't miss: You might like our blog posts American Crafters, Subway Yarn Bombing, and Altered Book Sculptures.

You can find books about subversive, feminist, mini-, and classic cross-stitching here

The Brooklyn Refinery is reader-supported. When you buy through links on our site, we may earn an affiliate commission. Learn more 

POPULAR POSTS

Make a Boro Bag

Follow a tutorial for making a patchworked bag with Sashiko topstitching.

Sashiko Videos

Follow tutorials for how to create traditional Japanese embroidery stitching.

Vintage Maps

Explore a library's digitized vintage maps, which you can download for free. 

How to Care for Quilts

Learn from a museum textile curator how to best care for your quilts.

Photo of a sewing foot and fabric

Make a Scappy Quilt

Learn to make a basket weave pattern quilt from scraps of fabric.

yarn bombed bike

Yarn Bombing Sisters

Sisters Lorna and Jill Watt create amazing yarn bomb installations .

Magnetic Ceramics

Ceramic artists create fantastical structures using magnetic clay.

Knit Like the Vikings

Learn about a Viking fabric-making technique which pre-dates knitting.

Make a Bilum Bag

Follow a tutorial for making a bilum bag - PNG's traditional fabric.

Home made DIY Pinhole camera

Make a Pinhole Camera

Learn to make a pinhole camera; develop paper film with common items.

What is Nalbinding?

Learn about a stretchy fabric made with connected loops.

Cartoon drawing of a Woman knitting

Digitized Knitting Magazines

Free digitized knitting magazines 1800 - now.

The Brooklyn Refinery Header Logo

Yarn Bombing Sisters

Yarn Bombing a tree by sisters Lorna and Jill Watt

Yarn Bombing Sisters

Sisters Lorna and Jill Watt work together to make knitted and crocheted yarn bombing projects in the San Francisco Bay area, where they create commissioned installations and guerrilla-style public art.

Below are two videos which follow the sisters in their planning, knitting, execution, and installation of several projects.

"Our materials definitely force our work to be ephemeral. A mural you could leave up for a long time. A yarn bomb? You're lucky if it lasts a year. So you definitely have to keep making new things all the time."

"I like coming up with ways to overcome our limitations." Lorna and Jill Watt

To keep up with Lorna and Jill, follow them on Instagram, and check out their website for tutorials and to see photos of commissions and recent projects.

For even more, head over to their Etsy and Ravelry stores, where you can find their self-published downloadable knitting and crochet patterns. See what new projects they're sharing via their New Crochet Pattern and Yarn-Bomb-Along page.

 · Don't miss: watch London Kaye yarn bomb a New York City subway car, and learn to knit with Knitting Basics, Knitting Videos, and 12 Advanced Knitting Techniques

Below are some books on yarn bombing, craftivism, and extreme knitting projects. The Brooklyn Refinery is reader-supported. When you buy through links on our site, we may earn an affiliate commission. Learn more

POPULAR POSTS

Make a Boro Bag

Follow a tutorial for making a patchworked bag with Sashiko topstitching.

Sashiko Videos

Follow tutorials for how to create traditional Japanese embroidery stitching.

Vintage Maps

Explore a library's digitized vintage maps, which you can download for free. 

How to Care for Quilts

Learn from a museum textile curator how to best care for your quilts.

Photo of a sewing foot and fabric

Make a Scappy Quilt

Learn to make a basket weave pattern quilt from scraps of fabric.

yarn bombed bike

Yarn Bombing Sisters

Sisters Lorna and Jill Watt create amazing yarn bomb installations .

Magnetic Ceramics

Ceramic artists create fantastical structures using magnetic clay.

Knit Like the Vikings

Learn about a Viking fabric-making technique which pre-dates knitting.

Make a Bilum Bag

Follow a tutorial for making a bilum bag - PNG's traditional fabric.

Home made DIY Pinhole camera

Make a Pinhole Camera

Learn to make a pinhole camera; develop paper film with common items.

What is Nalbinding?

Learn about a stretchy fabric made with connected loops.

Cartoon drawing of a Woman knitting

Digitized Knitting Magazines

Free digitized knitting magazines 1800 - now.

The Brooklyn Refinery Header Logo

Jacquard Weaving

Jacquard weaving in textiles

How Jacquard Looms Work

The four videos below are a fun introduction to connections between science and craft. Jacquard looms and early computers both used punch cards, which store binary system information. 

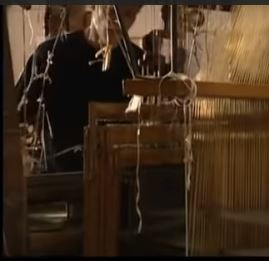
In a Jacquard loom, a weaving pattern is stored in punched cards which are strung together for the length of the desired pattern. The cards are made up of grids containing combinations of holes and closed spaces. The videos below illustrate the workings of the binary-based punch cards - the history of the mechanism, how the cards are made, and how the looms work to create the Jacquard fabric.

For a detailed description, read Some Introductory Notes Concerning Jacquard Technology written by Garth Fletcher.

Please note that three of the videos do not have narrators. The third and fourth videos have no sound.

More on Jacquard Looms, from Wikipedia:

"The Jacquard machine (French: [ʒakaʁ]) is a device fitted to a power loom that simplifies the process of manufacturing textiles with such complex patterns as brocadedamask and matelassé.[3] It was invented by Joseph Marie Jacquard in 1804.[4] The loom was controlled by a "chain of cards"; a number of punched cards laced together into a continuous sequence.[5] Multiple rows of holes were punched on each card, with one complete card corresponding to one row of the design…Chains, like Bouchon's earlier use of paper tape, allowed sequences of any length to be constructed, not limited by the size of a card.

The ability to change the pattern of the loom's weave by simply changing cards was an important conceptual precursor to the development of computer programming and data entry. Charles Babbage knew of Jacquard looms and planned to use cards to store programs in his Analytical Engine."  https://en.wikipedia.org/wiki/Jacquard_loom

  · Don't miss:  Tapestry Weaving, American Crafts, Ari Embroidery, and Soumak Weaving.

Below are thumbnail pics of some best-selling books about weaving. Click on a book cover for more information, or find them here - on Amazon. [As an Amazon Associate I earn from qualifying purchases (at no extra cost to you).]

Tapestry Weaving: A Comprehensive Study Guide
Tapestry Weaving (Search Press Classics)
Tapestry Weaving: Design and Technique
Tapestry Handbook: The Next Generation (Schiffer Books)
Inventive Weaving on a Little Loom: Discover the Full Potential of the Rigid-Heddle Loom, for Beginners and Beyond

POPULAR POSTS

Make a Boro Bag

Follow a tutorial for making a patchworked bag with Sashiko topstitching.

Sashiko Videos

Follow tutorials for how to create traditional Japanese embroidery stitching.

Vintage Maps

Explore a library's digitized vintage maps, which you can download for free. 

How to Care for Quilts

Learn from a museum textile curator how to best care for your quilts.

Photo of a sewing foot and fabric

Make a Scappy Quilt

Learn to make a basket weave pattern quilt from scraps of fabric.

yarn bombed bike

Yarn Bombing Sisters

Sisters Lorna and Jill Watt create amazing yarn bomb installations .

Magnetic Ceramics

Ceramic artists create fantastical structures using magnetic clay.

Knit Like the Vikings

Learn about a Viking fabric-making technique which pre-dates knitting.

Make a Bilum Bag

Follow a tutorial for making a bilum bag - PNG's traditional fabric.

Home made DIY Pinhole camera

Make a Pinhole Camera

Learn to make a pinhole camera; develop paper film with common items.

What is Nalbinding?

Learn about a stretchy fabric made with connected loops.

Cartoon drawing of a Woman knitting

Digitized Knitting Magazines

Free digitized knitting magazines 1800 - now.

How to Make a Bilum Bag

Bilum bag

How to Make a Bilum Bag

Bilum photo via Marielisha Ilai.

In Papua New Guinea, ‘bilum’ traditionally refers to a type of bag which is a symbol of a woman's social standing. Married women balance the bag's strap on their forehead, carry shopping goods and children in their stretchy bilum bag. 

Bilum bags are hand made using a knotless netting technique, using various looping methods. It is traditionally made from local plant materials, such as reeds, fibre from tree bark, sisal, and vine. It can also be made using alternatives like string and yarn, opening up the possibilities in colors that can be incorporated into bilum items. Like any looped fabric, bilum items can vary by patterns, colors, materials used, and size.

 · DON'T MISS: For more on bilum, and for videos on how locally sourced natural materials are prepped for bilum-making, check out our posts Bilum and Bilum Videos.

A Fabric's Purpose Expands

In the past few years, the women of PNG have revolutionized the way people think about bilum. A shift happened in the use of the looping technique when Florence Jaukae Kamel, a Papua New Guinea artist and designer, challenged the norm and started to think in terms of using bilum as a fabric rather than as a way to make bags.

Florence started to make dresses and hats. As a result, her designs significantly changed how people thought about bilum, and opened up a wider appreciation for the material and the women who make it.

Florence founded a collective of Goroka bilum-weaving PNG women (the Goroka Bilum Weavers Cooperative), which generates income for bilum crafters. In 2018, Florence was named Chairperson of the Bilum Export and Promotion Association (BEPA). Started in 2015, BEPA seeks to find local and international markets for their PNG-made bilum products.

Free Instructional Downloads

If you’d like to learn how to make bilum fabric, click through to download two instructional .pdfs below. The Journal of the Polynesian Society has instructions for several versions of looping techniques. And, the Papua New Guinea Government has created step-by-step instructions for how to make a bilum bag.
If you like the bold geometric look of Bilum, you might also like Tunisian and Tapestry crochet. Below are some books to help you explore this technique, as well as some other popular crochet books. Click on a book cover or button to learn more and to purchase. 
As an Amazon Associate I earn from qualifying purchases (at no extra cost to you).

 · DON'T MISS: For more crafting ideas, tutorials, and resources, explore Crafting Resources.

~ CROCHET BOOKS FOR YOUR LIBRARY ~

Modern Tapestry Crochet: Techniques, Projects, Adventure

This book lays out instructions for tapestry crochet in simple and easy-to-understand instructions - great for a beginner. It contains several patterns for scarves, cowls, shawls, blankets, hats, tote bags, and socks. After you learn the general technique laid out in this book, you'll be able to use any of the designs that are diagrammed to make any of the projects. 

The author of this book has been running workshops on how to make mochila bags since 2014. Her comprehensive book on the technique is a must-have for this technique - including patterns, making shoulder straps, ply-split braiding, and Kumihimo. 

Japanese Wonder Crochet is the first major Japanese crochet book to be translated into English. It introduces crafters outside Japan to the wonderful crochet techniques and charts that are so popular within the country. The book includes 25 projects, and 
shows a creative approach to classic crochet stitches such as Aran, herringbone, Bavarian, waffle, crocodile, reversible crochet, and many more. 

Corner-to-Corner is a fun and unique way of crocheting! By following a pixel graph instead of a written pattern, you can incorporate virtually any character or image you want into a crochet blanket. This great book includes how-to instructions and step-by-step photos. Also included are instructions for 5 cute throws. Adorable patterns and good instructions.

Explore Amigurumi, the Japanese art of crochet design, with 30 unique and darling patterns. These super cute designs are the reason this book is a best-seller. Lauren Espy inspires crocheters with her easy-to-follow patterns, pictures, and helpful instructions. 

Having fun with new and traditional crafts, art, design, DIY, and freebies.

TRENDING & POPULAR

FREE ART BOOKS ONLINE  Start your own free collection of art books from three major museums.

HOW TO MAKE AN AMISH RAG RUG  There's no sewing required to make this traditional homemade crafted item.

HOW TO MAKE A BORO BAG  Learn how to make a stand-out bag using a Japanese patchwork technique and Sashiko stitching. 

DISCOVER SASHIKO STITCHING  Learn how to make traditional Japanese decorative stitches for quilting, mending, and upcycling.

35,000 FREE KNITTING & CROCHETING PATTERNS Use our easily searchable list to find free patterns by Rowan, Vogue, Lion Brand, Berroco, and more.

'KNIT' LIKE THE VIKINGS  Discover an ancient fabric-making technique that's still done today, pre-dates knitting, and doesn't unravel.

BILUM  Discover a fabric-making technique used in Papua New Guinea that can be used to make bags and dresses.

How to Make a Soumak Weaving

Soumak Weaving example

Soumak Weaving

Like Kilim, Soumak is a flat woven tapestry rug-making technique. Its ancient origins are with weaving cultures in the Caucasus – from the Eastern Mediterranean and the adjacent areas of the Caucasus Mountains and Southwestern Turkmenistan.

This technique involves wrapping colored weft threads over and under the warp threads, allowing you to work on vertical, horizontal, or diagonal sections at any one time.

The earliest design traditions of Soumak weaving are believed to have been made solely for use within the community and not for export, with woven images of shamanic and other clan-based ceremonies and rituals.

Later productions of Soumak tapestry techniques came out of artists' images rather than cultural-backed representations for ceremonies and rituals, and have been used as beautifully figured practical items - such as rugs, bedding, bags, and saddle bags.

A technical description:

“The technique of making a soumak involves wrapping wefts over a certain number of warps (usually 4) before drawing them back under the last two warps. The process is repeated from selvedge to selvedge. The wefts are discontinuous; the weaver selects coloured threads in turn, and wraps each within the area which is to have that particular colour.

Unlike kilim, the back is left ragged, with all the loose ends of the differently-coloured weft threads visible, sometimes several inches long, providing extra thickness and warmth. Also unlike kilim, there are no slits where colours meet, as there is a supplementary or structural weft which supports the coloured pattern weft.

Some late Soumaks made by the Kurds are however "weftless", lacking the structural weft support, and the stitches naturally overlap… Soumak is a type of flat weave, somewhat resembling but stronger and thicker than kilim, with a smooth front face and a ragged back, where kilim is smooth both sides. Soumak lacks the slits characteristic of kilim, as it is usually woven with supplementary weft threads as continuous supports.”  Soumak Wikipedia  

Below are two videos showing the weaving technique. The first is a beginner’s Soumak Weaving How-To video by Patricia Cantos.  

The second is a video from London’s Barbican Centre, featuring tapestry weaver Christabel Balfour. While watching Christabel weaving, we can see the possibilities she has in which direction to weave, emphasizing the freedom you get while working with this technique. (Please note: the music is a bit loud over Christabel’s dialog.)

You can read more about slit tapestry weaving via the Weaving Art Museum.

  · Don't miss: American Crafts, Crafting Resources, Jacquard Weaving, and Tapestry Weaving.

POPULAR POSTS

Make a Boro Bag

Follow a tutorial for making a patchworked bag with Sashiko topstitching.

Sashiko Videos

Follow tutorials for how to create traditional Japanese embroidery stitching.

Vintage Maps

Explore a library's digitized vintage maps, which you can download for free. 

How to Care for Quilts

Learn from a museum textile curator how to best care for your quilts.

Photo of a sewing foot and fabric

Make a Scappy Quilt

Learn to make a basket weave pattern quilt from scraps of fabric.

yarn bombed bike

Yarn Bombing Sisters

Sisters Lorna and Jill Watt create amazing yarn bomb installations .

Magnetic Ceramics

Ceramic artists create fantastical structures using magnetic clay.

Knit Like the Vikings

Learn about a Viking fabric-making technique which pre-dates knitting.

Make a Bilum Bag

Follow a tutorial for making a bilum bag - PNG's traditional fabric.

Home made DIY Pinhole camera

Make a Pinhole Camera

Learn to make a pinhole camera; develop paper film with common items.

What is Nalbinding?

Learn about a stretchy fabric made with connected loops.

Cartoon drawing of a Woman knitting

Digitized Knitting Magazines

Free digitized knitting magazines 1800 - now.

Siberian Crafts Conservation

Siberian coat with decoration

Siberian Crafts Conservation

The American Museum of Natural History (AMNH) is a fantastic place to explore arts and crafts from around the world. The Museum is home to 33 million specimens and artifacts. Behind what you can see on display are conservators working to preserve and restore items that have been acquired by the Museum.

Screen grab from AMNH's The Guts and Glory of Object Conservation

The video The Guts and Glory of Object Conservation, below, showcases conservators preserving items from pre-Soviet Siberia.

Over 500+ items from pre-Soviet Siberia were collected by two teams of anthropologists who were on the AMNH-backed Jesup North Expedition from 1897 to 1902. The teams - an American team and a Siberian team - went up opposite sides of the Bering Strait along Siberia, Alaska, and the northwest coast of Canada. The purpose of the Expedition was to figure out who came over the Strait, and when.

   · Don't miss: American Baskets, American Crafts, and Nalbinding.

Recently, 100 of the 500+ items brought back were chosen for full conservation treatment at the Museum, funded by the Stockman Family Foundation Trust.  Among the pieces chosen are robes made from fish skin, jackets made from walrus intestines, containers made from birch bark, and coats made from reindeer hide.

The curators and conservators had to figure out what materials the items were made from, and then develop a plan to mend, repair, and preserve them.

The Museum collaborated with native Siberian groups in the preservation process, and then made a trip to share information about the pieces with the Siberian community.

Native Siberian scholar Vera Alexseyevna Solovyeva was a key link in the conservation process: 

“This collection’s very important because it has, probably,  the most elaborate collection in the whole world  about our peoples’ pre-Soviet period. It has…the full range of the material and spiritual culture...When Soviets came to power they tried to erase the memory of people…they destroyed all items that belonged to the shamans, that belonged to the rituals. When the Soviet Union collapsed, indigenous people started to have interest to revitalizing their culture and their spirituality.”

See AMNH's Collaboration between AMNH and Siberian Scholars for more information, and for a link to their video Shamans of Siberia.

Screen grabs from AMNH's video The Guts and Glory of Object Conservation.

POPULAR POSTS

Make a Boro Bag

Follow a tutorial for making a patchworked bag with Sashiko topstitching.

Sashiko Videos

Follow tutorials for how to create traditional Japanese embroidery stitching.

Vintage Maps

Explore a library's digitized vintage maps, which you can download for free. 

How to Care for Quilts

Learn from a museum textile curator how to best care for your quilts.

Photo of a sewing foot and fabric

Make a Scappy Quilt

Learn to make a basket weave pattern quilt from scraps of fabric.

yarn bombed bike

Yarn Bombing Sisters

Sisters Lorna and Jill Watt create amazing yarn bomb installations .

Magnetic Ceramics

Ceramic artists create fantastical structures using magnetic clay.

Knit Like the Vikings

Learn about a Viking fabric-making technique which pre-dates knitting.

Make a Bilum Bag

Follow a tutorial for making a bilum bag - PNG's traditional fabric.

Home made DIY Pinhole camera

Make a Pinhole Camera

Learn to make a pinhole camera; develop paper film with common items.

What is Nalbinding?

Learn about a stretchy fabric made with connected loops.

Cartoon drawing of a Woman knitting

Digitized Knitting Magazines

Free digitized knitting magazines 1800 - now.

Preserving Textiles

Preserve textiles such as Historical quilts

Preserving Textiles

Learn from conservation experts a number of ways you can protect and preserve your fabric pieces so you can maximize their lifespans.

In addition to general wear, textiles are vulnerable to deterioration due to pests, light, temperature, humidity, mold, mildew, improper repairs, and stressful handling.

The textiles of blankets, quilts, embroidered pieces, and clothing can benefit from certain positive environmental conditions. And, you can take steps to avoid certain negative environmental conditions so your textiles will last well into the future.

The Government of Canada offers advice for caring for and preserving textiles via its Conservation Institute website. Text-based information is available through them online and in .pdf form.

For in-depth video instructions for textile conservation, check out the 6-part series Conservation and Preservation of Heirloom Textiles from the Minnesota Historical Society’s textile conservator, Ann Frisina.

Watch all 6 parts in order, below, or skip around for specific information: Materials You Need; How to Make a Padded Hanger; Storing Costumes in Boxes; Storage of Flat Textiles in Boxes; Storage of Quilts and Coverlets; and Rolling Textiles on a Tube.

Materials You Need:

How to Make a Padded Hanger:

Storing Costumes in Boxes:

Storage of Flat Textiles in Boxes:

Storage of Quilts and Coverlets:

Rolling Textiles on a Tube:

POPULAR POSTS

Make a Boro Bag

Follow a tutorial for making a patchworked bag with Sashiko topstitching.

Sashiko Videos

Follow tutorials for how to create traditional Japanese embroidery stitching.

Vintage Maps

Explore a library's digitized vintage maps, which you can download for free. 

How to Care for Quilts

Learn from a museum textile curator how to best care for your quilts.

Photo of a sewing foot and fabric

Make a Scappy Quilt

Learn to make a basket weave pattern quilt from scraps of fabric.

yarn bombed bike

Yarn Bombing Sisters

Sisters Lorna and Jill Watt create amazing yarn bomb installations .

Magnetic Ceramics

Ceramic artists create fantastical structures using magnetic clay.

Knit Like the Vikings

Learn about a Viking fabric-making technique which pre-dates knitting.

Make a Bilum Bag

Follow a tutorial for making a bilum bag - PNG's traditional fabric.

Home made DIY Pinhole camera

Make a Pinhole Camera

Learn to make a pinhole camera; develop paper film with common items.

What is Nalbinding?

Learn about a stretchy fabric made with connected loops.

Cartoon drawing of a Woman knitting

Digitized Knitting Magazines

Free digitized knitting magazines 1800 - now.

How to Care for Quilts

Museums care for quilts

How to Care for Quilts


Textiles can be compromised by folding, exposure to sun, and other environmental conditions which cause wear and tear.

By their very nature, many quilts are made up of pieces of fabric that were already compromised and worn, even before they were used to make a potential heirloom. Some fabrics are more fragile or brittle by nature than others.

Knowing how to care for textiles will help preserve fabric stashes, family keepsakes, and heirlooms for the next generations.

The International Quilt Study Center & Museum at the University of Nebraska-Lincoln houses more than 5,500 quilts, dating from the 1600's to the present. They are experts at textile conservation.

They have written a guide on best practices for preserving quilts, which they offer as a free download. This 20 page ebook, To Protect & Preserve, outlines steps they take to preserve quilts in their collection.

You can take these same steps to take the best care of your quilts.

To Protect & Preserve covers conditions to consider:

  • Bugs and pests
  • Lighting
  • Temperature
  • Humidity
  • Cleaning
  • Must and dust
  • Rot
  • Proper storage

The Smithsonian Institute’s video Quilt Care shows how they care for quilts on display and in their storage.

Explore More About Quilts

You can explore 274 of the American quilts which are available for online study in the Smithsonian Institute's National Museum of American History's National Quilt Collection. Scroll down to see thumbnail photos, and a box on the right hand side that lets you do a filtered search.

Clicking on a thumbnail photo lets you zoom in and search individual quilts, allowing you close-up views of fabric designs, needlework techniques, and overall quilt patterns and styles.

Below is another video from The Smithsonian's National Quilt Collection, showcasing several quilts in their collection.

For even more, check out Museum Collection ImagesCraft Museums, and Preserving Textiles

Below are eight curated best-selling quilting books which you might find helpful. Click on a book cover for more information on Amazon. [As an Amazon Associate I earn from qualifying purchases (at no extra cost to you).]

Quilter's Complete Guide
Quilt As You Go Made Vintage
Better Homes and Gardens: Complete Guide to Quilting, More than 750 Step-by-Step Color Photographs
All Things Quilting with Alex Anderson: From First Step to Last Stitch
Big Book of Quilting: Hundreds of Tips, Tricks & Techniques
All-in-One Quilter’s Reference Tool: Updated Spiral-bound
The Complete Guide to Machine Quilting: How to Use Your Home Sewing Machine to Achieve Hand-Quilting Effects
The Quilter's Ultimate Visual Guide: From A to Z-Hundreds of Tips and Techniques for Successful Quiltmaking (A Rodale quilt book)

Home page screen grab via Quilt Care video by The Smithsonian Institute.

POPULAR POSTS

Make a Boro Bag

Follow a tutorial for making a patchworked bag with Sashiko topstitching.

Sashiko Videos

Follow tutorials for how to create traditional Japanese embroidery stitching.

Vintage Maps

Explore a library's digitized vintage maps, which you can download for free. 

How to Care for Quilts

Learn from a museum textile curator how to best care for your quilts.

Photo of a sewing foot and fabric

Make a Scappy Quilt

Learn to make a basket weave pattern quilt from scraps of fabric.

yarn bombed bike

Yarn Bombing Sisters

Sisters Lorna and Jill Watt create amazing yarn bomb installations .

Magnetic Ceramics

Ceramic artists create fantastical structures using magnetic clay.

Knit Like the Vikings

Learn about a Viking fabric-making technique which pre-dates knitting.

Make a Bilum Bag

Follow a tutorial for making a bilum bag - PNG's traditional fabric.

Home made DIY Pinhole camera

Make a Pinhole Camera

Learn to make a pinhole camera; develop paper film with common items.

What is Nalbinding?

Learn about a stretchy fabric made with connected loops.

Cartoon drawing of a Woman knitting

Digitized Knitting Magazines

Free digitized knitting magazines 1800 - now.

How Batik Fabric is Made

A man using a special pen called tjanting,, drawing with melted wax to make batik fabric

Making Batik Fabric

A close up of a woman using a tool to apply melted wax to make batik fabric

Below are four videos about the making of batik, a wax-resistant fabric-making process.

In order to get a multi-colored end result, the fabric will go through a series of dye baths, with wax drawing or stamping done in between the different colored baths.

Batik fabricators need to plan out the colors they're going to use, and begin with the lightest color. Each color is preserved from the next dye bath by drawing melted, liquid wax on the parts of the fabric that are to remain the current color.

The cooled wax seals the wax-covered parts of the cotton, preventing those areas from absorbing dye. The cotton will absorb the dye in the areas that are not covered in wax.

After all the dyeing, the wax will be melted off the fabric.

The videos below show different techniques and styles of batik-making, from carefully planned patterns made with a thin-line drawing tool to abstract, improvised strokes made with wide brushes.

Batik Videos

Batik of Java: A Centuries Old Tradition by the San Francisco Asian Art Museum

   · Don't miss: To read a transcript of this video, scroll down to the bottom of this page.

Batik Documentary by Alvyn Fabrics

Batik Production at Edtex in Ghana with Textile Designer Edwina Assan by Fashion Africa Now

Unique Batik from Tanzania by Bernd Riebe

  · Don't miss: How Printed Fabric is Made, Kaffee Fassett Design Process, and Preserving Textiles. Click here to see Batik supplies on Amazon. [As an Amazon Associate I earn from qualifying purchases (at no extra cost to you).]

Batik Documentary Transcript

"Many places in the world pattern textiles by applying wax to protect certain areas from dye. During the dye process, the waxed areas resist the dye, and when the wax is removed, a pattern emerges. Both the technique and the textiles produced are called batik. The word “batik” may derive from the Javanese words “to write” and “dots.”

Nowhere in the world is this method of patterning textiles as highly refined as in Indonesia. There are two main methods of making Indonesian batik: one using a small tool called a canting to draw patterns, the other using metal stamps to apply the wax. Stamps produce textiles faster for both export and domestic demand. In this way, batik can be made at a lower cost, and finished garments are more affordable.

The most refined and expensive batik is produced by hand. Patterns are drawn using a canting or wax stylus, a method called batik tulis or “written batik.” The stylus consists of a bamboo or wood stick with a small spouted copper reservoir for wax at the end. The artist dips the cup into a pot of hot wax, blows on it to assure smooth application through the spout, and then applies the wax, drawing patterns with the spout. After both sides of a cloth have been waxed, it is ready to be dyed. For a complex pattern with many colors, the cloth is waxed and dyed many times.

Let’s look at the process of batik by visiting a collective of artisans in the village of Kebon in Central Java. The first step in making batik is to apply the design. The design is first drawn on paper and then transferred using a pencil, or non-permanent ink, to fine white cotton cloth. The design may be a centuries-old traditional pattern, or, as in the case here, it may reflect the contemporary aesthetics of the artisans. After the pattern is transferred, the cloth is ready for the first layer of wax.

Batik wax is a combination of paraffin, beeswax, and resin. It is a translucent yellow when it is fresh, but may look dark brown or black after many reuses. The artisan retraces the design on the cloth with wax using the canting. Some areas are then filled in with decorative detail, known as isen-isen. A skilled batik artisan will know hundreds of isen-isen.

The artist applies the wax with steadiness; years of practice that often began as a child allows her to work quickly, with fluidity and accuracy. Once the wax has been applied to the entire cloth, it is ready for its first immersion in a dye bath.

Many communities in Indonesia use imported synthetic dyes; however, there is a growing trend to use natural dyes, as we find in this collective of artisans in Kebon. Traditionally, the ability to make dyes was extremely important in textile-producing communities, and villages would be known for the quality of dyes produced. Some frequently used colors are derived from indigo leaves, jelawe fruit, mahogany wood, teger wood, tinggi bark, and mango leaves.

The dye is heated in outdoor pots. Nothing goes to waste in the countryside where wood and ash waste from the fire will feed hungry chickens. The dye is transferred to a basin where the artisan ensures the cloth is immersed. After the first dye bath, the cloth is dried in the sun. Then, certain areas are covered with wax, to preserve the first color, before the cloth is dipped into a second color.

The artisan is familiar with the finished design, and knows where to apply the wax. Fine cantings are used to draw lines to contain the colorful design. Cantings with larger spouts will be used to “hold” large areas of color that will be preserved during subsequent dye baths. This process of applying wax to the cloth, dyeing, adding more wax, and further dyeing and drying will be repeated several, if not dozens of times, depending on the pattern and number of finished colors in the batik cloth.

Between waxings, the textile is sometimes immersed in boiling water to remove wax, and then rewaxed to protect different parts of the pattern from subsequent dyeing. Once the dyeing and waxing is completed, the cloth is ready for final wax removal.

The textiles are taken to a neighboring house where large pots of water are set up for wax removal. The wax will be collected for reuse by boiling it out in several pots from very hot to cooler water. The reclaiming of the wax is part of the sustainable practice in this community, where recycled wax is used again.

Finally, the cloth is wrung out and returned to the village, where it is hung to dry a last time. Finished batik cloths can be used for many purposes. They are worn as sarongs and made into clothing and accessories for both local uses and export. Today, contemporary fashion designers are also incorporating batik into their designs. Batik remains an important element of costume for dance performances and for ceremonial dress in many parts of Indonesia and neighboring countries Children learn how to work in a community of artisans, each generation passing on to the next the cultural heritage of this remarkable cloth."

Creative Commons Attribution/Non-Commercial/Share-Alike

POPULAR POSTS

Make a Boro Bag

Follow a tutorial for making a patchworked bag with Sashiko topstitching.

Sashiko Videos

Follow tutorials for how to create traditional Japanese embroidery stitching.

Vintage Maps

Explore a library's digitized vintage maps, which you can download for free. 

How to Care for Quilts

Learn from a museum textile curator how to best care for your quilts.

Photo of a sewing foot and fabric

Make a Scappy Quilt

Learn to make a basket weave pattern quilt from scraps of fabric.

yarn bombed bike

Yarn Bombing Sisters

Sisters Lorna and Jill Watt create amazing yarn bomb installations .

Magnetic Ceramics

Ceramic artists create fantastical structures using magnetic clay.

Knit Like the Vikings

Learn about a Viking fabric-making technique which pre-dates knitting.

Make a Bilum Bag

Follow a tutorial for making a bilum bag - PNG's traditional fabric.

Home made DIY Pinhole camera

Make a Pinhole Camera

Learn to make a pinhole camera; develop paper film with common items.

What is Nalbinding?

Learn about a stretchy fabric made with connected loops.

Cartoon drawing of a Woman knitting

Digitized Knitting Magazines

Free digitized knitting magazines 1800 - now.

Tapestry Weaving

A woman sitting, working on fabricating a huge modern tapestry

Tapestry Weaving

A photo of the tapestry "Winter, Cybele Begs for the Sun's Return"

Winter, Cybele Begs for the Sun’s Return (detail), 1692-93, design by Pierre Mignard; woven at the Gobelins Manufactory, Paris; wool, silk, and gilt metal-wrapped thread. Courtesy of and © Le Mobilier National. Photo by Lawrence Perquis

The Getty Museum's video The Art of Making a Tapestry (below) walks us through the various steps of making a tapestry at the Gobelins Manufactory in Paris. Here, tapestries are handcrafted using the same historical techniques as when they were first introduced in the time of Louis XIV.

The Gobelins were a family of dyers who created a variety of 15,000+ tone and hue choices. The color choices available to their weavers allowed them to create subtleties with wool thread that could imitate the shadings of paintings. 

It would take up to four years to create a single tapestry that matched the lushness of color canvases from the prominent painters of the day, such as Charles Le Brun, Jean-Baptiste Oudry, Charles-Antoine Coypel, and Francois Boucher.

Contemporary tapestries produced at Gobelins have been based on paintings by Henri Matisse, Pablo Picasso, and Joan Miro.

Tapestries made at Gobelins are in collections at the National Library, the Elysée Palace, the Luxembourg Palace, the Pantheon, Versailles, Palais Garnier, and Musée Nissim de Camondo.

In the video below, you'll get some insight into the preparation needed to make a large scale work, including transferring the drawing onto the loom’s vertical warp threads, choosing a color palette, dyeing the wool, preparing the bobbins, preparing the loom, and weaving.

The video was produced in conjunction with the Getty Center’s exhibit “Woven Gold: Tapestries of Louis XIV.” Click through to the Getty's Woven Gold page to see exhibition photos and tapestry details from the 2016 exhibit.

          · Don't miss: How to Make a Soumak WeavingCraft Museums, and 600 Free Art Books Online.

“The Sun King, Louis XIV of France, who reigned from 1643 to 1715, formed the greatest collection of tapestries in early modern Europe. Extraordinary resources of time, money, and talent were allocated to the creation of these works, which were meticulously woven by hand with wool, silk, and precious metal-wrapped thread, after designs by the most esteemed artists. 

As patron, heir, and collector, Louis XIV vastly augmented the prestigious French royal collection of tapestries. Displayed within his palaces while in residence and in outdoor courtyards on feast days, these monumental hangings embodied and proclaimed his magnificence. 

The legacy of tapestry weaving as a national endeavor continues in France today, with state commissions from contemporary artists such as Raymond Hains who designed Diptyque/I. With rare loans from the Mobilier National, this major international loan exhibition presents a selection of grand tapestries that evoke the brilliance of the Sun King’s court.”      Getty Center

Above are screenshots from the Getty Museum's video The Art of Making a Tapestry, illustrating the artisans working together to create this stunning tapestry.

POPULAR POSTS

Make a Boro Bag

Follow a tutorial for making a patchworked bag with Sashiko topstitching.

Sashiko Videos

Follow tutorials for how to create traditional Japanese embroidery stitching.

Vintage Maps

Explore a library's digitized vintage maps, which you can download for free. 

How to Care for Quilts

Learn from a museum textile curator how to best care for your quilts.

Photo of a sewing foot and fabric

Make a Scappy Quilt

Learn to make a basket weave pattern quilt from scraps of fabric.

yarn bombed bike

Yarn Bombing Sisters

Sisters Lorna and Jill Watt create amazing yarn bomb installations .

Magnetic Ceramics

Ceramic artists create fantastical structures using magnetic clay.

Knit Like the Vikings

Learn about a Viking fabric-making technique which pre-dates knitting.

Make a Bilum Bag

Follow a tutorial for making a bilum bag - PNG's traditional fabric.

Home made DIY Pinhole camera

Make a Pinhole Camera

Learn to make a pinhole camera; develop paper film with common items.

What is Nalbinding?

Learn about a stretchy fabric made with connected loops.

Cartoon drawing of a Woman knitting

Digitized Knitting Magazines

Free digitized knitting magazines 1800 - now.

Ari Embroidery

A close up of gold threaded ari embroidery on red fabric

Ari Embroidery

Ari embroidery, also known as ari work, is a type of decorative needlework which produces a chain stitch.

This embroidery technique began in India. It was adopted by Europeans by the eighteeneth century, where it is known as tambour work, tambour embroidery, and Luneville embroidery.

Ari embroidery can be done on woven and un-woven materials, including paper and leather. The material which is the base for embellishment can be stretched over a frame or held in the hands.

The Victoria and Albert Museum's short documentary (below) shows craftsmen at work on an ari embroidery piece at the Sankalan Embroidery Design and Production House in Jaipur, India.


We see the embroidery design first taking shape as a drawing made on tracing paper, and then making its way to fabric stretched tightly on a frame via a paper and plastic stencil that’s been pricked with holes all along the drawn lines.

A liquid Chalk solution is applied to the pin-pricked plastic, and rubbed  through the tiny holes, making an outline of the drawing onto the fabric.

      · Don't miss: For the Love of Cross-Stitching, Soumak Weaving, Jacquard Weaving, and Tapestry Weaving.  Find best-selling Embroidery books here. [As an Amazon Associate I earn from qualifying purchases (at no extra cost to you).]

Embroidery thread is held underneath the fabric, while a thin hook is poked through the top, catching and pulling the thread and bringing it through to the top of the piece, making a loop.

Each new loop is pulled through the previous one, making a continuous chain-stitch, following the dotted outline of the drawing.

After the ari work is finished, the embroiderer holds a piece of wood on the underside of the fabric as they use a wooden hammer to pound the threads flat on the upper side.

           · You might find helpful: Crafting Resources.

Screen grabs from the Victoria and Albert Museum's video How Was it Made? Ari Embroidery.

POPULAR POSTS

Make a Boro Bag

Follow a tutorial for making a patchworked bag with Sashiko topstitching.

Sashiko Videos

Follow tutorials for how to create traditional Japanese embroidery stitching.

Vintage Maps

Explore a library's digitized vintage maps, which you can download for free. 

How to Care for Quilts

Learn from a museum textile curator how to best care for your quilts.

Photo of a sewing foot and fabric

Make a Scappy Quilt

Learn to make a basket weave pattern quilt from scraps of fabric.

yarn bombed bike

Yarn Bombing Sisters

Sisters Lorna and Jill Watt create amazing yarn bomb installations .

Magnetic Ceramics

Ceramic artists create fantastical structures using magnetic clay.

Knit Like the Vikings

Learn about a Viking fabric-making technique which pre-dates knitting.

Make a Bilum Bag

Follow a tutorial for making a bilum bag - PNG's traditional fabric.

Home made DIY Pinhole camera

Make a Pinhole Camera

Learn to make a pinhole camera; develop paper film with common items.

What is Nalbinding?

Learn about a stretchy fabric made with connected loops.

Cartoon drawing of a Woman knitting

Digitized Knitting Magazines

Free digitized knitting magazines 1800 - now.

Subway Yarn Bombing

A phot of Yarn Bombing crochet artist London Kaye crocheting in a NYC subway car.

A NYC Subway Car Gets Yarn-Bombed

In the wonderful video by animalnewyork (below) we get to watch crochet artist London Kaye yarn-bomb a NYC subway car as commuters get on and off the train.

On Valentine's Day in 2014, London boarded a NYC L train, which connects Brooklyn to Manhattan, running under the East River and along 14th Street.

With the backdrop and bustle of the subway car as her inspiration, London gets out her yarn and hook, and proceeds to wrap the poles in Valentine-themed colors as New Yorkers look on.

"I crocheted for a really long time...scarves and hats, and things to wear. But I would never do anything with them. 

So one day, I figured, let me put them outside and cover things...it's always very unexpected who sees it and who the art connects with. I really like that."   London Kaye

Screen grab from animalnewyork

Follow London on Instagram or visit her Shop.

   · Don't miss: American Crafts, Yarn Bombing Sisters, and Extreme Knitting with Jacqui Fink.

POPULAR POSTS

Make a Boro Bag

Follow a tutorial for making a patchworked bag with Sashiko topstitching.

Sashiko Videos

Follow tutorials for how to create traditional Japanese embroidery stitching.

Vintage Maps

Explore a library's digitized vintage maps, which you can download for free. 

How to Care for Quilts

Learn from a museum textile curator how to best care for your quilts.

Photo of a sewing foot and fabric

Make a Scappy Quilt

Learn to make a basket weave pattern quilt from scraps of fabric.

yarn bombed bike

Yarn Bombing Sisters

Sisters Lorna and Jill Watt create amazing yarn bomb installations .

Magnetic Ceramics

Ceramic artists create fantastical structures using magnetic clay.

Knit Like the Vikings

Learn about a Viking fabric-making technique which pre-dates knitting.

Make a Bilum Bag

Follow a tutorial for making a bilum bag - PNG's traditional fabric.

Home made DIY Pinhole camera

Make a Pinhole Camera

Learn to make a pinhole camera; develop paper film with common items.

What is Nalbinding?

Learn about a stretchy fabric made with connected loops.

Cartoon drawing of a Woman knitting

Digitized Knitting Magazines

Free digitized knitting magazines 1800 - now.

How Printed Fabric is Made

A roomful of fabric ink which are used in a factory's printed fabric process

How Modern Printed Fabric is Made

The 17 minute documentary Printed Fabric Production gives us a look at the workings of a modern cotton print factory (filmed in Hong Kong and Zhejiang, China), which prints fabrics for Alvyn Fabrics.

Alvyn Fabrics began its cotton printing business by specializing in making cotton fabric for quilters and crafters. 

In the video below, we can go on a virtual tour of their step-by-step production processes used in their flatbed and rotary printing methods, which can print fabric that has up to 16 colors.

Below are some screen shots of the processes shown in the video.

     · Don't miss: How to Make a Linoleum Block Print and Preserving Textiles.

Following a trip to Indonesia, Alvyn Fabrics shifted their focus from novelty and juvenile prints to batik prints. To see a handmade batik wax-resistant fabric-making process, check out How Batik Fabric is Made.

POPULAR POSTS

Make a Boro Bag

Follow a tutorial for making a patchworked bag with Sashiko topstitching.

Sashiko Videos

Follow tutorials for how to create traditional Japanese embroidery stitching.

Vintage Maps

Explore a library's digitized vintage maps, which you can download for free. 

How to Care for Quilts

Learn from a museum textile curator how to best care for your quilts.

Photo of a sewing foot and fabric

Make a Scappy Quilt

Learn to make a basket weave pattern quilt from scraps of fabric.

yarn bombed bike

Yarn Bombing Sisters

Sisters Lorna and Jill Watt create amazing yarn bomb installations .

Magnetic Ceramics

Ceramic artists create fantastical structures using magnetic clay.

Knit Like the Vikings

Learn about a Viking fabric-making technique which pre-dates knitting.

Make a Bilum Bag

Follow a tutorial for making a bilum bag - PNG's traditional fabric.

Home made DIY Pinhole camera

Make a Pinhole Camera

Learn to make a pinhole camera; develop paper film with common items.

What is Nalbinding?

Learn about a stretchy fabric made with connected loops.

Cartoon drawing of a Woman knitting

Digitized Knitting Magazines

Free digitized knitting magazines 1800 - now.

Bilum Videos

A close up of a woman's hands working with fiber and needle making bilum bags

Bilum Videos


Bilum is Papua New Guinea's stretchy handmade fabric, which has traditionally been created to make bags. These strong, stretchy carry-alls have long straps which can be held in place on a carrier's forehead, to take the weight of carrying shopping and babies, conveniently leaving arms free.

Made in the traditional way, bilum bags are handmade using local plant materials which are prepped for use as a form of yarn. Reeds, fibre from tree bark, sisal, or vine are twisted into continuous lengths of consistently-sized yarn. This natural yarn is woven into a stretchy fabric with a single needle using a knotless netting technique.

Nowadays, bilum makers also use store bought string or yarn, expanding their color palette. Besides the gorgeous patterns woven into bags, items like feathers and fur are sometimes added as decorative details. 

In the past few years there’s been a creative movement in PNG that's given rise to a radical shift in the way people think about bilum, and an expansion in the way it's used. 

A shift happened in bilum-making PNG communities when Florence Jaukae Kamel, a Papua New Guinea artist and designer, radically changed the way people thought about the fabric. Florence challenged the norm and started to make dresses and hats using the bilum technique, considering bilum as a fabric rather than just a process for bag-making.

This artistic shift in thinking about bilum as a design element and technique has helped spread the word about bilum and bilum-makers.

Below are videos that give insight into the making of this amazing hand-crafted fabric.

    · Don't miss: Read Bilum for more about this amazing technique and Florence Jaukae Kamel, who is organizing bilum artists and crafters.

    · And, for another type of single-needle fabric-making technique, see Nalbinding and How to Knit Like the Vikings.

POPULAR POSTS

Make a Boro Bag

Follow a tutorial for making a patchworked bag with Sashiko topstitching.

Sashiko Videos

Follow tutorials for how to create traditional Japanese embroidery stitching.

Vintage Maps

Explore a library's digitized vintage maps, which you can download for free. 

How to Care for Quilts

Learn from a museum textile curator how to best care for your quilts.

Photo of a sewing foot and fabric

Make a Scappy Quilt

Learn to make a basket weave pattern quilt from scraps of fabric.

yarn bombed bike

Yarn Bombing Sisters

Sisters Lorna and Jill Watt create amazing yarn bomb installations .

Magnetic Ceramics

Ceramic artists create fantastical structures using magnetic clay.

Knit Like the Vikings

Learn about a Viking fabric-making technique which pre-dates knitting.

Make a Bilum Bag

Follow a tutorial for making a bilum bag - PNG's traditional fabric.

Home made DIY Pinhole camera

Make a Pinhole Camera

Learn to make a pinhole camera; develop paper film with common items.

What is Nalbinding?

Learn about a stretchy fabric made with connected loops.

Cartoon drawing of a Woman knitting

Digitized Knitting Magazines

Free digitized knitting magazines 1800 - now.

How to Make a Boro Bag

Close up of boro bag

How to Make a Boro Bag: A Japanese Textile Tradition

A New Approach to Stitches

To appreciate sashiko stitches ("little stabs" or "little pierce" stitches) and boro clothes (meaning tattered or repaired), we need to put aside the idea of always trying to hide our stitches, and explore the elegance of having our construction be bold and in plain sight. Long, decorative reinforced thread can be incorporated into any number of fabrics that make up clothes, bedding, and accessories.

Boro Tradition

Boro is Yuyo-no-Bi, or the Beauty of Practicality, found in the traditional Japanese patchwork technique of piecing together and mending fabric.

Boro is a traditional Japanese form of repairing clothes, where layers upon layers of fabric and stitches make up a multi-layered patchworked piece of clothing, accessory, or bedding. Boro pieces were created from years-worth, even generations-worth, of repairs being made to a jacket or bedcover.

Japanese indigo cotton Boro jacket circa 1900. Image from https://www.kimonoboy.com

Before cotton was introduced in Japan, fabric was hand-made, hand-spun, and hand-dyed linen, hemp, and ramine. When a piece of clothing or bedding began to fall apart they would be pieced, patched, and stitched back together. Sashiko stitches would bind the many layers together, like a quilt.

Long running sashiko stitches traditionally give new life to cloth items, strengthening the fabric and adding warmth.

When clothes started to fall apart for good, and were beyond repair even with more layering and sashiko stitches, they’d be repurposed and turned into smaller items such as aprons, bags, and cleaning cloths.

Making a Boro Bag with Sashiko Stitches

Screen grab from Bebe Bold. Follow BeBe Bold on Facebook.

Making a boro bag is a great way to try out sashiko stitching - having fun pairing contrasting colored stitches throughout an item, making dramatic marks with thread that take on a life of their own.

You'll need some simple sewing items to start, which we've listed below with links to Amazon. You can also jump in and see some Sashiko Kits available for purchase online, or purchase some Sashiko items separately. (As an Amazon Associate I earn from qualifying purchases - at no extra cost to you.) 

Having fun with new and traditional crafts, art, design, DIY, and freebies.

TRENDING & POPULAR

FREE ART BOOKS ONLINE  Start your own free collection of art books from three major museums.

HOW TO MAKE AN AMISH RAG RUG  There's no sewing required to make this traditional homemade crafted item.

DISCOVER SASHIKO STITCHING  Learn how to make traditional Japanese decorative stitches for quilting, mending, and upcycling.

35,000 FREE KNITTING & CROCHETING PATTERNS Use our easily searchable list to find free patterns by Rowan, Vogue, Lion Brand, Berroco, and more.

'KNIT' LIKE THE VIKINGS  Discover an ancient fabric-making technique that's still done today, pre-dates knitting, and doesn't unravel.

BILUM  Discover a fabric-making technique used in Papua New Guinea that can be used to make bags and dresses.

BeBe Bold’s video instructions below are helpful in learning an easy way to create a Boro Bag. To get a download of Bebe Bold's pattern, you’ll need to go to the website and purchase it. 

If you’re a thrifty crafter or on a budget, you can follow directions, including a free pattern, from Indigobird Design, or from Fabrice Editions to make a loop bag, and adapt it to be a boro bag. 

Photo via Hanmadiya Japanese Boro Bag Tutorial

You can find a Japanese Boro Bag Tutorial with photos at Handmadiya.com, as well as .pdf downloadable step-by-step directions for another type of Boro Bag Tutorial via  London's Victoria & Albert Museum.

         · Don't miss: Sashiko Stitching and Sashiko Videos.

You can adapt bag projects to make a boro bag, using hand stitches (sashiko), machine stitching, or a combination of both. All People Quilt's messenger bag would look great as a boro bag - you'll have to create a free account to download free patterns.

If you want to see how boro tradition and techniques are inspiring contemporary designers, keeping traditional craftsmanship alive, have a look at Kapital and Kiriko.

Susan Briscoe Designs is a great place to start for putting together a sashiko kit. Click here for a one-stop convenient resource for needles, threads, fabric, books, patterns, and instructional videos.

For more about the Sashiko tradition and written tutorials, consider some helpful books we've curated below. 

SASHIKO, JAPANESE QUILTING, MENDING, and SLOW STITCHING BOOKS

The Ultimate Sashiko Sourcebook

The Ultimate Sashiko Sourcebook by Susan Briscoe Explore the origins of Sashiko, and what you need to get started. Ten project chapters show how easy it is to use sashiko patterns to make beautiful items for the home. *At the time of publishing, the price was $21.

Make and Mend: Sashiko-Inspired Embroidery Projects to Customize and Repair Textiles and Decorate Your Home

Make and Mend: Sashiko-Inspired Embroidery Projects to Customize and Repair Textiles and Decorate Your Home by Jessica Marquez

This book includes 15 projects, including mending clothes and home goods. *At the time of publishing, the price was $13.

Japanese Sashiko Inspirations: 25 Ways to Explore a Traditional Technique

Japanese Sashiko Inspirations: 25 Ways to Explore a Traditional Technique by Susan Briscoe

Experiment with 12 essential sashiko techniques. Each chapter includes a beginner's project,  and a more intricate design. *At time of publishing, the price was $22.

Japanese Quilting: Sashiko

Japanese Quilting: Sashiko by Hiromitsu Takano This book includes 30 designs, each accompanied by a full drawing, ranging from the Ougi (Fan) to Sayagata (Buddhist symbols). *At the time of publishing, the price was $19.

The Geometry of Hand-Sewing: A Romance in Stitches and Embroidery from Alabama Chanin and The School of Making (Alabama Studio)

The Geometry of Hand-Sewing by Natalie Chanin This book features more than 100 stitches—from the most basic straight and chain to the more fanciful feather and herringbone, with photos of both right and wrong sides. *At the time of publishing, the price was $17.

Japanese Country Quilting: Sashiko Patterns and Projects for Beginners

Japanese Country Quilting-Sashiko Patterns and Projects for Beginners by Karen Kim Matsunaga  Instructions for stitching patterns inspired by natural motifs, including 60 traditional patterns. *At time of publishing, the price was $24.

How to Felt a Wool Sweater

Washing machine picture for sweater felt article

How to Felt a Wool Sweater


If you’ve thrown a sweater into the wash thinking it will survive the machine's tossing and turning without too much shrinkage, and then been surprised by the pint-sized sweater that you pull out after the final rinse cycle, then you know how to make your own felted wool.

I’ve learned from my washing mistakes, and now I look at my aging sweaters and determine whether they can be rehabilitated into a new life through the magic of shrinkage.

Wool that's been agitated in hot water changes its characteristic stretchiness, as the fibers tighten and become matted together. The resulting dense felted fabric is no longer a sweater that can unravel.

Rather, It's felted wool that can be cut and sewn together without fear of fraying. It’s got a new life as a stronger, more durable and warmer fabric that's now ready to be turned into mittens, scarves, hats, skirts, slippers, ponchos, capes, shawls, and quilted bedcovers.

Washing machine picture showing hot temperature needed to felt a sweater


After you intentionally shrink your first sweater, you'll begin to see the possibilities of working with this fabric, and you might end up collecting sweaters for future projects just like you'd do with fabric for quilting, building an inventory of different colors, weights, and stitch patterns.

When searching for sweaters to felt, keep in mind that you want the wool content to be at least 80%. Every sweater with at least 80% wool is brimming with possibilities. Men's Size XXL sweaters will give you larger pieces of felt post-washing. Baby and kids sweaters might come in patterns you wouldn't find in adult sweaters. And sweaters with extra long ribbing might come in handy for making mittens.

          · Don't miss: American Crafts, Preserving Textiles, and Crafting Resources.

Tips for felting:

  • Wash like colors together
  • Set machine to the highest hot setting
  • Add a small amount of laundry liquid
  • Check on the sweater every 5 minutes or so 
  • Remove the sweater from the machine when the shrinkage is just right - if it's balled up and won't lie flat, it's been shrunk too much
  • Lie the sweater flat for air drying
  • If you want more shrinkage, put the damp sweater in the dryer, and check on it frequently

You can also felt sweaters by hand:

  • Fill up a basin with hot water and a little liquid soap 
  • Add the sweater to the water
  • Scrub and agitate the sweater until it shrinks
  • Make sure you rinse all the detergent out
  • If necessary, toss it in the dryer for more shrinkage - be sure to check on the shrinkage every few minutes so it doesn't over-shrink
Photo of scissors to cut sweaters to turn into felt

Once the sweater is dry, disassemble it:

  • Cut off buttons
  • Turn the sweater inside-out so the seams are exposed
  • With a good pair of scissors, cut close to a side seam all the way up to the sleeve
  • Cutting close to the shoulder seam, cut the sleeve off
  • Cut along the shoulder seams
  • Cut the other sleeve off
  • Don't cut the second side seam
  • Leave the main body of the sweater as one piece - you might want a big section for a project
  • On each sleeve, cut down the sleeve seam, giving you a flat piece of felted wool
  • As you're cutting the sweater apart, keep an eye out for moth holes and stains
  • Put a piece of paper tape over any holes and stains you find, so you can make sure to cut around the blemishes.

More tips:

If you need to store your felt, make sure you put your pieces in a dry, covered container, away from moths and other bugs.

To keep bugs away, you can add a couple of drops of Rosemary, Cedarwood, or Thyme essential oil to cotton balls and add them to your felt storage container. You can also add a lavender sachet.

If you’d like a more detailed explanation of turning sweaters into felted material with before-and-after photos, Make Magazine offers some advice and a felting how-to article.

Sweaters that are partial wool can also be upcycled, but won't be fray-proof like felted wool. To deconstruct the sweater, cut into pieces by following the seams. 

In the making of any project with non-felted sweaters, you'll need to stop any potential fraying by machine stitching zig-zags on all the raw, cut edges.

Next, watch a thrifty knitter source sweaters to be deconstructed for their yarn at DIY Mindset

Below are three books about working with sweaters and felted wool. Click on a link to see them or purchase them on Amazon. [As an Amazon Associate I earn from qualifying purchases (at no extra cost to you).]

POPULAR POSTS

Make a Boro Bag

Follow a tutorial for making a patchworked bag with Sashiko topstitching.

Sashiko Videos

Follow tutorials for how to create traditional Japanese embroidery stitching.

Vintage Maps

Explore a library's digitized vintage maps, which you can download for free. 

How to Care for Quilts

Learn from a museum textile curator how to best care for your quilts.

Photo of a sewing foot and fabric

Make a Scappy Quilt

Learn to make a basket weave pattern quilt from scraps of fabric.

yarn bombed bike

Yarn Bombing Sisters

Sisters Lorna and Jill Watt create amazing yarn bomb installations .

Magnetic Ceramics

Ceramic artists create fantastical structures using magnetic clay.

Knit Like the Vikings

Learn about a Viking fabric-making technique which pre-dates knitting.

Make a Bilum Bag

Follow a tutorial for making a bilum bag - PNG's traditional fabric.

Home made DIY Pinhole camera

Make a Pinhole Camera

Learn to make a pinhole camera; develop paper film with common items.

What is Nalbinding?

Learn about a stretchy fabric made with connected loops.

Cartoon drawing of a Woman knitting

Digitized Knitting Magazines

Free digitized knitting magazines 1800 - now.

600+ Free Art Books Online

David Teniers the Younger, David Taisniers, an example of the art books available online for free

600+ Free Art Books Online

Hefty art books, with full-color reproductions on glossy pages, demand respect on any shelf or coffee table. But they can be expensive, take up space, and use up paper.

Three American art museums have gifted us all with free access to their collections of art books. Without committing to making a payment beyond our internet and phone charges, we can build our own online libraries of art books and exhibition catalogs, courtesy of the Guggenheim, Met, and Getty Museums. 

Below are links and instructions to get you started building your own online library.

The Solomon R. Guggenheim Museum

Exterior photo of Guggenheim Museum re. free art books online

The Solomon R. Guggenheim Museum publishes books and catalogs to coincide with its exhibitions. The Guggenheim offers access to view 200+ of its published texts which accompanied shows, from 1936 – 2005, on their archive.org page

Just click on an image and you’ll get a pop-up screen with an online magazine style layout.

You can flip through the pages forwards and backwards with simple clicks on the right and left hand sides of the book. Information about the publication is listed beneath the text, and similar texts are listed beneath that information.

If you’d like to download the publication, just click on the search icon (magnifying glass in the upper right), and you’ll get a pop-up window with several format choices: .pdf, ePub, Plain Text, DAISY, and Kindle.

The Met Museum

Interior photo of the Met Museum re. free art books online

New York’s Metropolitan Museum of Art (The Met) offers 50 years’ worth of its publications on art history available to read and download for free. These 1,500+ publications are available on their MetPublications page.

They include books, online publications, Bulletins, and Journals, dating back as far as 1964.

“MetPublications includes a description and table of contents for most titles, as well as information about the authors, reviews, awards, and links to related Met titles by author and by theme. Current book titles that are in-print may be previewed and fully searched online, with a link to purchase the book. The full contents of almost all other book titles may be read online, searched, or downloaded as a PDF."

Use the search box on the left side to find a publication by Title, Author, Keyword, Publication type, Thematic category, Format, or Collection/Department:

  • American Decorative Arts
  • American Paintings and Sculpture
  • Ancient Near Eastern Art
  • Antonio Ratti Textile Center
  • Arms and Armor
  • Arts of Africa, Oceania, and the Americas
  • Asian Art
  • Drawings and Prints
  • Education
  • Egyptian Art
  • European Paintings
  • European Sculpture and Decorative Arts
  • Greek and Roman Art
  • Islamic Art
  • Medieval Art and the Cloisters
  • Modern and Contemporary Art
  • Musical Instruments
  • Objects Conservation
  • Paintings Conservation
  • Paper Conservation
  • Photograph Conservation
  • Photographs
  • Robert Lehman Collection
  • Scientific Research
  • The Costume Institute
  • Watson Library
  • "Many of these out-of-print books will be available for purchase, when rights permit, through print-on-demand capabilities in association with Yale University Press. For the Met's Bulletin, all but the most recent issue can be downloaded as a PDF. For the Met's Journal, all individual articles and entire volumes can be downloaded as a PDF.”  Met Publications

    The Getty Museum

    Exterior photo of J. Paul Getty Museum re. free art books online


    Getty Publications offers over 250 art books, free to browse and download, through their Virtual Library. The Virtual Library’s free-to-download books and texts come from several Getty institutions: the J. Paul Getty Museum, the Getty Conservation Institute, and the Getty Research Institute

    All of the books are available in .pdf format.

    Want to check out free photos from museums? In the past few years, many museums, libraries, and corporate collections have uploaded photo libraries online and made them available to the public. Some have even made their images open to public domain use, with free downloads.

    If you'd like to explore further, see our articles Museum Collection Images, Craft Museums, and Digitized Knitting Magazines.

    Collectible Art Books

    If you love flipping through glossy pages of photo-rich specialty books, you'll find a great selection of art, design, fashion, and architecture books at the online stores The Met Musem Store and Taschen. [This post contains affiliate links. Please read my disclosure for more information.] You can find our curated art and craft book shop by clicking on any of the book covers below. 

    Having fun with new and traditional crafts, art, design, DIY, and freebies.

    TRENDING & POPULAR

    HOW TO MAKE AN AMISH RAG RUG  There's no sewing required to make this traditional homemade crafted item.

    HOW TO MAKE A BORO BAG  Learn how to make a stand-out bag using a Japanese patchwork technique and Sashiko stitching. 

    DISCOVER SASHIKO STITCHING  Learn how to make traditional Japanese decorative stitches for quilting, mending, and upcycling.

    35,000 FREE KNITTING & CROCHETING PATTERNS Use our easily searchable list to find free patterns by Rowan, Vogue, Lion Brand, Berroco, and more.

    'KNIT' LIKE THE VIKINGS  Discover an ancient fabric-making technique that's still done today, pre-dates knitting, and doesn't unravel.

    BILUM  Discover a fabric-making technique used in Papua New Guinea that can be used to make bags and dresses.

    Yarn Theory: This is Your Brain on Wool

    Daisy flower on a sunny day representing the happiness you feel when working with wool yarn

    Yarn Theory: This is Your Brain on Wool

    Baby sheep with wool coat

    Knitters know that meditative-like state of mind when calm and concentration directs fingers flying around yarn and needles. Crafters know that zone well - that peaceful, relaxing time spent working something into existence - and neuroscientists are writing about it.

    Crafters can follow trends and make things using amazing inventions like long arm sewing machines and 3D printers. Or we can go old-school, with yarn and needles.

    We have a lot of tools at our disposal – but the biggest tool we have is our freedom to express ourselves, through yarn, fabric, paper, clay, pens and pencils, cameras, etc. And that creative freedom can bring happiness.

    Your Brain Loves When You Knit

    “…recent studies are finding that complex crafting is good for mental health. The repetitive mindfulness of knitting, for example, has been likened to meditation. When 3,545 knitters were surveyed online by Betsan Corkhill, a knitting therapist, more than half of those who responded said they felt “very happy” after knitting. Many of them did it specifically for relaxation and stress relief. Those who knitted more frequently reported more mental and emotional relief than those who did it less frequently.

    Is it just working with needle and thread that has these effects? No. Neuroscientists are studying other forms of creativity and finding that activities like cooking, drawing, cake decorating, photography, art, music and even doing crossword puzzles are beneficial, according to Time magazine.

    Why? One thought is that when we’re being creative, our brains release dopamine, a natural anti-depressant. Creativity that takes concentration is a non-medicinal way of getting a feel-good high….”    Nancy Shreeves Mother Nature Network

    Ingrid Bergman knitting on beach

    Ah, dopamine…

    The urge to create isn't limited to working during certain times or in certain places. We can travel with our knitting, crocheting, or embroidery - riding in cars, trains, subways. It has a calming effect, and can bookend our days before and after thinking about our work routines.

    “Little research has been done specifically on crafting, but neuroscientists are beginning to see how studies on cognitive activities such as doing crossword puzzles might also apply to someone who does complex quilting patterns. Others are drawing connections between the mental health benefits of meditation and the zen reached while painting or sculpting....

    Psychologist Mihaly Csikszentmihalyi first described this phenomenon as flow: a few moments in time when you are so completely absorbed by an activity that nothing else seems to matter. Flow, Csikszentmihalyi says, is the secret to happiness -- a statement he supports with decades of research.

    "When we are involved in (creativity), we feel that we are living more fully than during the rest of life," Csikszentmihalyi said during a TED talk in 2004. "You know that what you need to do is possible to do, even though difficult, and sense of time disappears. You forget yourself. You feel part of something larger."

    Our nervous system is only capable of processing a certain amount of information at a time, he explains. That's why you can't listen and understand two people who are talking to you at once. So when someone starts creating, his existence outside that activity becomes "temporarily suspended."

    ...Crafting also improves our self-efficacy, Levisay says, or how we feel about performing particular tasks. Psychologists believe a strong sense of self-efficacy is key to how we approach new challenges and overcome disappointments in life. So realizing you can, in fact, crochet a sweater for your nephew can help you tackle the next big paper your teacher assigns.”   Jacque Wilson This is Your Brain on Crafting

    The trucker-quilter featured in the Wall Street Journal video is a crafter after my own heart, pulling out the sewing machine while on the road, getting in the zone of dopamine-induced quilt-making between deliveries.

    Getting in the crafting flow is sometimes the best part of the week. Crafting helps us make our spaces cozier, gives us a way to express ourselves, and, according to Jane Brody:

    “Dr. Herbert Benson, a pioneer in mind/body medicine and author of “The Relaxation Response,” says that the repetitive action of needlework can induce a relaxed state like that associated with meditation and yoga…..Although it is possible that only people who are cognitively healthy would pursue such activities, those who read newspapers or magazines or played music did not show similar benefits. The researchers speculate that craft activities promote the development of neural pathways in the brain that help to maintain cognitive health.”

    Yep.

    Need some crafting/DIY inspiration and links to free stuff? Get started with our quick links to free resources, how-to's, and online stores for sourcing at our Crafting Resources page. 

    Or, start out on our blog collection pages for articles and links on Knitting, Sewing, Quilting, and Crafting Videos.

    See what we've found in Pinterest!

    POPULAR POSTS

    Make a Boro Bag

    Follow a tutorial for making a patchworked bag with Sashiko topstitching.

    Sashiko Videos

    Follow tutorials for how to create traditional Japanese embroidery stitching.

    Vintage Maps

    Explore a library's digitized vintage maps, which you can download for free. 

    How to Care for Quilts

    Learn from a museum textile curator how to best care for your quilts.

    Photo of a sewing foot and fabric

    Make a Scappy Quilt

    Learn to make a basket weave pattern quilt from scraps of fabric.

    yarn bombed bike

    Yarn Bombing Sisters

    Sisters Lorna and Jill Watt create amazing yarn bomb installations .

    Magnetic Ceramics

    Ceramic artists create fantastical structures using magnetic clay.

    Knit Like the Vikings

    Learn about a Viking fabric-making technique which pre-dates knitting.

    Make a Bilum Bag

    Follow a tutorial for making a bilum bag - PNG's traditional fabric.

    Home made DIY Pinhole camera

    Make a Pinhole Camera

    Learn to make a pinhole camera; develop paper film with common items.

    What is Nalbinding?

    Learn about a stretchy fabric made with connected loops.

    Cartoon drawing of a Woman knitting

    Digitized Knitting Magazines

    Free digitized knitting magazines 1800 - now.

    DIY Mindset

    A cup of coffee and a knitting project,, illustrating a way to repurpose yarn.

    A DIY Mindset

    Resourceful and thrifty crafters have always seen the possibilities in donated, discarded, and under-utilized materials.

    An astounding amount of items end up being discarded – while still having lots of “life” left in them.

    Cotton and wool have natural life spans. You can feel with your fingers how far along a natural fiber is in its lifespan – the cotton is either worn thin or gets too rough-feeling. Aged wool starts to lose its shape.

    If you’re a recycler or an up-cycler, then you’ll want to give your clothes a boost every time they need it – stitching on a new button, or making a weaving repair of a hole. You’ll be keeping old traditions alive, such as darning and fine stitching, and you’ll be able to keep your favorite clothes for a little longer.

    From Old to New Again

    But when clothes finally lose their oomph – their youthful elasticity - and are beyond repair, then we can repurpose them. We can turn them into patches for pants, fabric for quilts, or even yarn to be knitted, crocheted, or woven into a rug.

    You loved your clothes for their color or pattern, or because they reminded you of a time and place. So, why not give them another life in another form?

    I’ve sourced fabric from all but one of these:

    • From around our house
    • From friends and family
    • Thrift stores
    • Church sales
    • Auctions
    • Swap meets
    • Craigslist
    • Local offer-ups
    • Curb alerts
    • Online auctions
    • Library sales
    • Estate sales
    • Flea markets
    • Police auctions

    Okay, not police auctions. I was just kidding about that one.

    Church sales, flea markets, auctions, and thrift stores are American as apple pie. Our thrifty ancestors took old wool blankets and turned them into hooked rugs, and turned old shirts and sheets into quilts and rag rugs.

    A DIY Mindset in Action

    While recycling and repurposing aren’t uniquely American, it seems like hunting down bargains and, at the same time, keeping items from going to the incinerator is a pastime that many of us are passionate about.

    Below is a video about a thrifty knitter who sources for yarn at thrift stores—but he’s looking for sweaters, not balls of yarn. I don't think anyone would be able to tell that the sweaters he knits started out as sweaters picked up for pennies on the dollar. Watch the video and see if you agree with me!

    When you unravel a sweater to reuse the wool, you’ll most likely have a lot of kinks that you’ll want to get out. Staci from Very Pink Knits lets us in on her process of preparing salvaged yarn for re-use.

    If you're just getting started with knitting, you might want to check out Yarn and Knitting Basics and How to Knit. Finally, you'll find free patterns here: 35,000 Free Knitting and Crocheting Patterns.

    BOOKS

    Below are some books about repurposing wool and cotton into new projects. Click through to see the books on Amazon. [As an Amazon Associate I earn from qualifying purchases (at no extra cost to you).]

    The Sweater Chop Shop: Sewing One-of-a-Kind Creations from Recycled Sweaters by Crispina Ffrench

    The ReFashion Handbook: Refit, Redesign, Remake for Everybody by Beth Huntington

    Sweater Surgery: How to Make New Things With Old Sweaters by Stefanie Girard

    Sewing Green: 25 Projects Made With Repurposed & Organic Materials Plus Tips & Resources for Earth-Friendly Stitching by Betz White

    POPULAR POSTS

    Make a Boro Bag

    Follow a tutorial for making a patchworked bag with Sashiko topstitching.

    Sashiko Videos

    Follow tutorials for how to create traditional Japanese embroidery stitching.

    Vintage Maps

    Explore a library's digitized vintage maps, which you can download for free. 

    How to Care for Quilts

    Learn from a museum textile curator how to best care for your quilts.

    Photo of a sewing foot and fabric

    Make a Scappy Quilt

    Learn to make a basket weave pattern quilt from scraps of fabric.

    yarn bombed bike

    Yarn Bombing Sisters

    Sisters Lorna and Jill Watt create amazing yarn bomb installations .

    Magnetic Ceramics

    Ceramic artists create fantastical structures using magnetic clay.

    Knit Like the Vikings

    Learn about a Viking fabric-making technique which pre-dates knitting.

    Make a Bilum Bag

    Follow a tutorial for making a bilum bag - PNG's traditional fabric.

    Home made DIY Pinhole camera

    Make a Pinhole Camera

    Learn to make a pinhole camera; develop paper film with common items.

    What is Nalbinding?

    Learn about a stretchy fabric made with connected loops.

    Cartoon drawing of a Woman knitting

    Digitized Knitting Magazines

    Free digitized knitting magazines 1800 - now.

    Yarn and Knitting Basics

    Knitting Needles Green Yarn for knitting basics

    Yarn and Knitting: The Basics 

    Let's walk through what it takes to become a knitter, one step at a time. We'll learn about abbreviations and how to read a pattern. We'll explore how to pick the right needles and yarn for any given project. And we'll see over-the-shoulder videos of knitting in action, from simple to advanced stitches.

    Please note that this post has some links that lead to knitting tools and accessories that you might find helpful. As an Amazon Associate I earn from qualifying purchases (at no extra cost to you).

    Let's Start at the Beginning...

    There are several things you’ve got to puzzle out, but with a little help you’ll be well on your way to knitting up a storm.

    Let’s figure out what tools you need, how to read a pattern, get a heads-up about the terms and abbreviations you’re going to come across, and learn the basics to get you started.

    First things first. If you're antsy and want to jump ahead to watch how to knit, Row House Yarn has KnitSchool, which are a series of free, easily-digestible videos filmed from the view of the knitter.

    But, because yarn can be a fussy material to work with, your first knitted piece will probably not match what you visualized. So, how about starting out small to get the hang of what it feels like to deal with making good stitches? Remember - slow and steady wins the race! 

    How about knitting a small scarf, baby blanket, doll blanket, dog blanket, or potholder? Okay, let’s get started…

    Choosing the Right Needles for Your Project

    Needles come in three types: straight with one pointed end and one capped end; circular; and straight with 2 pointed ends (double-pointed).

    The straight needles with the capped end are used to make flat pieces – you knit to the end of a row, turn your needle around, and knit the next row. So, every other row being knit is the front side or the back side.

    Needles are your tools, so it’s important to get the tools which work the right way and feel good in your hands. Needles are made of metal, plastic, wood, and bamboo. One day you’ll most likely have a collection of needles, and you’ll know exactly which ones to use for your project.

    Yes, that day will come and you’ll be super-happy.

    Needles come in sizes based on thickness and length. For any particular project, you’ll want needles that aren’t too long (making them unnecessarily unwieldly) and aren’t too short (forcing you to work with bunched up stitches). You’ll find the sweet spot for size as you get used to knitting.

    Personally, I love metal needles. I love the clacking sound they make, and I like that the yarn can be eased up and down the needles a little bit because of the slippery nature of the metal. But some people really dislike that metal needle clacking sound.

    Bamboo and wooden needles are really helpful because yarn sticks to them a little bit.

    Straight needles usually come in lengths of 7”, 10”, 12”, and 14”.

    Circular needles are great for big projects (like blankets) and projects in the round (like hats, infinity scarves, and some sweaters). They come in several sizes, with different lengths of wire or nylon cord extending between the needles. Common circular needles have wire lengths of 16”, 20”, 24”, and 32”.

    Double pointed needles (DPNs) are used for projects that require binding off of stitches, like mittens or socks – projects that need to be knit in the round but which are too small for circular needles. DPNs come in many different sizes, in sets of 4 or 5 needles.

    When knitting with DPNs, you’ll need to be proactive in preventing stitches from slipping off the ends. You can remedy this by putting a needle point cover over one or both ends of the needles to keep the stitches from slipping off.

    The size needle you’ll be using for any project is going to be determined by the yarn you’re using for that project. As a general rule of thumb, the thicker the yarn you’re using, the thicker your knitting needles are going to be. Most patterns suggest a needle size, and most packaged yarns suggest a needle size.

    When you start your project, you’ll want to make sure your gauge (which means the tension you’ve knitted – or, the number of stitches per inch) matches the pattern.

    How on earth do you do that, you ask?

    Hang in there…a really useful link about knitting gauge is coming up.

    But, just so you know, you’ll want to knit a practice square for your project. If your number of stitches is off – if your stitches are too tight or too loose – you’ll need to change your needle size for that project. If your practice square is too tight, you’ll want to use the next bigger size needles. If it’s too loose, you’ll want the next smaller size needles.

    In general, you’ll know what needle size to use based on the pattern you’re using or the size suggested for the yarn you’re using, stated on the yarn package.

    A heads-up: American and European needles are sized differently. American needles are numbered between 0 and 50, UK/Canadian needles are numbered 14 to 000, and European needles are in millimeters, from 2.0mm to 25.00 mm.

    Medium-sized needles are 6, 7, or 8. Any of these sizes would be good for a beginner project, using them with medium-weight yarn, and a medium length.

    Here's a needle size conversion chart:

    Double-Checking That You've Chosen the Right Needles and Yarn Sizes For Your Project...What is Gauge and Why is it Important?

    Usually at the beginning of a pattern you’ll see a note about gauge. Gauge measures tension.

    Any pattern is based on how many stitches there are per inch. Gauge is the number of stitches in one inch of knitting. Knitting has four variables – the weight of the yarn, the size of the needles, the particular stitch, and the knitter.

    We’re humans, not machines, so even if we all use the same needles, yarn, and stitch, our knitting will be a bit different from others because some of us knit tighter, and some knit looser. It all comes down to tension, and we need to adjust our tension – by making adjustments to the yarn or needles - before we follow a pattern.

    The gauge stated in a pattern tells you how many stitches and rows you’ll need per inch so that your project will end up the intended size. Before you start your project, you’ll need to knit a sample square using the needles and yarn you intend to use in order to compare the number of stitches you’re knitting per inch with the number of stitches per inch the pattern expects you to knit.

    This sample is called a gauge swatch.

    Your gauge swatch will show you whether you can go ahead and start knitting your project, or whether you have to change your needles or yarn before you start so that the project ends up the way the pattern-maker intended.

    Below is a super helpful explanation of measuring gauge by VeryPink Knits, one of our favorite online knitting teachers:

    To create your gauge swatch, use a stockinette stitch (or a garter edge with a stockinette middle) – knit one row, purl the next row, and repeat- unless the pattern specifically states to knit a different pattern. You’ll want to make a 6 x 6 inch square, loosely binding off the end.

    Next, take the time to wash and block dry the square before you count the stitches. That way, you’ll know that you can safely wash and wear your item after it’s made, and that it’ll be the right fit according to the pattern you’re making.

    You’ll measure 4 inches of that washed square with a hard ruler, tape measure, or gauge knit sizer ruler, away from any curled edges. Count the number of stitches within the 4 inches.

    Your pattern will let you know how many stitches you’ll need in 1 inch or in 4 inches.

    If your gauge swatch has less the number of stitches per inch than the pattern calls for, then your knitting is too loose for the pattern and you need to use the next smaller size needles, or heavier yarn.

    If your gauge swatch has more stitches than you should have, then your knitting is too tight, and you need to switch to the next larger size needles, or lighter yarn.

    An exception to this rule: you have some wiggle room in your gauge depending on the project. If you’re knitting something that doesn’t have to be precise – a stuffed toy, for example - and you’re okay with your project not matching the dimensions of the pattern, then you can be a little lax in trying to match the pattern’s gauge. But if you want a more precise match, you’ll be glad you sorted out the gauge before putting in hours’ worth of knitting.

    Yarn

    So many choices! See some bestsellers here.

    Wool, acrylic, cotton…

    Let’s look at the yarn label and what it tells us.

    Yarn labels will tell you the Yarn Weight (thickness), Physical Weight (ounces/grams), Length (Yardage), Color, Lot Number, type of yarn (wool, acrylic, cotton, etc.), gauge, washing instructions, and perhaps suggested needle size.

    Infographic of yarn label information

    Patterns will tell you how much yarn you’re going to need. So, there are 2 factors – you’re going to have to do a little arithmetic to make sure you’re going to have enough of the yarn you want. And, if you’re making something that’s one color, you’re going to want all your yarn to be from the same dye lot.

    If you run out of yarn and go back to buy more, there’s no guarantee that you’ll find the same color that’s also from the same dye lot. So, it’s best to be sure and do the arithmetic to figure out how many skeins you’ll need before you begin, and purchase them all at once.

    Otherwise, there’s a chance that if you purchase yarn at two different times you might not be able to get them from the same dye lot, meaning that you might have to get some yarn that's from another dye lot, and you might be able to see two different shades of a color in your finished item.

    The Gauge listed on the package lets you know the manufacturer’s recommendation for the size knitting needle or crochet hook to use based on the yarn’s thickness, with the number of stitches you'll get per inch.

    You might want to hang on to the yarn care/launder guide for each project, or make a note of it in a project notebook. It’ll be helpful to you when you need to clean your item. And, it’ll be valuable information to include if you’re giving away or selling your hand-crafted item.

    Washing instructions for wool yarn.
    A list of information found on a yarn label.

    Needles and Yarn Weight

    The size knitting needles you use for any project will depend on the yarn you’d like to use. The finer the yarn, the smaller the needle circumference. Fine yarns require smaller stitches – otherwise, you’d have huge gaping holes between stitches. Unless the pattern calls for a design of loosely-knitted fabric, your ultimate knitted piece should form a solid knitted fabric, which is achieved by getting the needles and yarn well matched.

    Here's a handy chart from the Craft Yarn Council (part of a download available on their site):

    Cracking the Codes

    You’ll need to learn the abbreviations and terms used in patterns. It will take time to get to the point where you’re able to decode a pattern with ease and confidence. Whenever starting a project, you should read the pattern from start to finish before picking up the needles – maybe even more than once.

    How about printing out a Knitting Abbreviation Master List from the Craft Yarn Council and keeping it handy when you’re first tackling this new crafting language?

    And keep in mind that each pattern or pattern book may have special definitions – apart from these standard ones below.  Just keep your eyes out for these in your pattern.

    You’re going to inevitably pause in your knitting, so have a plan for keeping track of where you left off in the pattern – you’ll thank yourself for that! 

    [Note: you might want to keep your stitches from falling off your needles by using knitting needle point protectors/stoppers.]

    List of Abbreviations

    Below the abbreviation list is a terms list, and below that are links to videos which show you what’s described in the abbreviations and terms (the most commonly used terms are bolded).

    [ ]            work instructions within brackets as many times as directed

    ( )            work instructions within parentheses in the place directed

    * *          repeat instructions following the asterisks as directed

    *             repeat instructions following the single asterisk as directed

    "              inch(es)

    alt

    alternate

    approx

    approximately

    beading

    Adding beads by threading them directly into yarn being worked

    beg

    Begin/beginning

    bet

    blocking

    between

    The process of gently shaping your knitted item by dampening the fibers and laying the item flat

    BO

    bind off [cast off]

    CA

    CB

    cab

    color A

    color B

    cable

    CC

    contrasting color

    cdd

    centered double decrease (see S2KPO)

    ch

    chain

    ch-sp

    chain space

    cl

    cluster

    cm

    cn

    centimeter(s)

    cable needle

    CO

    cast on

    colorwork

    knitting with several colors at once

    cont

    continue(ing)

    dc

    double crochet

    dec

    decrease/decreases/decreasing

    dpn

    double pointed needles(s)

    est

    established

    fl

    foll

    front loop(s)

    follow/follows/following

    g

    grams

    grafting

    also called weaving or kitchener stitch, grafting joins two open edges stitch by stitch using a yarn needle

    i-cord

    an i-cord is a tube knitted in the round using two double-pointed needles.

    inc

    increase/increases/increasing

    incl

    including

    inst

    instructions

    K or K

    knit

    k tbl

    knit through back of loop

    k2tog

    knit two stitches together

    kfb

    knit into front and back of stitch

    Kitchener Stitch

    also called weaving or grafting, the kitchner stitch joins two open edges stitch by stitch using a yarn needle

    knitting in the round

    kwise                   

    use Double Pointed Needles (DPNs), 1 long circular for Magic Loop, or 2 circulars


    knitwise

    LH

    LLI

    lp(s)

    left hand

    (Left Lifted Increase) with left needle, lift the stitch below the stitch just worked, and knit it. 1 stitch increased.

    loop(s)

    m

    m             

    marker

    meter

    MB

    make bobble

    MC

    main color

    m1 or M1

    make 1 knit stitch: insert left needle, from front to back, under strand of yarn which runs between last stitch on left needle and first stitch on right needle; knit this stitch through back loop. 1 stitch increased.

    M1L

    [Make 1 Left] insert left needle, from front to back, under strand of yarn which runs between next stitch on left needle and last stitch on right needle; knit this stitch through back loop. 1 stitch increased

    M1P or

    m1 p-st

    make 1 purl stitch.

    M1R

    [Make 1 Right] insert left needle, from back to front, under strand of yarn which runs between next stitch on left needle and last stitch on right needle; knit this stitch through front loop. 1 stitch increased.


    mm


    millimeter(s)

    mult

    multiple

    opp

    opposite

    oz

    ounce(s)

    p or P

    purl

    p2tog

    purl two stitches together

    pat(s) or patt[s]

    pattern[s]

    pfb

    purl into front and back of stitch

    pm

    pop

    place marker

    popcorn

    prev

    psso

    previous

    pass slipped stitch(es) over

    rem

    remaining

    rep

    repeat

    rev St st

    reverse stockinette stitch

    RLI

    (Right Lifted Increase) with right needle lift the stitch below the next stitch, and knit it. 1 stitch increased.

    RS

    right side(s)

    Rnd(s)

    round(s)

    S2KPO

    slip 2 sts together as if to knit, knit next, pass 2 slipped sts over

    sc

    single crochet

    SKP

    slip 1 stitch as if to knit, knit 1 stitch, pass slipped stitch over

    SK2P

    slip 1 stitch, knit 2 together, pass slipped stitch over

    SSK

    slip the next 2 stitches, 1 by 1, knitwise; insert the tip of the left needle from left to right into the fronts of those 2 sts and knit them tog. 1 st decreased.

    SSP

    slip the next 2 stitches as if to knit; return these stitches back to the left needle, then purl those 2 sts together through the back loop

    sl

    slip

    slp

    slip one as if to purl

    sl st

    slip stitch

    sp

    space

    St(s)

    Or st(s)

    stitch(es)

    St st

    stockinette stitch/stocking stitch

    tbl

    through back of loop(s)

    Three-Needle Bind Off

    hold both pieces of knitting with right sides together.
    Insert needle into first st on front needle and first st on back needle, and knit them together. *Repeat this for the next st on the front and back needles. Draw the first st worked over the second st.*
    Repeat from * to * until all sts have been bound off.

    tog

    together

    WS

    wrong side(s)

    w&t

    Wrap & Turn [used when working short rows]

    To wrap and turn on a RS row, knit to point specified in pattern, bring yarn to front of work between needles, slip next stitch to right-hand needle, bring yarn around this stitch to back of work, slip stitch back to left-hand needle, turn work to begin purling back in the other direction.

    To wrap and turn on a WS row, purl to point specified in pattern, bring yarn to back of work between needles, slip next stitch to right-hand needle, bring yarn around this stitch to front of work, slip stitch back to left-hand needle, turn work to begin knitting back in the other direction.

    Working Wraps Together with Wrapped Stitches:
    When working rows which follow short rows, work the "wraps" at the turning points of the short rows, together with the stitches they wrap, as follows:

    When working a RS row: Knit to wrapped stitch. Slip next stitch from left needle to right needle, use tip of left needle to pick up "wrap" and place it on right needle, insert left needle into both wrap and stitch, and knit them together.

    When working a WS row: Purl to wrapped stitch. Slip next stitch from left needle to right needle, use tip of left needle to pick up "wrap" and place it on right needle, slip both wrap and stitch back to left needle, purl together through back loops.

    working in the round

    use your choice of DPNs, 1 long circular (magic loop) or 2 short circulars

    Wyif

    Wyib

    with yarn in front

    with yarn in back

    yd(s)

    yfwd

    YO

    yrn

    yon

    yard(s)

    yarn forward

    yarn over

    yarn around needle

    yarn over needle

    List of Knitting Terms

    as established

    In other words, keep knitting the pattern or series of steps that the pattern has instructed.

    as if to knit

    Knitwise- begin knitting the next stitch as though you’re going to knit it.

    at the same time

    Here, you’ll be working two sets of instructions. Keep working the instructions you’ve been following, and also work the additional instructions right after you see “at the same time.”

    Example: “Continue working pattern as set and at the same time begin increasing 2 sts at the beginning of every right side row...” means…continue creating new stitches as per the instructions you’ve been following AND start to increase 2 stitches at the beginning of every right side row as well.

    back of work

    When you’re holding the needles, the “back of work” is the side facing away from you.

    BO = Bind off

    Binding off is taking off stitches from your needle. It’s sometimes called Casting off, and it’s how you finish most knitted pieces.

    block

    Blocking is a finishing technique. You lay your finished pieces out flat and dampen or steam them. This helps to form and shape them and also helps define intricate stitch patterns.

    CO = Cast on

    Casting on is the beginning of each knitted piece – it’s putting the first stitches onto a needle.

    cont in patt

    Continue in pattern – Continue working the pattern as previously instructed. In other words, keep knitting the way you were originally.

    Dec = decrease

    To Decrease is to eliminate one or more stitches. The most common way to decrease is to work two stitches together as one.

    ending with RS row

    The last row to work will be a right side row, so you might see instructions that say: Continue working as established ending with a right side (RS) row.

    ending with WS row

    The last row to work will be a wrong side row, so you might see instructions that say: Continue working as established ending with a wrong side (WS) row.

    every other row

    These instructions are for alternate rows. Example: Continue increasing stitches every other row or continue increasing stitches on every alternate row means you’ll need to increase on one row, work a regular row without increasing, and then increase on the next row, not increase the following row, etc.

    frogging

    Unraveling or ripping out the work.

    front of work

    This is the side that’s facing you when you hold your needles. It can be the right side or the wrong side of the work.

    gauge

    Gauge is a measure of tension, or the number of stitches and rows per inch.

    Inc = Increase

    To increase is to add one or more stitches.

    join yarn

    Adding a new ball or section of yarn.

    knitwise

    Begin knitting the next stitch as though you’re going to knit it.

    K the knits, P the purls

    This is a common way to describe a pattern of knit and purl stitches. For brevity, a pattern might instruct you to repeat every row knitting the knit stitches and purling the purl stitches as previously instructed.

    Left Front (or Left Sleeve)

    The piece that will be worn on the left front and left arm of your body.

    Maintain pattern as established

    You’ll see this term used when you are working a pattern stitch and are increasing - or decreasing - at the edges. You’ll keep the center part in the pattern as you have already set it up, and will add - or subtract - stitches at each end without disturbing the pattern.

    on alternate row(s)

    Work the instructions every other row.

    purlwise

    Begin knitting the next stitch as though you’re going to purl it.

    Rep = repeat

    To repeat is to do the same thing again for the number of times stated in the pattern.

    reverse shaping

    This is a term often seen in sweater patterns, where the right front and left front are the same, except that the shaping needs to be reversed. You’ll work both fronts identically, only you reverse the increases and decreases (the shaping). If one front was decreasing stitches at the beginning of the row, then one front would be decreasing stitches at the end of the row.

    Right Front (or Right Sleeve)

    The piece that will be worn on the right front and right arm of your body.

    RS

    This is the finished side – the one that will be visible.

    selvage or selvedge

    Selvedges are the edge stitches at both ends of your row of knitting.

    Sl = Slip

    Slip a stitch or a number of stitches from one needle to the other, without working it.

    small (medium, large)

    This format in a set of instructions is a common method of showing changes in a knitting pattern for other sizes. Small is usually first, and then other sizes are listed in parentheses. It could also read as: 36 (38, 40, 42). Throughout the pattern you’ll follow directions for your specific size.

    For example - instructions for size small may be to cast on 60 stitches, for a size medium to cast on 66 stitches, and for a size large to cast on 72 stitches. The instructions would look like this: CO 60 (66, 72) sts.

    tink

    Tink - knit spelled backwards - is the term knitters use if they make a mistake. It means unknitting.

    Tog = together

    Work 2 or more stitches together, forming a decrease.

    work even

    To “work even” means to continue knitting without making any increases or decreases.

    WS

    Wrong Side, or the side that won’t be visible when the project is finished.

    YO = yarn over

    Take the yarn over the needle.

    Image via UK Hand Knitting http://www.ukhandknitting.com/

    Decoding the Abbreviations and Terms

    Here’s an example of the type of instructions you’ll see in a pattern:

    CO 12 sts.

    CO means cast on; sts means stitches. So, you’ll first make a slip knot on one needle, then cast on 11 more stitches on the same needle (in knitting, the slip knot always counts as a stitch). You’ll have 12 stitches in total.

    Please note: In crochet instructions, the slip knot never counts as a stitch.

    Row 1 (RS): Knit.
    Row 2 (WS): Purl.

    On Row 1, which is the right side of the piece (RS), you’ll knit all 12 stitches on the needle. Then for Row 2, the wrong side (WS) of the piece, you’ll purl each stitch.

    Then you might see instructions like:

    Rep Rows 1 and 2 until piece measures 4” from the beginning, ending with a WS row.

    That means that you’ll keep repeating the pattern already started – knitting Row 1 (a knit row) and Row 2 (a purl row), in a sequence until the piece measures 4” from the cast-on row.

    To measure, place your piece on a flat surface and do not stretch it out. Place the end of a ruler or tape measure against the needle, and measure down to your initial cast-on row. If your work doesn’t measure what is specified, just keep repeating the rows. Since the pattern says to end with a wrong-side row, that means that the last row you work should be a purl (WS) row.

    When you repeat working a knit row and then a purl row for a number of rows, you’re creating a knit pattern called stockinette stitch, abbreviated St st. When a pattern instructs you to work in St st, it means that you’ll alternate knitting a knit row with a purl row.

    If you were to follow instructions that say:

    CO 12 sts.

    Row 1: Knit.

    Rep Row 1 until piece measures 4” from the beginning.

    Then you’ll have created a garter stitch. There’s very little difference between the right side and the wrong side when you simply knit every row, without any purling, and the item is basically reversible.

    Decoding the Symbols

    Asterisks, Parentheses, and Brackets

    Symbols are used as shortcuts in knitting patterns. If a pattern calls for a series of steps to be repeated several times across a row, then a shortcut for writing out these steps over and over again for each row, an asterisks (*) is used to indicate the repeats.

    For example:

    CO 18 sts.

    Row 1: *K2, P2; rep from * across, end K2.

    These instructions are asking you to knit the first two stitches, then purl the next two stitches; then you will knit 2, then purl 2, again, and repeat the steps following the asterisk all across the row until the last two stitches, which you will knit.

    Row 2: *P2, K2; rep from * across, end P2.

    Here you’ll be purling the sts you knitted on the preceding row, and knitting the sts you purled on the preceding row. Sometimes patterns will simply say: knit the knit stitches and purl the purl stitches.

    Brackets [ ] or parentheses ( ) function like asterisks – except that you’re repeating a series of specified stitches for a certain number of times. The number immediately following the brackets instructs you how many times to do the step. For example:

    * K5, (p1, k1) twice, p1; repeat from * to end of row…  means that, you knit 5, then you purl 1 and knit 1 two times, followed by another purl 1, and then you repeat this entire sequence across the entire row.

    A Helpful Stitch Chart Download from The Craft Yarn Council

    Stitch charts in knit and crochet patterns are being used more and more as an addition to or in place of words to describe a pattern stitch. They’re visual shortcuts.

    The Craft Yarn Council is working towards standardization, and the .pdf download available on their website lists what the Council considers to be the clearest and easiest to both render and read. Keep these symbols handy, but always refer to and defer to the pattern key for any symbol definitions.

    Tools

    When I venture into trying out a new craft, I’m really hesitant to go spend much money because I really don’t know whether I’ll take to it, and I don’t want to feel bad about purchasing *stuff* that’s just going to sit in my to-do pile.

    But if you take to knitting, there are some really helpful tools and accessories that might seem like a good investment for your new passion. Add to your stash of knitting goodies as you become a dedicated knitting master! The links below are to Amazon, where you'll see several best-selling choices for each category:

    Whew! Now you’re equipped with understanding the terms and what needles and yarn you’ll need to gather.

    You understand the abbreviations and you know you can decode a knitting pattern.

    Next, you’ll need to learn to start the actual stitching – and practice, practice, practice.

    You’ll want to start small and give yourself lots of freedom to make mistakes, because that’s how you’re really going to learn. Remember, everyone has to rip out mistakes sometimes! It's part of what makes you a knitter.

    You can refer to written instructions, videos, or both – whatever works best for you. 

    Helpful video tutorials, from beginning to advanced:

    Here are some quick links to Row House Yarn's tutorials:

    Knitting Basics  

    Working in the Round 

    Increasing and Decreasing Stitches 

    Basic Cabling 

    Changing Colors 

    Advanced Skills 

    Using a Stitch Holder 

    And, don't miss our posts with video instructions and other helpful information: How to Knit - A Beginner's Beginning, Knitting Videos, and Knitting Articles.

    One Final Word: Free Resources and a Social Platform

    Welcome to the club! There are over 50 million knitters worldwide, and now you're one of them. Yay!

    If you love flipping through magazines for ideas and inspiration, you can check out knitting and crocheting patterns spanning from the Victorian Age to the present via the free site The Magazine Rack, part of the Internet Archive.

    My hope for you is that you’ll have fun knitting. Besides knitting at home in your favorite chair,  I hope you'll join Ravelry (a social platform for knitters). You can also find a local knitting group to join through facebook, a yarn store, a learning community, a charity knitting group, or your own circle of family or friends. 

    You might enjoy swapping yarn and patterns with others in your group!

    For the next step, check out How to Knit and 35,000 Free Knitting Patterns

    If you're curious about which knitting books are the most popular and which knitting techniques are trending, check out our curated list of 25 Best Selling Knitting Books. Click through to see what readers are saying about these beloved books.

    We have an overall list of Crafting Resources which includes links to freebies and low-cost classes.

    Good luck with all your knits and purls!

    xoxo

    POPULAR POSTS

    Make a Boro Bag

    Follow a tutorial for making a patchworked bag with Sashiko topstitching.

    Sashiko Videos

    Follow tutorials for how to create traditional Japanese embroidery stitching.

    Vintage Maps

    Explore a library's digitized vintage maps, which you can download for free. 

    How to Care for Quilts

    Learn from a museum textile curator how to best care for your quilts.

    Photo of a sewing foot and fabric

    Make a Scappy Quilt

    Learn to make a basket weave pattern quilt from scraps of fabric.

    yarn bombed bike

    Yarn Bombing Sisters

    Sisters Lorna and Jill Watt create amazing yarn bomb installations .

    Magnetic Ceramics

    Ceramic artists create fantastical structures using magnetic clay.

    Knit Like the Vikings

    Learn about a Viking fabric-making technique which pre-dates knitting.

    Make a Bilum Bag

    Follow a tutorial for making a bilum bag - PNG's traditional fabric.

    Home made DIY Pinhole camera

    Make a Pinhole Camera

    Learn to make a pinhole camera; develop paper film with common items.

    What is Nalbinding?

    Learn about a stretchy fabric made with connected loops.

    Cartoon drawing of a Woman knitting

    Digitized Knitting Magazines

    Free digitized knitting magazines 1800 - now.

    >
    Skip to content