Tag Archive
Tag Archives for " Rugs "Rugs
Rugs
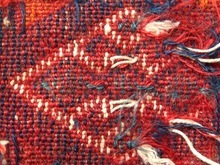
Like Kilim, Soumak is a flat woven tapestry rug-making technique. Its ancient origins are with weaving cultures in the Caucasus – from the Eastern Mediterranean and the adjacent areas of the Caucasus Mountains and Southwestern Turkmenistan.
This technique involves wrapping colored weft threads over and under the warp threads, allowing you to work on vertical, horizontal, or diagonal sections at any one time.
The earliest design traditions of Soumak weaving are believed to have been made solely for use within the community and not for export, with woven images of shamanic and other clan-based ceremonies and rituals.
Later productions of Soumak tapestry techniques came out of artists' images rather than cultural-backed representations for ceremonies and rituals, and have been used as beautifully figured practical items - such as rugs, bedding, bags, and saddle bags.
A technical description:
“The technique of making a soumak involves wrapping wefts over a certain number of warps (usually 4) before drawing them back under the last two warps. The process is repeated from selvedge to selvedge. The wefts are discontinuous; the weaver selects coloured threads in turn, and wraps each within the area which is to have that particular colour.
Unlike kilim, the back is left ragged, with all the loose ends of the differently-coloured weft threads visible, sometimes several inches long, providing extra thickness and warmth. Also unlike kilim, there are no slits where colours meet, as there is a supplementary or structural weft which supports the coloured pattern weft.
Some late Soumaks made by the Kurds are however "weftless", lacking the structural weft support, and the stitches naturally overlap… Soumak is a type of flat weave, somewhat resembling but stronger and thicker than kilim, with a smooth front face and a ragged back, where kilim is smooth both sides. Soumak lacks the slits characteristic of kilim, as it is usually woven with supplementary weft threads as continuous supports.” Soumak Wikipedia
Below are two videos showing the weaving technique. The first is a beginner’s Soumak Weaving How-To video by Patricia Cantos.
The second is a video from London’s Barbican Centre, featuring tapestry weaver Christabel Balfour. While watching Christabel weaving, we can see the possibilities she has in which direction to weave, emphasizing the freedom you get while working with this technique. (Please note: the music is a bit loud over Christabel’s dialog.)
You can read more about slit tapestry weaving via the Weaving Art Museum.
· Don't miss: American Crafts, Crafting Resources, Jacquard Weaving, and Tapestry Weaving.
POPULAR POSTS
Follow a tutorial for making a patchworked bag with Sashiko topstitching. | Follow tutorials for how to create traditional Japanese embroidery stitching. | Explore a library's digitized vintage maps, which you can download for free. | Learn from a museum textile curator how to best care for your quilts. |
Learn to make a basket weave pattern quilt from scraps of fabric. | Sisters Lorna and Jill Watt create amazing yarn bomb installations . | Ceramic artists create fantastical structures using magnetic clay. | Learn about a Viking fabric-making technique which pre-dates knitting. |
Follow a tutorial for making a bilum bag - PNG's traditional fabric. | Learn to make a pinhole camera; develop paper film with common items. | Learn about a stretchy fabric made with connected loops. | Free digitized knitting magazines 1800 - now. |
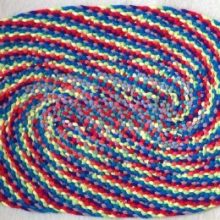
Rags can be turned into rugs in several different ways. You can make an Amish Toothbrush Rag Rug, or a No-Sew Crocheted Rag Rug. Both of these types of rugs are made with strips of fabric which get looped/knotted or crocheted until you get the size you want.
Alternatively, you can braid three strips of fabric together into braids, and then turn the braid into a circular or oval braided rug. Working from the center outward, you’ll need to keep the braids tacked together by stitching them at pretty close intervals so there are no gaping holes.
There’s another technique, though, where you create a rag rug by braiding, but it doesn’t involve stitching the braids together. These are Braid-in Rag Rugs.
Erin Halvorsen, whose Youtube Channel is chock full of clear instructions, has good tips on making these rugs.
She has a four-part tutorial on her Channel where she walks you through how to make them from stretchy fabric, like old t-shirts and other jersey material.
To make these rugs, you’ll need lots of fabric strips, and either a safety pin, tapestry needle, or yarn needle.
You can also make one to your own specs, using wire and tape, following instructions from Barri-Jayne.
Take note: It’s important that whatever you’re using as a ‘needle,’ in this case a blunt threading device - a closed safety pin, tapestry needle, or home-made needle – make sure it doesn’t have a sharp end. It must be round.
You’re going to be working with 4 strands of t-shirt 'yarn,' and each strand will have a ‘needle’ for working the strand into the rug in its turn, so you don’t want anything sharp slinging around while you’re braiding.
At some point while you’re working the rug, it might start to curl up at the edges. In Part 1, Erin shows a rug started with cotton sheet yarn, and you can see that it’s starting to warp and buckle because it doesn’t have enough stretchiness to make the turns at the oval ends. She switches to t-shirt fabric and has better luck with her rag rug lying flat.
In the videos below Erin is careful to explain in detail the steps to make braid-in rag rugs.
· Don't miss: Crafting Resources.
Erin shows you that the ends of the strips of jersey have to be different lengths. You will be braiding with lengths of t-shirt yarn and add to each yarn as you go along – you won’t be able to use skeins, because they would get too tangled up.
You’ll have 4 different lengths of yarns being braided together. And you’ll have to add a new strand of yarn to each braid strand as they start to run out. You'll want to stagger where the yarn strand ends are joined together.
Erin demonstrates how you take the outer strand of yarn and braid it so that it’s woven into the three other strands, and looped into the rug that’s being built up from the center out. After each braid, you tug on the strands to get them nicely interlocked.
We see Erin changing a color by adding one strand to another, using the Amish Knot method. You could also sew or machine-stitch two strands of yarn together.
Part 2 shows how the rug begins. Erin chooses three strands of t-shirt or jersey yarn, places them on top of each other at one end, and stitches them together. You can do this by hand or by machine. Make a three-strand braid for about a foot.
You can see that your 3-strand braid has resulted in each piece being folded over. To incorporate the 4th strand, you’ll add it at the end of your foot-long start. You’ll bend it in half, weave it into the 3 strands by going under/over, and then sew or machine stitch this 4th strand to the other strands.
Now you’re set to start the In-Braiding Method. Place your foot-long starter perpendicular to you, with the strands farthest away from you. Separate the strands a bit to form the order they’ll be braided. You’ve got your first row of braids, about a foot long. Now you’re going to make your second row, working towards yourself.
Thread each of your strands into a needle or attach safety pins to the ends.
Erin shows how to In-Braid, reiterating what she demonstrated in the 1st video. It’s a bit harder to make the first few rows, but becomes easier as you go further away from the center.
In Part 4, Erin shows what needs to be done to turn the corner.
So far, Erin’s worked a 3-strand braid going one way for a foot, and then she worked it going the opposite way, incorporating the 4th strand.
Now she’s back at her starting point, and has to turn a corner in order to continue. In order to do that and keep the rug flat, she adds extra stitches, by braiding in the same holes. These extra stitches compensate for the added volume needed at the oval ends so the rug doesn’t buckle. (If you’ve made a crocheted rag rug, you’ve done this at the oval ends.)
T-shirt yarn is floppy, and you have to do a lot of tugging and pulling to get this rag rug to be even and sit flat. But if you’ve got the patience to wrestle the fabric around the first couple of turns, it’ll get easier and you’ll end up with a wonderful rug that will last for years.
When you’ve got your Braid-In Rag Rug at the desired size, it’s time to properly finish it off. This technique does not involve any stitching.
Erin demonstrates how to weave the strands into the rug one yarn strand at a time.
If you'd like to read more about rag rugs, check out How to Make a Rag Rug and How to Make a Toothbrush Amish Rug.
POPULAR POSTS
Follow a tutorial for making a patchworked bag with Sashiko topstitching. | Follow tutorials for how to create traditional Japanese embroidery stitching. | Explore a library's digitized vintage maps, which you can download for free. | Learn from a museum textile curator how to best care for your quilts. |
Learn to make a basket weave pattern quilt from scraps of fabric. | Sisters Lorna and Jill Watt create amazing yarn bomb installations . | Ceramic artists create fantastical structures using magnetic clay. | Learn about a Viking fabric-making technique which pre-dates knitting. |
Follow a tutorial for making a bilum bag - PNG's traditional fabric. | Learn to make a pinhole camera; develop paper film with common items. | Learn about a stretchy fabric made with connected loops. | Free digitized knitting magazines 1800 - now. |
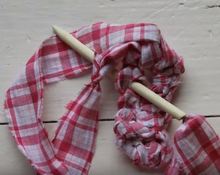

Amish Knot Rug by Lisa Pidgeon screen grab
A really great recycling project is to make a toothbrush rag rug. You don’t actually need a toothbrush…it’s just a left-over term from half a century ago.
You can make a rug that’s the size and the colors you want from old sheets and cotton that no longer serve their original purposes.
It requires ripping, making small cuts, and doing lots of threading loops and pulling them tight. That’s it—no sewing! Below are some written and video instructions to get you started.
You’re going to rip cotton into long strips that are 1 ½ to 2 inches wide, and about 44 inches long. Once you’ve got the hang of it, you can make the pieces as long or short as you want, depending on how much ‘tail’ you can tolerate when doing the threading, and how often you’d like the colors and patterns to change.
You’ll need old sheets or fabric that’s easy to rip. You can aim to have a plain color rug, whether it’s a solid color or several solid colors. Or you can use fabric with patterns – which, when worked into knots that make up your rug, will end up in a mottled pattern.
To make this rug, you’ll be connecting long pieces of scrap fabric together. For your first rug, you should try and gather lightweight cotton that’s flexible and easy to handle.
When you get used to this technique, you’ll be able to mix up fabrics with different weights as much as you like and handle changes in flexibility like a pro.
You’ve got scrap fabric that’s been cut or ripped into pieces that are 1 ½ to 2” wide x 44” long. At each of the two ends of the long strips, you’ll need to cut a small slit. This slit is how you’re going to join one piece of fabric to the next. Using sharp scissors, cut about a ½ inch slit in the end, starting at about ½ inch in from the end. The easiest way to do this is to fold over the end and make a ¼ inch snip on the fold.
Let’s call the 1st strip Strip A, the second Strip B, and so on. To start your rug, you’re going to have to join an anchor strip to another one. To start this process, feed Strip B through an end snipped hole of Strip A. Feed it through just 6 inches or so. Then take the other end of Strip B and put it through the snipped end of Strip B that just got passed through Strip A. Pull it all the way through, and tighten it a bit.
This way of joining two strips - an Amish knot - gives you something that looks like a mini necktie knot.
Sometimes it’s just easier to watch an example…Barri-Jayne Makes has a wonderful video tutorial 'How to Make a Round Amish Knot Toothbrush Rag Rug.'
Watch below:
Barri-Jayne explains that years ago every toothbrush had a hole in the handle. Toothbrushes would be upcycled to become rug-making needles, by cutting off the brush end and rounding it off. So, the fabric would be threaded through the toothbrush hole.
These days you can purchase a rag rug needle, or you can create your own needle from some wire and masking tape, as Barri-Jayne shows us at 1:20 in her video.
Barri-Jayne creates the rug from a center and works her way outward, making circles of knots. You can stop whenever you feel your rug is the size you want.
After you’ve made a few circles by looping fabric through holes, you’ll see that your holes are becoming much bigger than your original holes. You’ll create more holes in the next circle by doubling the number of loops you make in each hole, in order to keep the rug the same mass throughout. You can see this technique at 10:35 in the video. Then, you’ll go back to one loop per hole.
When your strip of fabric becomes short because most of it has been worked into your rug, you’ll add another strip by the snip-and-feed no-sew method of joining two strips together.
Just keep going round and round until you’ve got the size rug you want. To finish the rug off, you’ll tie the two strips together in a square knot, and tuck the ends through several loops on the underside of the rug, just to keep them out of the way and not visible.
Below are two more videos from Barri-Jayne Makes: How to Make an Oval Amish Toothbrush Rag Rug, and Washing Handmade Amish Rag Rugs.
If you're an upcycling or farmhouse-style enthusiast, you might also like The Lost Art of Braid-in Rag Rugs and How to Make a Rag Rug. If you like to repurpose fabric and yarn, you might like our post DIY MIndset.
Amish-Made Goods
Want to explore some hand-made dollhouses, doll clothes, doll quilts, and dollhouse furniture made by Ohio-based Amish craftspersons? To see and purchase, visit our post Amish Made Dollhouses. The sturdy wooden miniatures and cotton doll clothes and quilts are a great addition to any doll collection, and are made to last.
Books
Below are shopping links to some books that would be a great addition to any DIY- and farmhouse-style household. Please note that as an Amazon Associate I earn from qualifying purchases - at no extra cost to you!

This cook book features Amish and Mennonite comfort food recipes, including homemade root beer, Shoofly Pie, Apple Dumplings, Chicken Pot Pie, Rhubarb Jam, and more.
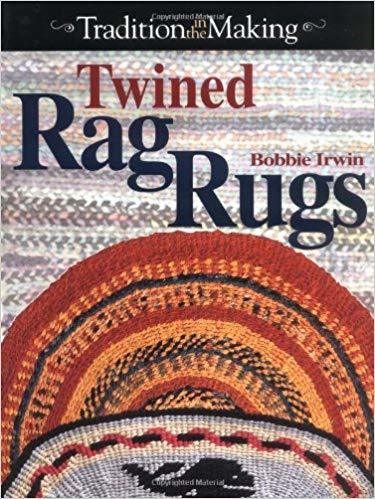
This book will teach you how to create a twined rag rug, using a homemade frame and scrap fabric. It includes step-by-step diagrams and photos for 9 samplers.
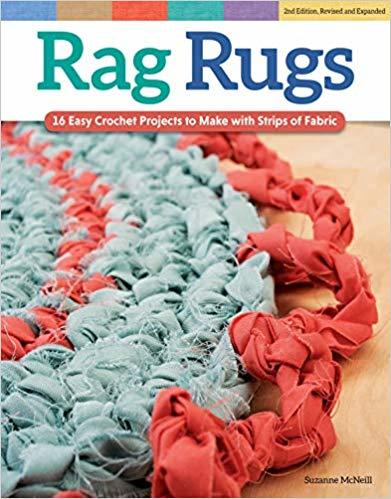
With gorgeous color photographs and clear, straightforward instructions, Suzanne McNeill presents 16 projects to make with strips of fabric. For rafters of all ages and skill levels.
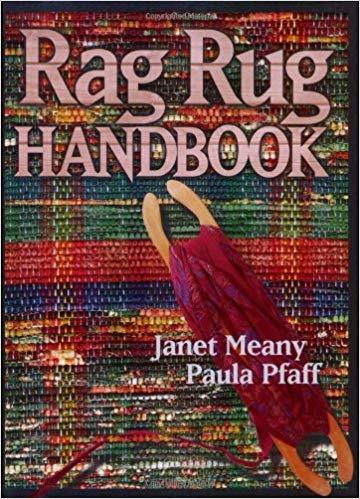
This classic book has everything a weaver needs to know about weaving rag rugs, from basic information to drafts for 20 traditional two- and four-shaft patterns.
Having fun with new and traditional crafts, art, design, DIY, and freebies.
TRENDING & POPULAR
FREE ART BOOKS ONLINE Start your own free collection of art books from three major museums.
HOW TO MAKE AN AMISH RAG RUG There's no sewing required to make this traditional homemade crafted item.
HOW TO MAKE A BORO BAG Learn how to make a stand-out bag using a Japanese patchwork technique and Sashiko stitching.
DISCOVER SASHIKO STITCHING Learn how to make traditional Japanese decorative stitches for quilting, mending, and upcycling.
35,000 FREE KNITTING & CROCHETING PATTERNS Use our easily searchable list to find free patterns by Rowan, Vogue, Lion Brand, Berroco, and more.
'KNIT' LIKE THE VIKINGS Discover an ancient fabric-making technique that's still done today, pre-dates knitting, and doesn't unravel.
BILUM Discover a fabric-making technique used in Papua New Guinea that can be used to make bags and dresses.
The great thing about making a rag rug is that you can create a gorgeous functional handcrafted item that will last many years – and may be a cherished family heirloom – for very little money.
You can use sheets or cotton from clothes that you were going to toss or donate. If you’re looking for certain colors or patterns to incorporate into your rug, you could head out to your favorite fabric store. Or, save money and head to your local thrift store (at my local Goodwill Bin store, I pay for good quality cotton shirts by the pound). Making a rag rug doesn’t require a lot of investment up front – as long as you can get your hands on approximately 10 yards of cotton or cotton blend fabric.
You’ll need to either cut or tear strips of fabric to get started (see How to Make an Amish Rag Rug if you need instructions). If you cut the fabric you’ll have to make sure you’re cutting straight lines, either along the selvedge or against the selvedge.
You don’t want to end up with a higgly-piggly cut or a diagonal cut if you can help it because then you’ll have compromised the strength of your fabric in the first case, and made it too stretchy in the second case.
Unless you want that extra added texture in your rug to pop up now and then, you’ll want to get rid of the selvedge. The selvedges are the long sides of the fabric. You’ll want to make a scissor snip close to one of the selvedges, then grab the 2 parts where the snip’s been made, and just tear. You’ll be tearing with the weave of the cotton, so you’ll get a straight line.
Measure 1 ½ to 2 inches from that tear line, make a scissor snip, and tear. Keep measuring and tearing until you’ve torn the entire piece of fabric into strips.
If you want to try your hand at working with a double-length long strip, then you can do a simple trick at the end of the fabric. Don’t rip all the way – rip to about an inch from the end, and make a snip 1 ½ to 2 inches to start the next width, and rip to the very end. You can see this technique at 3:02 in the video.
You’ll most likely have random threads that are hanging from the sides of the strips. You’ll want to gently pull them away from your strips. The strips will have these raw edges, but they’re strong, and will be even stronger when they’re turned into looped knots.
Gather your strips into balls, or wrap them into skeins. When you run out of material, you’re going to have to join the next strip or skein by making an Amish Knot, aka Scandinavian Knot. For quick instructions, refer to the first video in our How to Make an Amish Rag Rug post. You'll find instructions at the timestamp 4:00 - 5:25.
If you’d like, you can always join your pieces by stitching them together on a machine, either by overlapping two pieces, or by making a seam. If you’ve got a rotary fabric cutter, see-through ruler, and self-healing cutting mat, you can pretty easily make a continuous piece of sheet yarn using a technique you can see in Erin Halvorsen’s video 'Learn to Cut Sheet Yarn in One Long Strip,' below.
In the Amish Toothbrush Rag Rug, Barri-Jayne uses 4 loops to get her round rug going. Here, Anna Dearing uses 21 initial stitches to get her oval rug going.
Barri-Jayne had to add extra loops when her rag rug holes got too big. Anna adds crochet stitches at the ends of her ovals so the rug doesn’t buckle.
When you’re finished, you’ve got something that’ll be warm underfoot in the wintertime, and will be durable. You can throw it in the washer and dryer multiple times, and it’ll just keep its shape.
Erin shows us how to make a beautifully colored crocheted rag rug in her 2-part tutorial:
For making different types of rag rugs, read our posts The Lost Art of Braid-in Rag Rugs and How to Make a Toothbrush Amish Rag Rug. You might find our post Crafting Resources helpful - with lists of free resources and How-To's.
Having fun with new and traditional crafts, art, design, DIY, and freebies.
TRENDING & POPULAR
FREE ART BOOKS ONLINE Start your own free collection of art books from three major museums.
DISCOVER SASHIKO STITCHING Learn how to make traditional Japanese decorative stitches for quilting, mending, and upcycling.
BILUM Discover a fabric-making technique used in Papua New Guinea that can be used to make bags and dresses.
HOW TO MAKE AN AMISH RAG RUG There's no sewing required to make this traditional homemade crafted item.
35,000 FREE KNITTING & CROCHETING PATTERNS Use our easily searchable list to find free patterns by Rowan, Vogue, Lion Brand, Berroco, and more.
HOW TO MAKE A LINOLEUM BLOCK PRINT Watch how-to videos for beginners explaining the basic step-by-step process of making a linoleum block print.
HOW TO MAKE A BORO BAG Learn how to make a stand-out bag using a Japanese patchwork technique and Sashiko stitching.
'KNIT' LIKE THE VIKINGS Discover an ancient fabric-making technique that's still done today, pre-dates knitting, and doesn't unravel.
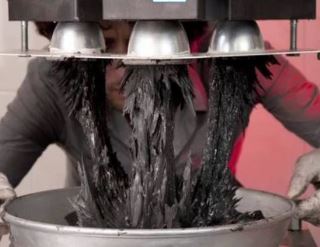
MAGNETIC CLAY CERAMICS Ceramic artists working with magnetic clay can play with the forces of nature to create fantastical structures.