Yarn and Knitting: The Basics
Let's walk through what it takes to become a knitter, one step at a time. We'll learn about abbreviations and how to read a pattern. We'll explore how to pick the right needles and yarn for any given project. And we'll see over-the-shoulder videos of knitting in action, from simple to advanced stitches.
Please note that this post has some links that lead to knitting tools and accessories that you might find helpful. As an Amazon Associate I earn from qualifying purchases (at no extra cost to you).

Let's Start at the Beginning...
There are several things you’ve got to puzzle out, but with a little help you’ll be well on your way to knitting up a storm.
Let’s figure out what tools you need, how to read a pattern, get a heads-up about the terms and abbreviations you’re going to come across, and learn the basics to get you started.
First things first. If you're antsy and want to jump ahead to watch how to knit, Row House Yarn has KnitSchool, which are a series of free, easily-digestible videos filmed from the view of the knitter.
But, because yarn can be a fussy material to work with, your first knitted piece will probably not match what you visualized. So, how about starting out small to get the hang of what it feels like to deal with making good stitches? Remember - slow and steady wins the race!
How about knitting a small scarf, baby blanket, doll blanket, dog blanket, or potholder? Okay, let’s get started…

Choosing the Right Needles for Your Project
Needles come in three types: straight with one pointed end and one capped end; circular; and straight with 2 pointed ends (double-pointed).
The straight needles with the capped end are used to make flat pieces – you knit to the end of a row, turn your needle around, and knit the next row. So, every other row being knit is the front side or the back side.
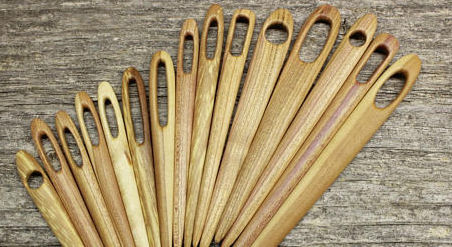
Needles are your tools, so it’s important to get the tools which work the right way and feel good in your hands. Needles are made of metal, plastic, wood, and bamboo. One day you’ll most likely have a collection of needles, and you’ll know exactly which ones to use for your project.
Yes, that day will come and you’ll be super-happy.
Needles come in sizes based on thickness and length. For any particular project, you’ll want needles that aren’t too long (making them unnecessarily unwieldly) and aren’t too short (forcing you to work with bunched up stitches). You’ll find the sweet spot for size as you get used to knitting.
Personally, I love metal needles. I love the clacking sound they make, and I like that the yarn can be eased up and down the needles a little bit because of the slippery nature of the metal. But some people really dislike that metal needle clacking sound.
Bamboo and wooden needles are really helpful because yarn sticks to them a little bit.
Straight needles usually come in lengths of 7”, 10”, 12”, and 14”.
Circular needles are great for big projects (like blankets) and projects in the round (like hats, infinity scarves, and some sweaters). They come in several sizes, with different lengths of wire or nylon cord extending between the needles. Common circular needles have wire lengths of 16”, 20”, 24”, and 32”.
Double pointed needles (DPNs) are used for projects that require binding off of stitches, like mittens or socks – projects that need to be knit in the round but which are too small for circular needles. DPNs come in many different sizes, in sets of 4 or 5 needles.
When knitting with DPNs, you’ll need to be proactive in preventing stitches from slipping off the ends. You can remedy this by putting a needle point cover over one or both ends of the needles to keep the stitches from slipping off.
The size needle you’ll be using for any project is going to be determined by the yarn you’re using for that project. As a general rule of thumb, the thicker the yarn you’re using, the thicker your knitting needles are going to be. Most patterns suggest a needle size, and most packaged yarns suggest a needle size.
When you start your project, you’ll want to make sure your gauge (which means the tension you’ve knitted – or, the number of stitches per inch) matches the pattern.
How on earth do you do that, you ask?
Hang in there…a really useful link about knitting gauge is coming up.
But, just so you know, you’ll want to knit a practice square for your project. If your number of stitches is off – if your stitches are too tight or too loose – you’ll need to change your needle size for that project. If your practice square is too tight, you’ll want to use the next bigger size needles. If it’s too loose, you’ll want the next smaller size needles.
In general, you’ll know what needle size to use based on the pattern you’re using or the size suggested for the yarn you’re using, stated on the yarn package.
A heads-up: American and European needles are sized differently. American needles are numbered between 0 and 50, UK/Canadian needles are numbered 14 to 000, and European needles are in millimeters, from 2.0mm to 25.00 mm.
Medium-sized needles are 6, 7, or 8. Any of these sizes would be good for a beginner project, using them with medium-weight yarn, and a medium length.
Here's a needle size conversion chart:

Double-Checking That You've Chosen the Right Needles and Yarn Sizes For Your Project...What is Gauge and Why is it Important?
Usually at the beginning of a pattern you’ll see a note about gauge. Gauge measures tension.
Any pattern is based on how many stitches there are per inch. Gauge is the number of stitches in one inch of knitting. Knitting has four variables – the weight of the yarn, the size of the needles, the particular stitch, and the knitter.
We’re humans, not machines, so even if we all use the same needles, yarn, and stitch, our knitting will be a bit different from others because some of us knit tighter, and some knit looser. It all comes down to tension, and we need to adjust our tension – by making adjustments to the yarn or needles - before we follow a pattern.
The gauge stated in a pattern tells you how many stitches and rows you’ll need per inch so that your project will end up the intended size. Before you start your project, you’ll need to knit a sample square using the needles and yarn you intend to use in order to compare the number of stitches you’re knitting per inch with the number of stitches per inch the pattern expects you to knit.
This sample is called a gauge swatch.
Your gauge swatch will show you whether you can go ahead and start knitting your project, or whether you have to change your needles or yarn before you start so that the project ends up the way the pattern-maker intended.
Below is a super helpful explanation of measuring gauge by VeryPink Knits, one of our favorite online knitting teachers:
To create your gauge swatch, use a stockinette stitch (or a garter edge with a stockinette middle) – knit one row, purl the next row, and repeat- unless the pattern specifically states to knit a different pattern. You’ll want to make a 6 x 6 inch square, loosely binding off the end.
Next, take the time to wash and block dry the square before you count the stitches. That way, you’ll know that you can safely wash and wear your item after it’s made, and that it’ll be the right fit according to the pattern you’re making.
You’ll measure 4 inches of that washed square with a hard ruler, tape measure, or gauge knit sizer ruler, away from any curled edges. Count the number of stitches within the 4 inches.
Your pattern will let you know how many stitches you’ll need in 1 inch or in 4 inches.
If your gauge swatch has less the number of stitches per inch than the pattern calls for, then your knitting is too loose for the pattern and you need to use the next smaller size needles, or heavier yarn.
If your gauge swatch has more stitches than you should have, then your knitting is too tight, and you need to switch to the next larger size needles, or lighter yarn.
An exception to this rule: you have some wiggle room in your gauge depending on the project. If you’re knitting something that doesn’t have to be precise – a stuffed toy, for example - and you’re okay with your project not matching the dimensions of the pattern, then you can be a little lax in trying to match the pattern’s gauge. But if you want a more precise match, you’ll be glad you sorted out the gauge before putting in hours’ worth of knitting.
Yarn
So many choices! See some bestsellers here.
Wool, acrylic, cotton…
Let’s look at the yarn label and what it tells us.
Yarn labels will tell you the Yarn Weight (thickness), Physical Weight (ounces/grams), Length (Yardage), Color, Lot Number, type of yarn (wool, acrylic, cotton, etc.), gauge, washing instructions, and perhaps suggested needle size.

Patterns will tell you how much yarn you’re going to need. So, there are 2 factors – you’re going to have to do a little arithmetic to make sure you’re going to have enough of the yarn you want. And, if you’re making something that’s one color, you’re going to want all your yarn to be from the same dye lot.
If you run out of yarn and go back to buy more, there’s no guarantee that you’ll find the same color that’s also from the same dye lot. So, it’s best to be sure and do the arithmetic to figure out how many skeins you’ll need before you begin, and purchase them all at once.
Otherwise, there’s a chance that if you purchase yarn at two different times you might not be able to get them from the same dye lot, meaning that you might have to get some yarn that's from another dye lot, and you might be able to see two different shades of a color in your finished item.
The Gauge listed on the package lets you know the manufacturer’s recommendation for the size knitting needle or crochet hook to use based on the yarn’s thickness, with the number of stitches you'll get per inch.
You might want to hang on to the yarn care/launder guide for each project, or make a note of it in a project notebook. It’ll be helpful to you when you need to clean your item. And, it’ll be valuable information to include if you’re giving away or selling your hand-crafted item.


Needles and Yarn Weight
The size knitting needles you use for any project will depend on the yarn you’d like to use. The finer the yarn, the smaller the needle circumference. Fine yarns require smaller stitches – otherwise, you’d have huge gaping holes between stitches. Unless the pattern calls for a design of loosely-knitted fabric, your ultimate knitted piece should form a solid knitted fabric, which is achieved by getting the needles and yarn well matched.
Here's a handy chart from the Craft Yarn Council (part of a download available on their site):

Cracking the Codes
You’ll need to learn the abbreviations and terms used in patterns. It will take time to get to the point where you’re able to decode a pattern with ease and confidence. Whenever starting a project, you should read the pattern from start to finish before picking up the needles – maybe even more than once.
How about printing out a Knitting Abbreviation Master List from the Craft Yarn Council and keeping it handy when you’re first tackling this new crafting language?
And keep in mind that each pattern or pattern book may have special definitions – apart from these standard ones below. Just keep your eyes out for these in your pattern.
You’re going to inevitably pause in your knitting, so have a plan for keeping track of where you left off in the pattern – you’ll thank yourself for that!
[Note: you might want to keep your stitches from falling off your needles by using knitting needle point protectors/stoppers.]
List of Abbreviations
Below the abbreviation list is a terms list, and below that are links to videos which show you what’s described in the abbreviations and terms (the most commonly used terms are bolded).
[ ] work instructions within brackets as many times as directed
( ) work instructions within parentheses in the place directed
* * repeat instructions following the asterisks as directed
* repeat instructions following the single asterisk as directed
" inch(es)
alt | alternate |
approx | approximately |
beading | Adding beads by threading them directly into yarn being worked |
beg | Begin/beginning |
bet blocking | between The process of gently shaping your knitted item by dampening the fibers and laying the item flat |
BO | bind off [cast off] |
CA CB cab | color A color B cable |
CC | contrasting color |
cdd | centered double decrease (see S2KPO) |
ch | chain |
ch-sp | chain space |
cl | cluster |
cm cn | centimeter(s) cable needle |
CO | cast on |
colorwork | knitting with several colors at once |
cont | continue(ing) |
dc | double crochet |
dec | decrease/decreases/decreasing |
dpn | double pointed needles(s) |
est | established |
fl foll | front loop(s) follow/follows/following |
g | grams |
grafting | also called weaving or kitchener stitch, grafting joins two open edges stitch by stitch using a yarn needle |
i-cord | an i-cord is a tube knitted in the round using two double-pointed needles. |
inc | increase/increases/increasing |
incl | including |
inst | instructions |
K or K | knit |
k tbl | knit through back of loop |
k2tog | knit two stitches together |
kfb | knit into front and back of stitch |
Kitchener Stitch | also called weaving or grafting, the kitchner stitch joins two open edges stitch by stitch using a yarn needle |
knitting in the round kwise | use Double Pointed Needles (DPNs), 1 long circular for Magic Loop, or 2 circulars knitwise |
LH LLI lp(s) | left hand (Left Lifted Increase) with left needle, lift the stitch below the stitch just worked, and knit it. 1 stitch increased. loop(s) |
m m | marker meter |
MB | make bobble |
MC | main color |
m1 or M1 | make 1 knit stitch: insert left needle, from front to back, under strand of yarn which runs between last stitch on left needle and first stitch on right needle; knit this stitch through back loop. 1 stitch increased. |
M1L | [Make 1 Left] insert left needle, from front to back, under strand of yarn which runs between next stitch on left needle and last stitch on right needle; knit this stitch through back loop. 1 stitch increased |
M1P or m1 p-st | make 1 purl stitch. |
M1R | [Make 1 Right] insert left needle, from back to front, under strand of yarn which runs between next stitch on left needle and last stitch on right needle; knit this stitch through front loop. 1 stitch increased. |
mm | millimeter(s) |
mult | multiple |
opp | opposite |
oz | ounce(s) |
p or P | purl |
p2tog | purl two stitches together |
pat(s) or patt[s] | pattern[s] |
pfb | purl into front and back of stitch |
pm pop | place marker popcorn |
prev psso | previous pass slipped stitch(es) over |
rem | remaining |
rep | repeat |
rev St st | reverse stockinette stitch |
RLI | (Right Lifted Increase) with right needle lift the stitch below the next stitch, and knit it. 1 stitch increased. |
RS | right side(s) |
Rnd(s) | round(s) |
S2KPO | slip 2 sts together as if to knit, knit next, pass 2 slipped sts over |
sc | single crochet |
SKP | slip 1 stitch as if to knit, knit 1 stitch, pass slipped stitch over |
SK2P | slip 1 stitch, knit 2 together, pass slipped stitch over |
SSK | slip the next 2 stitches, 1 by 1, knitwise; insert the tip of the left needle from left to right into the fronts of those 2 sts and knit them tog. 1 st decreased. |
SSP | slip the next 2 stitches as if to knit; return these stitches back to the left needle, then purl those 2 sts together through the back loop |
sl | slip |
slp | slip one as if to purl |
sl st | slip stitch |
sp | space |
St(s) Or st(s) | stitch(es) |
St st | stockinette stitch/stocking stitch |
tbl | through back of loop(s) |
Three-Needle Bind Off | hold both pieces of knitting with right sides together. |
tog | together |
WS | wrong side(s) |
w&t | Wrap & Turn [used when working short rows] To wrap and turn on a RS row, knit to point specified in pattern, bring yarn to front of work between needles, slip next stitch to right-hand needle, bring yarn around this stitch to back of work, slip stitch back to left-hand needle, turn work to begin purling back in the other direction. To wrap and turn on a WS row, purl to point specified in pattern, bring yarn to back of work between needles, slip next stitch to right-hand needle, bring yarn around this stitch to front of work, slip stitch back to left-hand needle, turn work to begin knitting back in the other direction. Working Wraps Together with Wrapped Stitches: When working a RS row: Knit to wrapped stitch. Slip next stitch from left needle to right needle, use tip of left needle to pick up "wrap" and place it on right needle, insert left needle into both wrap and stitch, and knit them together. When working a WS row: Purl to wrapped stitch. Slip next stitch from left needle to right needle, use tip of left needle to pick up "wrap" and place it on right needle, slip both wrap and stitch back to left needle, purl together through back loops. |
working in the round | use your choice of DPNs, 1 long circular (magic loop) or 2 short circulars |
Wyif Wyib | with yarn in front with yarn in back |
yd(s) yfwd YO yrn yon | yard(s) yarn forward yarn over yarn around needle yarn over needle |

List of Knitting Terms
as established
In other words, keep knitting the pattern or series of steps that the pattern has instructed.
as if to knit
Knitwise- begin knitting the next stitch as though you’re going to knit it.
at the same time
Here, you’ll be working two sets of instructions. Keep working the instructions you’ve been following, and also work the additional instructions right after you see “at the same time.”
Example: “Continue working pattern as set and at the same time begin increasing 2 sts at the beginning of every right side row...” means…continue creating new stitches as per the instructions you’ve been following AND start to increase 2 stitches at the beginning of every right side row as well.
back of work
When you’re holding the needles, the “back of work” is the side facing away from you.
BO = Bind off
Binding off is taking off stitches from your needle. It’s sometimes called Casting off, and it’s how you finish most knitted pieces.
block
Blocking is a finishing technique. You lay your finished pieces out flat and dampen or steam them. This helps to form and shape them and also helps define intricate stitch patterns.
CO = Cast on
Casting on is the beginning of each knitted piece – it’s putting the first stitches onto a needle.
cont in patt
Continue in pattern – Continue working the pattern as previously instructed. In other words, keep knitting the way you were originally.
Dec = decrease
To Decrease is to eliminate one or more stitches. The most common way to decrease is to work two stitches together as one.
ending with RS row
The last row to work will be a right side row, so you might see instructions that say: Continue working as established ending with a right side (RS) row.
ending with WS row
The last row to work will be a wrong side row, so you might see instructions that say: Continue working as established ending with a wrong side (WS) row.
every other row
These instructions are for alternate rows. Example: Continue increasing stitches every other row or continue increasing stitches on every alternate row means you’ll need to increase on one row, work a regular row without increasing, and then increase on the next row, not increase the following row, etc.
frogging
Unraveling or ripping out the work.
front of work
This is the side that’s facing you when you hold your needles. It can be the right side or the wrong side of the work.
gauge
Gauge is a measure of tension, or the number of stitches and rows per inch.
Inc = Increase
To increase is to add one or more stitches.
join yarn
Adding a new ball or section of yarn.
knitwise
Begin knitting the next stitch as though you’re going to knit it.
K the knits, P the purls
This is a common way to describe a pattern of knit and purl stitches. For brevity, a pattern might instruct you to repeat every row knitting the knit stitches and purling the purl stitches as previously instructed.
Left Front (or Left Sleeve)
The piece that will be worn on the left front and left arm of your body.
Maintain pattern as established
You’ll see this term used when you are working a pattern stitch and are increasing - or decreasing - at the edges. You’ll keep the center part in the pattern as you have already set it up, and will add - or subtract - stitches at each end without disturbing the pattern.
on alternate row(s)
Work the instructions every other row.
purlwise
Begin knitting the next stitch as though you’re going to purl it.
Rep = repeat
To repeat is to do the same thing again for the number of times stated in the pattern.
reverse shaping
This is a term often seen in sweater patterns, where the right front and left front are the same, except that the shaping needs to be reversed. You’ll work both fronts identically, only you reverse the increases and decreases (the shaping). If one front was decreasing stitches at the beginning of the row, then one front would be decreasing stitches at the end of the row.
Right Front (or Right Sleeve)
The piece that will be worn on the right front and right arm of your body.
RS
This is the finished side – the one that will be visible.
selvage or selvedge
Selvedges are the edge stitches at both ends of your row of knitting.
Sl = Slip
Slip a stitch or a number of stitches from one needle to the other, without working it.
small (medium, large)
This format in a set of instructions is a common method of showing changes in a knitting pattern for other sizes. Small is usually first, and then other sizes are listed in parentheses. It could also read as: 36 (38, 40, 42). Throughout the pattern you’ll follow directions for your specific size.
For example - instructions for size small may be to cast on 60 stitches, for a size medium to cast on 66 stitches, and for a size large to cast on 72 stitches. The instructions would look like this: CO 60 (66, 72) sts.
tink
Tink - knit spelled backwards - is the term knitters use if they make a mistake. It means unknitting.
Tog = together
Work 2 or more stitches together, forming a decrease.
work even
To “work even” means to continue knitting without making any increases or decreases.
WS
Wrong Side, or the side that won’t be visible when the project is finished.
YO = yarn over
Take the yarn over the needle.

Image via UK Hand Knitting http://www.ukhandknitting.com/
Decoding the Abbreviations and Terms
Here’s an example of the type of instructions you’ll see in a pattern:
CO 12 sts.
CO means cast on; sts means stitches. So, you’ll first make a slip knot on one needle, then cast on 11 more stitches on the same needle (in knitting, the slip knot always counts as a stitch). You’ll have 12 stitches in total.
Please note: In crochet instructions, the slip knot never counts as a stitch.
Row 1 (RS): Knit.
Row 2 (WS): Purl.
On Row 1, which is the right side of the piece (RS), you’ll knit all 12 stitches on the needle. Then for Row 2, the wrong side (WS) of the piece, you’ll purl each stitch.
Then you might see instructions like:
Rep Rows 1 and 2 until piece measures 4” from the beginning, ending with a WS row.
That means that you’ll keep repeating the pattern already started – knitting Row 1 (a knit row) and Row 2 (a purl row), in a sequence until the piece measures 4” from the cast-on row.
To measure, place your piece on a flat surface and do not stretch it out. Place the end of a ruler or tape measure against the needle, and measure down to your initial cast-on row. If your work doesn’t measure what is specified, just keep repeating the rows. Since the pattern says to end with a wrong-side row, that means that the last row you work should be a purl (WS) row.
When you repeat working a knit row and then a purl row for a number of rows, you’re creating a knit pattern called stockinette stitch, abbreviated St st. When a pattern instructs you to work in St st, it means that you’ll alternate knitting a knit row with a purl row.
If you were to follow instructions that say:
CO 12 sts.
Row 1: Knit.
Rep Row 1 until piece measures 4” from the beginning.
Then you’ll have created a garter stitch. There’s very little difference between the right side and the wrong side when you simply knit every row, without any purling, and the item is basically reversible.
Decoding the Symbols
Asterisks, Parentheses, and Brackets
Symbols are used as shortcuts in knitting patterns. If a pattern calls for a series of steps to be repeated several times across a row, then a shortcut for writing out these steps over and over again for each row, an asterisks (*) is used to indicate the repeats.
For example:
CO 18 sts.
Row 1: *K2, P2; rep from * across, end K2.
These instructions are asking you to knit the first two stitches, then purl the next two stitches; then you will knit 2, then purl 2, again, and repeat the steps following the asterisk all across the row until the last two stitches, which you will knit.
Row 2: *P2, K2; rep from * across, end P2.
Here you’ll be purling the sts you knitted on the preceding row, and knitting the sts you purled on the preceding row. Sometimes patterns will simply say: knit the knit stitches and purl the purl stitches.
Brackets [ ] or parentheses ( ) function like asterisks – except that you’re repeating a series of specified stitches for a certain number of times. The number immediately following the brackets instructs you how many times to do the step. For example:
* K5, (p1, k1) twice, p1; repeat from * to end of row… means that, you knit 5, then you purl 1 and knit 1 two times, followed by another purl 1, and then you repeat this entire sequence across the entire row.
A Helpful Stitch Chart Download from The Craft Yarn Council
Stitch charts in knit and crochet patterns are being used more and more as an addition to or in place of words to describe a pattern stitch. They’re visual shortcuts.
The Craft Yarn Council is working towards standardization, and the .pdf download available on their website lists what the Council considers to be the clearest and easiest to both render and read. Keep these symbols handy, but always refer to and defer to the pattern key for any symbol definitions.

Tools
When I venture into trying out a new craft, I’m really hesitant to go spend much money because I really don’t know whether I’ll take to it, and I don’t want to feel bad about purchasing *stuff* that’s just going to sit in my to-do pile.
But if you take to knitting, there are some really helpful tools and accessories that might seem like a good investment for your new passion. Add to your stash of knitting goodies as you become a dedicated knitting master! The links below are to Amazon, where you'll see several best-selling choices for each category:
- Yarn Storage Organizer
- Crafting Organizers and Storage Containers
- Circular Knitting Needles
- Interchangeable Circular Needle Set
- Blunt Tip Bent Needles
- Knitting Point Protectors
- Knitting Row Counter
- Knitting Stitch Markers
- Cable Needles for Knitting
- Tape Measure for Sewing
- Scissors
- Stitch and Row Gauge
- Tapestry Needle
- Stitch Holders
- Case for knitting needles
- Wool Needles
- Crochet Hook
- Knitting Pattern Books
- Best Selling Knitting Books
- Ball winder
- Double pointed needles
- Blocking Pins for Knitting
Whew! Now you’re equipped with understanding the terms and what needles and yarn you’ll need to gather.
You understand the abbreviations and you know you can decode a knitting pattern.
Next, you’ll need to learn to start the actual stitching – and practice, practice, practice.
You’ll want to start small and give yourself lots of freedom to make mistakes, because that’s how you’re really going to learn. Remember, everyone has to rip out mistakes sometimes! It's part of what makes you a knitter.
You can refer to written instructions, videos, or both – whatever works best for you.
Helpful video tutorials, from beginning to advanced:
Here are some quick links to Row House Yarn's tutorials:
And, don't miss our posts with video instructions and other helpful information: How to Knit - A Beginner's Beginning, Knitting Videos, and Knitting Articles.
One Final Word: Free Resources and a Social Platform
Welcome to the club! There are over 50 million knitters worldwide, and now you're one of them. Yay!
If you love flipping through magazines for ideas and inspiration, you can check out knitting and crocheting patterns spanning from the Victorian Age to the present via the free site The Magazine Rack, part of the Internet Archive.
My hope for you is that you’ll have fun knitting. Besides knitting at home in your favorite chair, I hope you'll join Ravelry (a social platform for knitters). You can also find a local knitting group to join through facebook, a yarn store, a learning community, a charity knitting group, or your own circle of family or friends.
You might enjoy swapping yarn and patterns with others in your group!
For the next step, check out How to Knit and 35,000 Free Knitting Patterns.
If you're curious about which knitting books are the most popular and which knitting techniques are trending, check out our curated list of 25 Best Selling Knitting Books. Click through to see what readers are saying about these beloved books.
We have an overall list of Crafting Resources which includes links to freebies and low-cost classes.
Good luck with all your knits and purls!
xoxo
POPULAR POSTS
Follow a tutorial for making a patchworked bag with Sashiko topstitching. | Follow tutorials for how to create traditional Japanese embroidery stitching. | Explore a library's digitized vintage maps, which you can download for free. | Learn from a museum textile curator how to best care for your quilts. |
Learn to make a basket weave pattern quilt from scraps of fabric. | Sisters Lorna and Jill Watt create amazing yarn bomb installations . | Ceramic artists create fantastical structures using magnetic clay. | Learn about a Viking fabric-making technique which pre-dates knitting. |
Follow a tutorial for making a bilum bag - PNG's traditional fabric. | Learn to make a pinhole camera; develop paper film with common items. | Learn about a stretchy fabric made with connected loops. | Free digitized knitting magazines 1800 - now. |
