Archive

Category Archives for "Sewing"

May Morris


May Morris

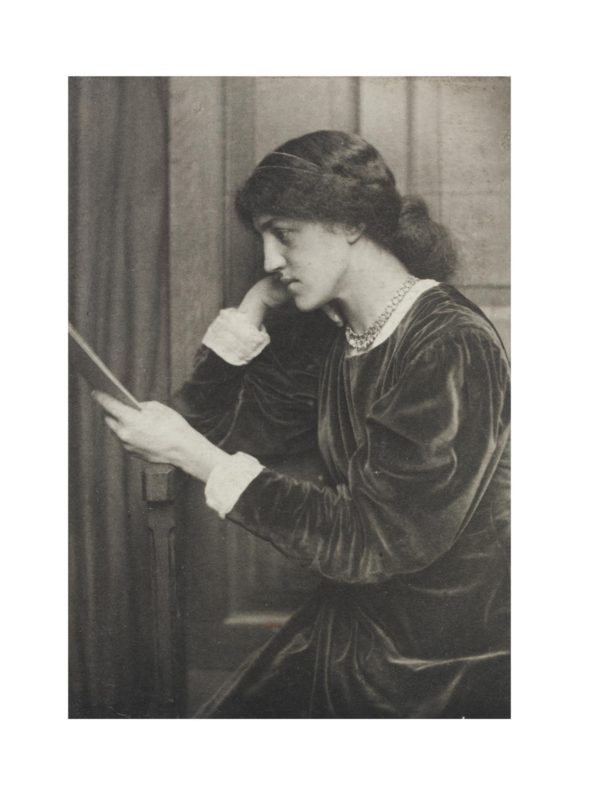
Photo portrait of May Morris

Portrait of May Morris by Frederick Hollyer, circa 1890. Photo via © Victoria and Albert Museum, London
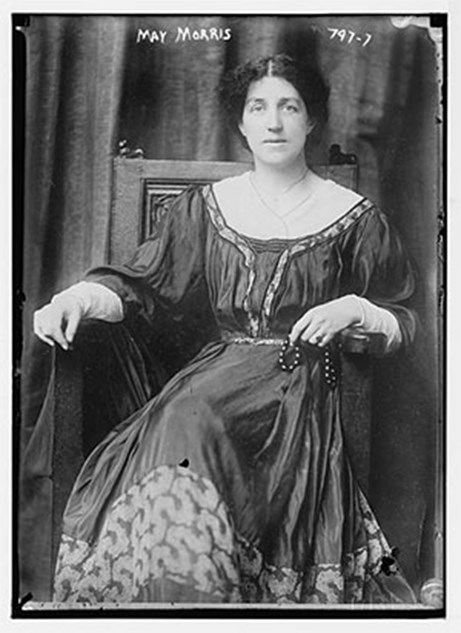
May Morris (1862 - 1938) and her father William Morris (1834 – 1896) were both significant figures of the British Arts and Crafts Movement. While William Morris's place in art history is well established, May's place is less well known. This is changing, thanks to a special exhibition of her work that was organized by the William Morris Gallery, and two recently published books on her life and work.

May was born into a creative family, setting the tone for her life's work. William Morris is known for his involvement in the Arts and Crafts Movement. The Movement was focused on hand-made and hand-crafted items, rejecting the mass produced products of the Victorian period. Morris is widely acknowledged for his masterful designs which feature images of organic growth - of leaves, branches, and flowers. He is also known as a craftsman, designer, poet, printer, socialist, novelist, and environmentalist. His legacy remains important today.

Jane Burden Morris, May's mother, was an embroiderer. She was also a muse and a model to her husband and to Dante Gabriel Rossetti, the English painter, poet, and illustrator who founded the Pre-Raphaelite Brotherhood. Elizabeth Burden, May's aunt, was an embroiderer and teacher.  
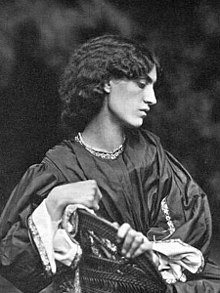
Portrait of Jane Morris by John Robert Parsons, copied by Emery Walker Ltd., July, 1865.
From the series copied by Emery Walker Photo via National Portrait Gallery

Portrait of William Morris by Frederick Hollyer, 1888

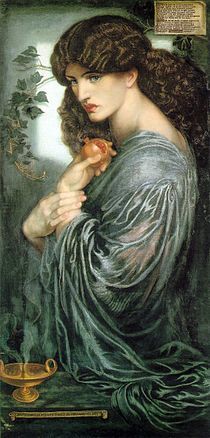
Jane Morris painted by Dante Gabriel Rosetti as Proserpine (1874)

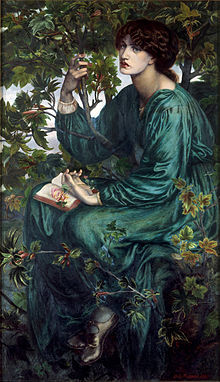
Jane Morris painted by Dante Gabriel Rossetti –The Day Dream (1880)

In 1861, William Morris founded the firm Morris, Marshall, Faulkner & Co., along with the artists Edward Burne-Jones and Dante Gabriel Rossetti, the architect Philip Webb, and others who were responding to the shoddy practices of much of Victorian manufacturing. Morris designed wallpaper, fabrics, tapestries, furniture, and stained glass windows. He assumed total control of the company in 1875, and renamed it Morris & Co.

May Morris was born in 1862. Her mother and aunt taught her to embroider; her father taught her textile design. At age 16, she enrolled at the National Art Training School (NATS) in South Kensington, London - the precursor of the Royal College of Art. She was part of the first generation to study crafts in art schools such as the NATS. Her focus in school was on textiles and embroidery, with a special interest in Opus Anglicanum - a form of fine needlework developed in medieval England that was used primarily for making church vestments.
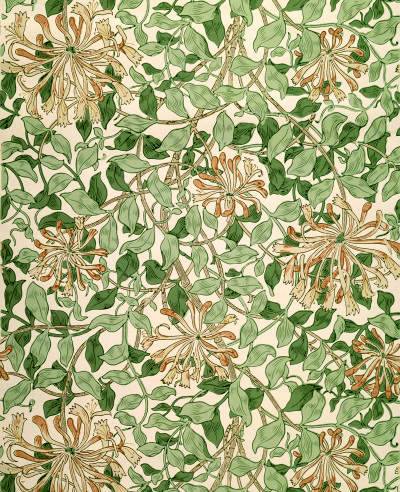
'Honeysuckle' Wallpaper designed by May Morris, 1883. Woodblock print on paper; hand-printed wallpaper decorated with honeysuckle. Printed by Morris & Co., hand-printed by Morris & Co., 1883.  Photo via © Victoria and Albert Museum, London
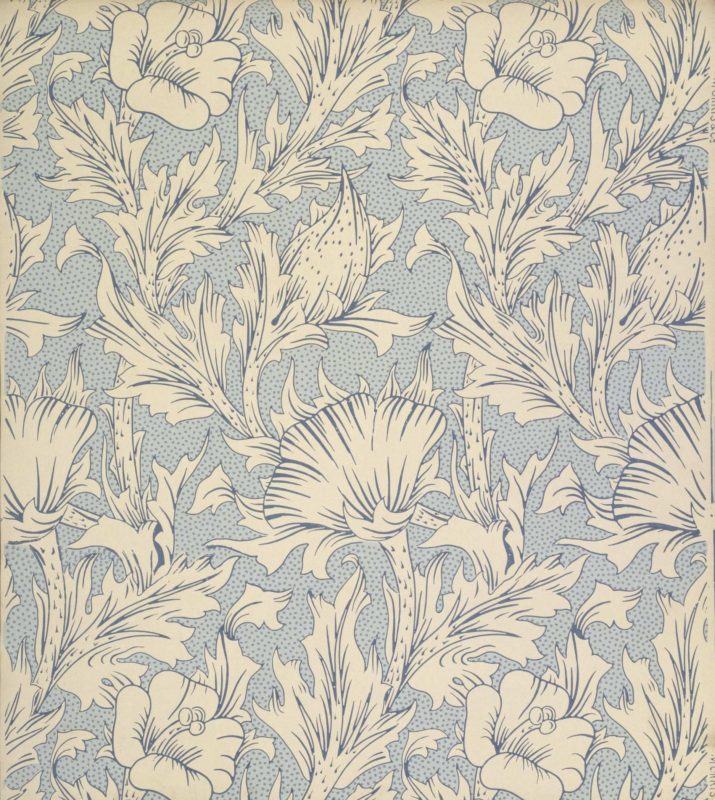
Specimen of 'Horn Poppy' wallpaper, a design of poppy flowers and foliage; Color woodblock print on paper; Designed by Mary (May) Morris; Published by Morris & Co.; Printed by Jeffrey & Co.; Part of a pattern book of Morris & Co. patterns (E.633-858-1915); England; 1885.  Photo via © Victoria and Albert Museum, London
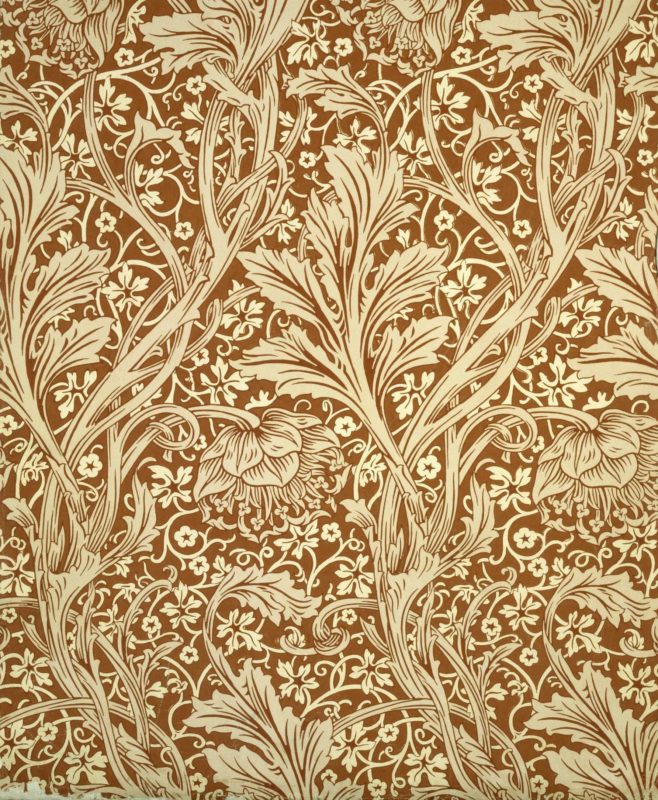
Arcadia wallpaper designed by May Morris

Designed by May Morris: Specimen of 'Arcadia' wallpaper, a pattern of intertwined flowers and foliage, cream and brown; color woodblock print, on paper via Mary (May) Morris; Part of 'Volume 2', a pattern book containing 27 Morris & Co. patterns from 1882-96 (E.530-608-1919); England; ca. 1886. Height: 68.5 cm size of volume, Width: 53.3 cm size of volume.  Photo via © Victoria and Albert Museum, London

Arts and Crafts in the Victorian Age

The Arts and Crafts Movement flourished in Europe and North America between about 1880 and 1920. 

“The Arts and Crafts movement was an international trend in the decorative and fine arts that developed earliest and most fully in the British Isles and subsequently spread across the British Empire and to the rest of Europe and America.

Initiated in reaction against the perceived impoverishment of the decorative arts and the conditions in which they were produced, the movement flourished in Europe and North America between about 1880 and 1920. In Japan it emerged in the 1920s as the Mingei movement. It stood for traditional craftsmanship, and often used medievalromantic, or folk styles of decoration. It advocated economic and social reform and was anti-industrial in its orientation. It had a strong influence on the arts in Europe until it was displaced by Modernism in the 1930s, and its influence continued among craft makers, designers, and town planners long afterwards.

The term was first used by T. J. Cobden-Sanderson at a meeting of the Arts and Crafts Exhibition Society in 1887, although the principles and style on which it was based had been developing in England for at least 20 years. It was inspired by the ideas of architect Augustus Pugin, writer John Ruskin, and designer William Morris. In Scotland it is associated with key figures such as Charles Rennie Mackintosh.”   Wikipedia

In 1878, at age 23, May became the Director of the Embroidery Department of her father’s company. She managed the embroidery division until his death, in 1896. From 1885 until 1896, the Morris & Co. embroidery workshop operated from May Morris's house at Hammersmith Terrace. After 1896, it may have been run out of the Oxford Street shop, using craftspeople to make the orders. As Director of the Embroidery Department, May supervised the production of items commissioned by clients and made in the Morris & Co. style - overseeing the making of altar cloths, portières, fire screens, cushion covers, tablecloths, table runners, wall hangings, card cases, sachets, and bed covers. 

As a designer and embroidered who had studied historical needlework as an art student, May elevated embroidery to an art form. She worked with needlework that emphasized freehand stitching and delicate color shading. Her art embroidery was in sharp contrast to the style of Berlin wool work, which was popular until the 1880s.
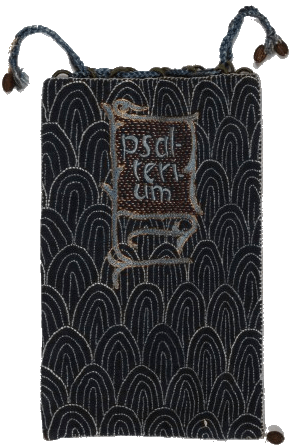
Embroidered book bag by May Morris and Jenny Morris c. 1880s - 1890s. Hand embroidered silks and gold thread on linen. 22.8 x 15.4 cm. "This bag was designed and made by William Morris's two daughters, May and Jenny. It was designed by May to contain a 'Psalter' (a book of psalms), from William Morris's extensive collection of medieval manuscripts. The bag is made of indigo linen and embroidered by Jenny in silk with the word "Psalterium" in Gothic script. Stitches include back stitch, stem stitch, long & short stitch, loop stitch, satin stitch, couching and buttonhole stitch; round edges with words filled in with chain stitch; pomegranate is padded laid work; surface couched in gold thread."  William Morris Gallery  Photo © William Morris Gallery, London Borough of Waltham Forest
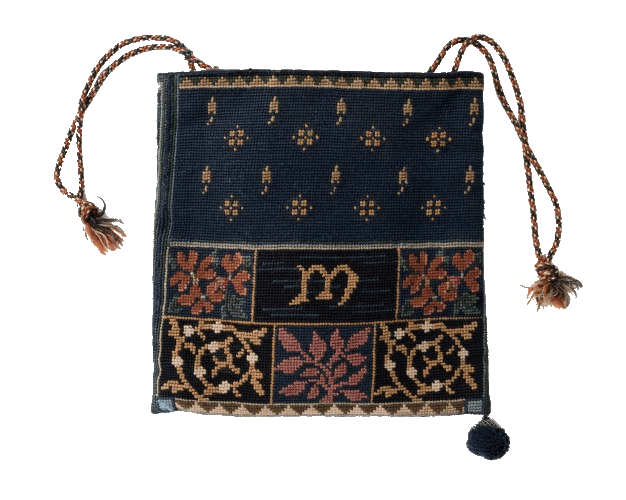
Embroidered bag by May Morris c. 1932. Wool on canvas. Photo © William Morris Gallery, London Borough of Waltham Forest
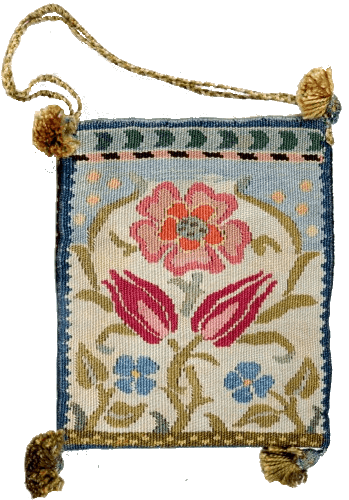
Small Evening Bag designed by May Morris. © William Morris Gallery, London Borough of Waltham Forest
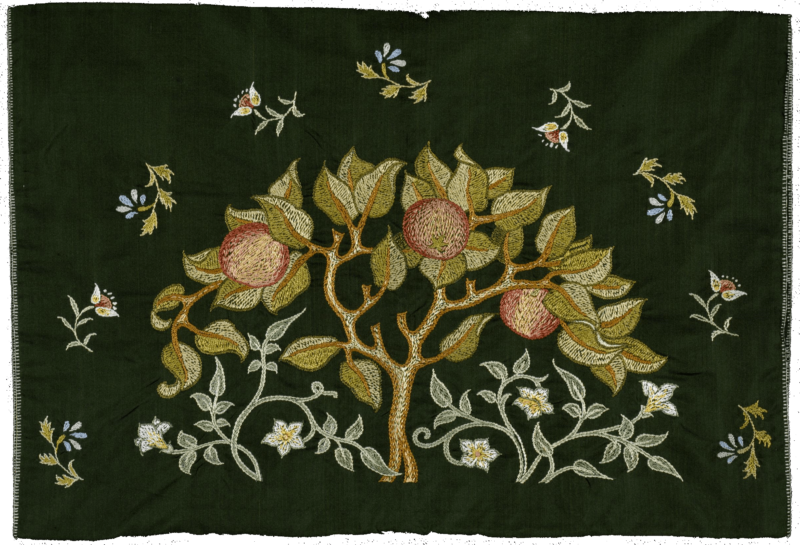
Nightdress sachet embroidered silk, with Apple Tree. Designed by May Morris for Morris & Co. Colored silks on green. Said by donor to have been embroidered by Caroline Phillips, Lady Trevelyan. ca. 1890-1892  Photo via © Victoria and Albert Museum, London
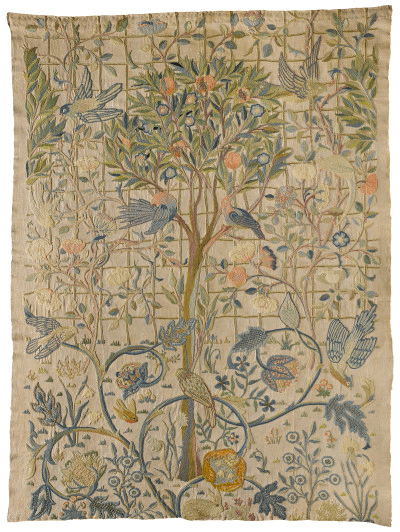
Embroidery design by May Morris; worked by May Morris and Theodosia Middlemore for Melsetter House, Orkney, c.1900

The Importance of Embroidered Textiles for Morris & Co.

“Embroidered textiles were the first furnishings designed and produced by William Morris, enabling him to decorate his homes with the historically inspired textiles he desired, and providing an outlet for his intellectual and physical need to make things by hand. 

After Morris’s interests moved on to designing and manufacturing other products, the Morris & Co. embroidery studio, managed by his daughter May from 1885 to 1896, functioned as one of the most commercial areas of the company, producing kits and finished embroideries, which were popular with the middle classes and wealthy aristocrats and business people.

Embroideries available ranged from cushions and tea cosies to panels for folding screens, and large scale decorative hangings. May Morris introduced many new designs, and was responsible for the success of the embroidery department, as a highly skilled designer and embroiderer, and effective manager."  V & A Museum
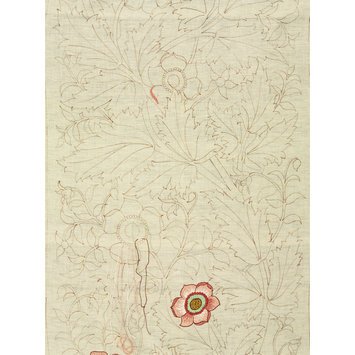
"Embroidery kit, Morris & Co., 'Anemone' design, purchased c.1904. Cotton ground or 'Manchester cloth,' painted with design, partly worked with silk thread. Worked areas with stem stitch, darning stitch, satin stitch and laid work. Ground fabric edged on three sides with a double hem, with tacking stitches. Selvedge at left hand edge."  Image via V&A Museum

William Morris is known mostly for his wallpaper designs today. But the embroidered items and embroidery kits, created under May's guidance, were a significant source of income for the company.

"As a screen panel, 'Anemone' appears nine times in the Morris & Co. embroidery workroom daybook in the NAL collections (MSL/1939/2636), in which May Morris listed all embroidery work commissioned for the years 1892-96. This indicates the continued popularity of the embroidered screen panels and this particular design. This 'started' panel, including the cotton ground, painted design, and coloured silks, with areas completed so that the recommended technique could be followed at home, cost £1 and one shilling in 1896. In this case, the panel was never worked, and the threads were also given to the Museum (T.159-2016 to T.190-2016). The embroidery kit was passed to the donor, Jill Ford, by her mother, Elsie Winifred Couper (1906-1948), the daughter of the Scottish civil engineer Benjamin Blyth II (1849-1917).”  V & A Museum
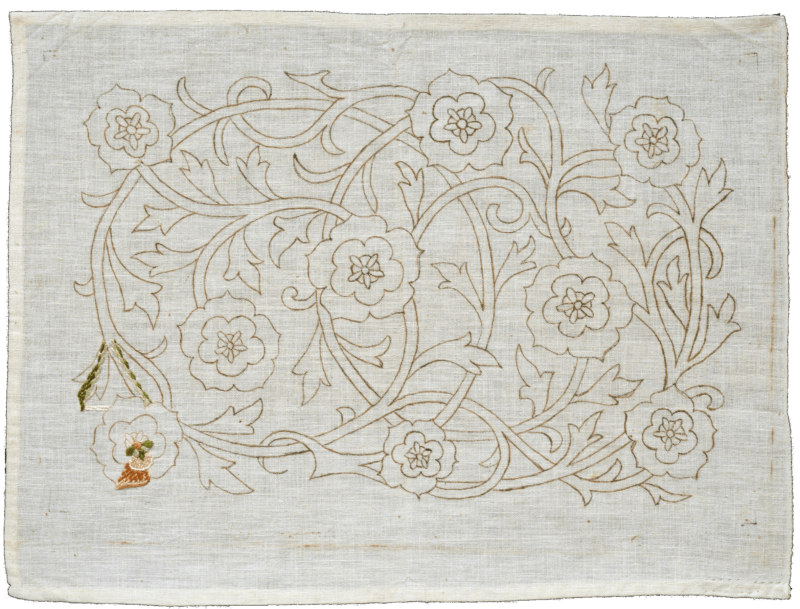
Panel, Small Rose embroidery kit (started) with embroidered cotton in silks, designed by May Morris for Morris & Co., England, ca. 1890. Width: 15 in, Length: 19.5 in. Worked in darning stitch, stem stitch, long and short stitch and satin stitch. Photo via © Victoria and Albert Museum, London
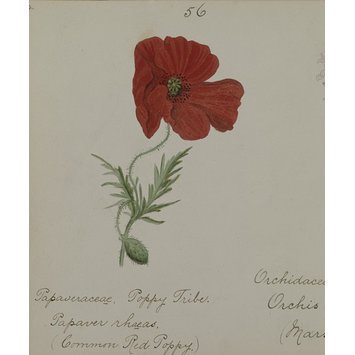
Wild Flowers painted by May Morris

English Wild Flowers gathered near Newbury Berks and painted by Mary Elizabeth Morris (Sketchbook) circa 1890. Watercolor and pencil, on wove paper, bound in half-calf and red cloth, lettered in gold. Photo via © Victoria and Albert Museum, London
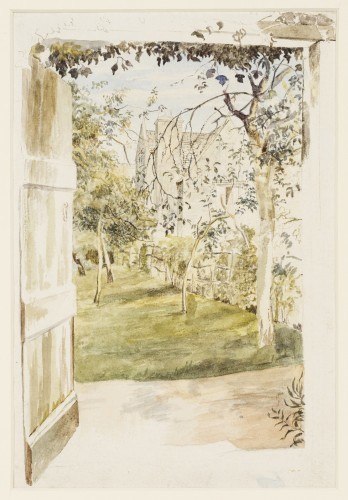
May Morris pencil and watercolor on paper: View of Kelmscott Manor from the Old Barn (c.1880s). Photo © William Morris Gallery, London Borough of Waltham Forest
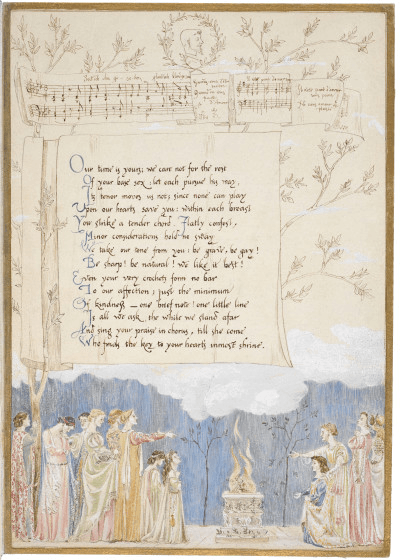
May Morris Valentine to George Bernard Shaw, 1886. Pen and ink, watercolor and body color on board. 26.6 x 18.6 cm. Photo © William Morris Gallery, London Borough of Waltham Forest

May taught at Hammersmith College of Art, Birmingham School of Art, and the Leicester School of Art, and went on a lecture tour in the United States between 1909 and 1910. She was also active in the Royal School of Art Needlework, which was founded in 1872 under the patronage of Princess Helena, a daughter of Queen Victoria. In contrast to government schools of design for women which were teaching through theory, the school, now the Royal School of Needlework (RSAN), was set up to help students learn needlework through practical, hands-on technical training. Students studied collections of ancient embroidery in the South Kensington Museum in order to better understand and learn the techniques used in historical textile works, and got pragmatic experience through structured apprenticeships. 

May’s aunt, Elizabeth Burden, was a chief technical instructor at RSAN. Read more about Elizabeth via the Morris Society

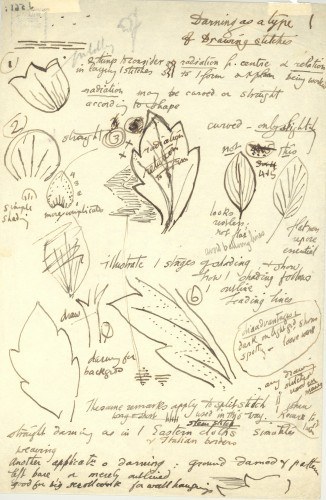
May Morris's notes and sketches for embroidery lectures c. 1899 - 1902. "This lecture note dates from May Morris's time teaching embroidery at Birmingham Municipal School of Art and the Central School of Arts and Crafts in London. The notes and sketches set out her plans for practical lessons, covering design, technique and materials." William Morris Gallery © William Morris Gallery, London Borough of Waltham Forest


Organizing Women Crafts-Makers

London’s Art Workers’ Guild was founded in 1884 by a group of architects and designers, and many of the prominent figures of the Arts and Crafts Movement were among the Guild’s members. The Guild was formed to bring architects, designers, and craftsmen together under the shared idea of the importance of handicraft as machine-driven industry was threatening to replace traditionally hand-crafted pieces made by designer-makers. The movement promoted an aesthetic of high-quality designs inspired by pre-industrial examples, produced by hand.

“The ideas of Pugin, Ruskin and Morris encouraged much questioning of both industrial society and of the state of art and architecture. Men seemed to be separated from the products of their hands; art seemed the product of convention rather than the creative craftsman. One answer was the idea of the Guild, a re-creation of the social organisation of the Middle Ages, those craft societies which, apparently, built the cathedrals.” Art Workers’ Guild History

In 1888 several members of the Guild organized the Arts and Crafts Exhibition Society, which was created to show handicrafts.  According to Walter Crane, one of the Society’s founders, the purpose of the Society was:

“We desired first of all to give opportunity to the designer and craftsman to exhibit their work to the public for its artistic interest and thus to assert the claims of decorative art and handicraft to attention equally with the painter of easel pictures, hitherto almost exclusively associated with the term art in the public mind. Ignoring the artificial distinction between Fine and Decorative art, we felt that the real distinction was what we conceived to be between good and bad art, or false and true taste and methods in handicraft, considering it of little value to endeavour to classify art according to its commercial value or social importance, while everything depended upon the spirit as well as the skill and fidelity with which the conception was expressed, in whatever material, seeing that a worker earned the title of artist by the sympathy with and treatment of his material, by due recognition of its capacity, and its natural limitations, as well as of the relation of the work to use and life” Walter Crane "Of the Arts and Crafts Movement"
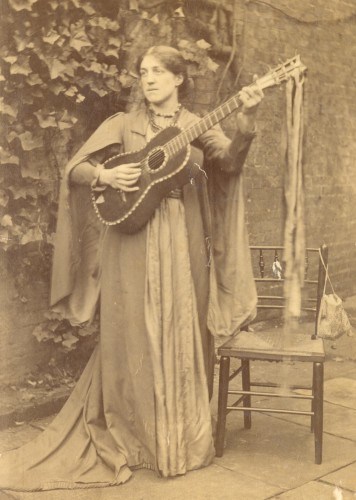
Photo of May Morris (circa 1886).  Photo © William Morris Gallery, London Borough of Waltham Forest
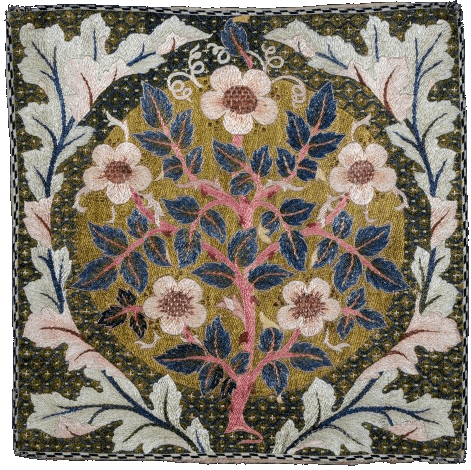
Rose Wreath embroidery (c.1890) 51 x 51 cm "Rose Wreath was designed by William Morris and this example embroidered by May Morris as a cushion cover for her friend Amy Carruthers Tozer. The design was exhibited at the Arts and Crafts Exhibition in 1890." William Morris Gallery

May was involved in the Arts and Crafts Movement throughout the 1890s and 1900s. She exhibited works at the Arts and Crafts Exhibition Society's exhibitions in London in 1893, 1896, 1899, 1903, and 1906, alongside members of craft Guilds - which excluded women.

The male architects, designers, and craftsmen who were involved in the Arts and Crafts Movement had a social network for meeting and sharing ideas in the form of the Art Workers’ Guild. But the the women May worked with were barred from this Guild, which served as a social networking and meeting place. 

In 1907, at the age of 45, in direct response to this exclusion, May co-founded the Women’s Guild of Arts with Mary Elizabeth Turner, creating a supportive network for the professional craftswomen of the period. May wanted “to keep to the highest level the arts by which and for which we live” in an “atmosphere of camaraderie.” Members of this women’s group included some of the most prominent figures in the Arts and Crafts Movement: painter Evelyn De Morgan, jeweler Georgie Gaskin, bookbinder Katherine Adams, sculptor Mabel White, watercolourist and engraver Mary Annie Sloane, Agnes Garrett, Mary Lowndes, Marianne Stokes, Evelyn De Morgan, Mary Seton Watts, and Mary J. Newill.

The Women’s Guild of Arts mission was to “keep to the highest level the arts by which and for which we live, to keep ever fresh and vital the enthusiasm, the belief – all the things which are the impetus of human endeavor.”

The Art Workers’ Guild remained a male-only institution until the 1960s, when it finally welcomed its first female crafts-maker – Joan Hassall, a wood engraver and book illustrator.

May was a designer, an embroiderer, a pioneer of art embroidery, a teacher, a writer, a political activist, an historian, a socialist, and a supporter of Women's Suffrage. Today, many of May’s works are held in museums – including the William Morris Gallery, the National Museums of Scotland and Wales, as well as regional museums and galleries, National Trust properties, and university collections.

In the winter of 2017 – 2018, the William Morris Gallery raised funds for a special exhibition of May’s works, which showcased her contribution as a designer of the Arts and Crafts Movement, and recognized her important role in elevating needlework from a domestic craft to an art form.

The exhibit, May Morris: Art & Life, was one of the highest attended in the Gallery’s history. It marked an advance in placing May in art and design history.
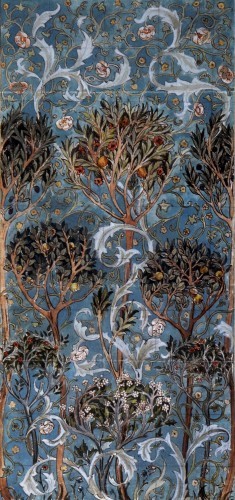
The Orchard - a design for a large embroidered panel. Pencil, watercolor, and ink on paper (c. early 1890s). © William Morris Gallery, London Borough of Waltham Forest
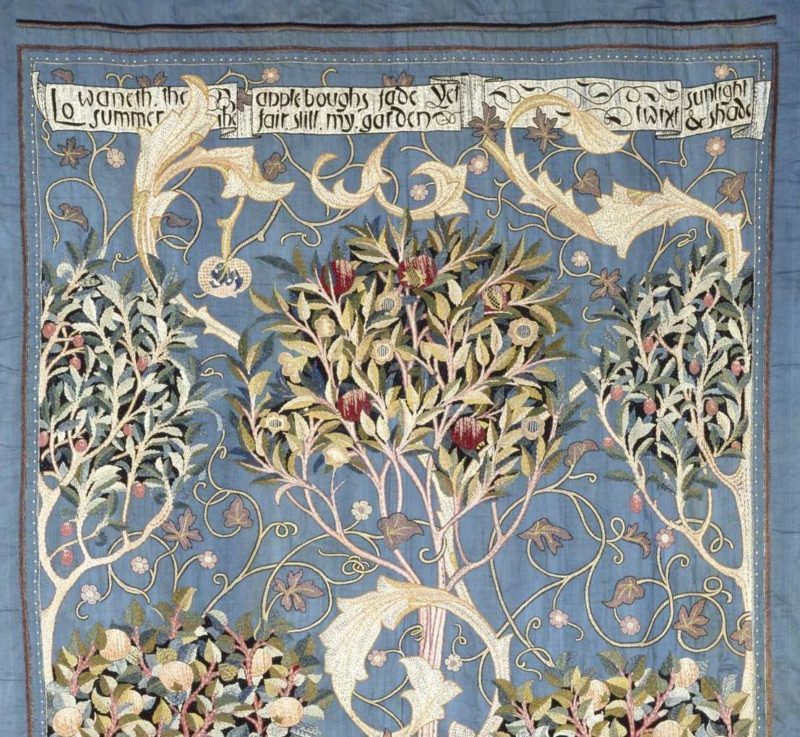
Detail of "The Orchard" or "Fruit Garden" Wall hanging, portière. Silk taffeta in colored silks, and strip of tape, designed by May Morris, embroidered by Theodosia Middlemore, Great Britain, 1894

Embroidered motto: 'Lo waneth the Summer the apple boughs fade Yet fair still my garden twixt sunlight & shade'
signed and dated: 'Theodosia/1894'

Photo via © Victoria and Albert Museum, London
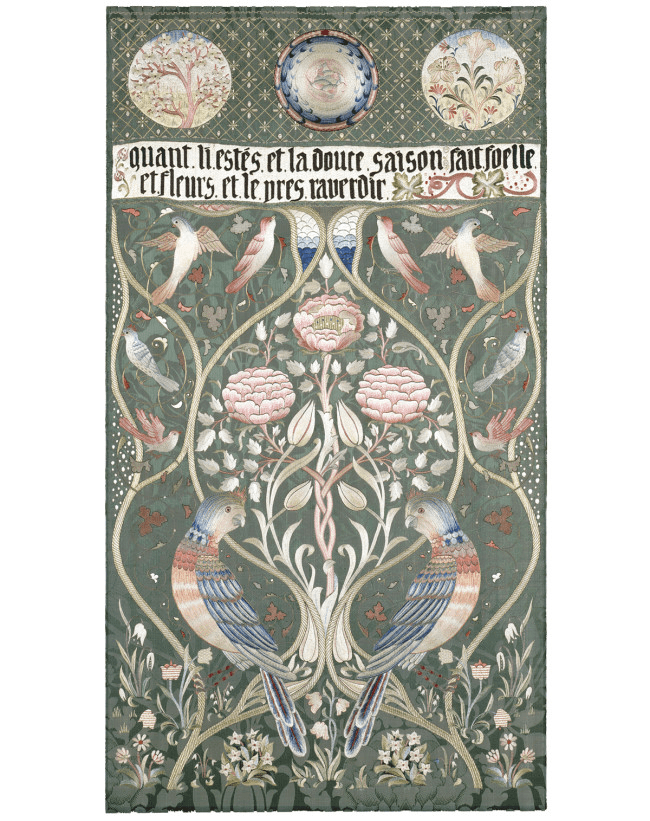
‘Spring and Summer’ panel, designed and probably embroidered by May Morris. c. 1895–1900. Colored silks on silk damask, 130.8 x 71.9 cm. Embroidered motto translates as: “When the summer’s gentle season makes leaves and flowers and field green again."
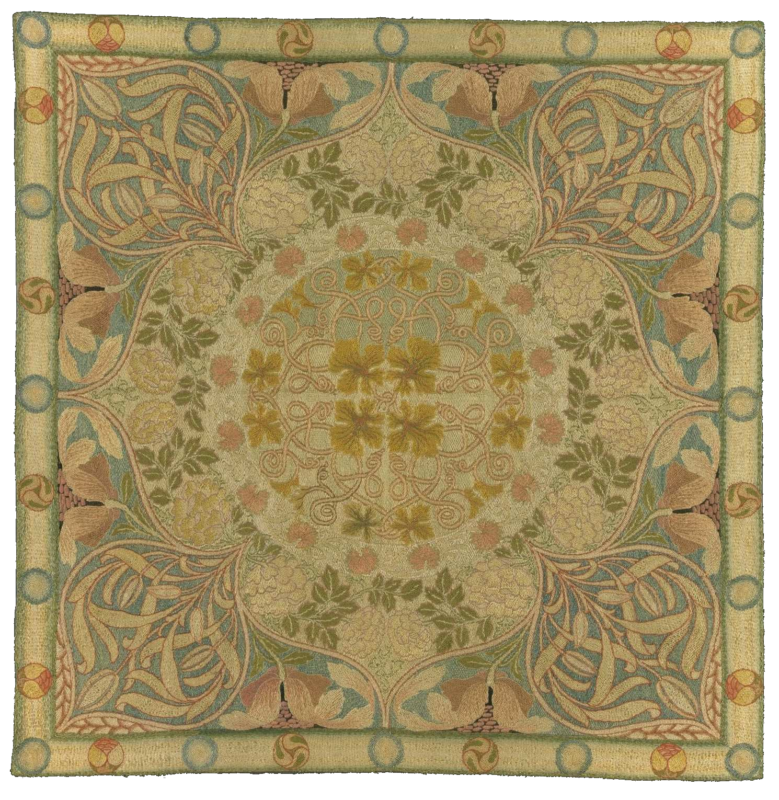
Tablecloth by May Morris

Tablecloth, linen with silk embroidery, probably designed by May Morris, 1896, worked by Mrs Laurence Hodson or in the Morris and Co. workshops, ca.1896, England. Silk thread on linen ground, silk lining.
Worked in darning stitch, stem stitch and satin stitch.
Silk lining attached with running stitch. Height: 108 cm, Width: 108 cm, Weight: 0.58 kg Photo via © Victoria and Albert Museum, London
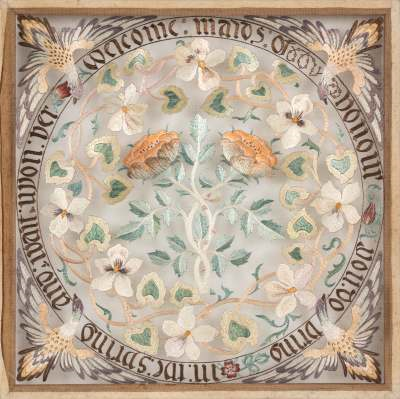
Embroidered wall hanging featuring May Morris’s Maids of Honour design, c.1890s
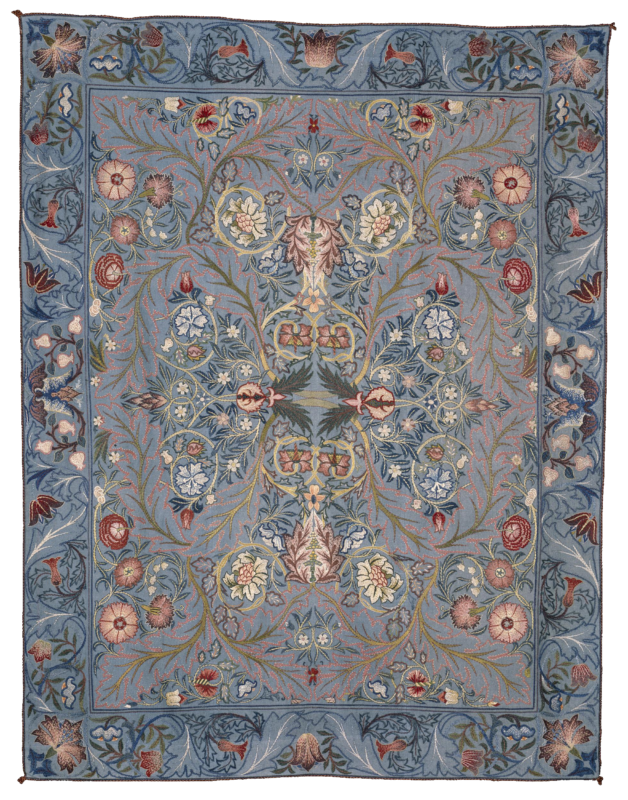
Design by May Morris

Acanthus Wall hanging depicting acanthus designed by William Morris, ca. 1880. Worked by May Morris and others, c. 1900-1910 (probably). Height: 249.5 cm, Width: 169.3 cm, Weight: 2.7 kg
Felted woolen cloth, colored silk thread, silk cord Photo via © Victoria and Albert Museum, London
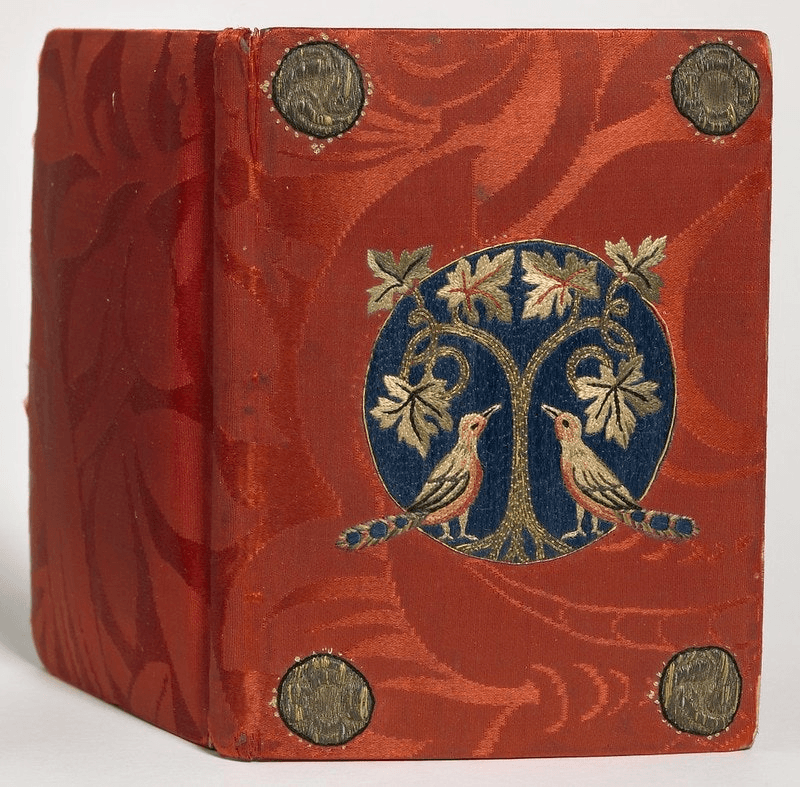
Embroidered book cover to The Tale of King Florus and Fair Jehane, thought to be embroidered by May Morris. Photo © The University of Manchester Library


Resources - Free to Download

In 1893, May Morris wrote a pamphlet, Decorative Needlework. The pamphlet includes a history of decorative needlework, and chapters on different types of stitches and how to make them, with illustrations.

There were originally only 125 copies printed, but the pamphlet is now available for free through the public domain. You can download a copy of it as a .pdf here.

From May's Dedicatory Note:

"These pages are written for and dedicated to those who, without much previous knowledge of the art of embroidery, have a love for it and a wish to devote a little time and patience to its practice. The booklet does not profess in any way exhaustive, but should be useful as a keynote to further study, having been written from practical knowledge of the subject.

I have tried to show that executive skill and the desire of and feeling for beauty, realized in a work of definite utility, are the vital and essential elements of this as of all other branches of art, and that no one of these elements can the embroideress neglect or overlook if her work is to have life and meaning.  If she pursues her craft with due care, and one might even say with enthusiasm, however, she will not only taste that keen pleasure which every one feels in creative work, however unpretending, but the product will be such as others will be careful to preserve: this in itself being an incentive to good work. For work done at the demand of fashion or caprice and that done inevitably, that is, for its own sake, are as widely dissimilar as can be: the first being discarded in a month or so as ridiculous and out of date, and the other remaining with us in all its dignity of beauty and fitness, to be guarded as long as may be against the unavoidable wear and tear of time." May Morris 

May Morris wrote an article on textile art for the Decorator and Furnisher Magazine, Volume 21, published in 1893. In it, she describes: tapestry stitch, chain stitch, applique, couching, patchwork, and darning. Click here to download a .pdf of her article. The .pdf includes an article on working with color by Alexander D. Grant.

Listen to an interview from BBC SOUNDS In Our Time: William Morris

Produced by Simon Tillotson with: Ingrid Hanson, Lecturer in 18th and 19th Century Literature at the University of Manchester; Marcus Waithe, University Senior Lecturer in English Literature at the University of Cambridge and Fellow of Magdalene College; and Jane Thomas, Professor of Victorian and Early 20th Century Literature at the University of Hull

"Melvyn Bragg and guests discuss the ideas of William Morris, known in his lifetime for his poetry and then his contribution to the Arts and Crafts movement, and increasingly for his political activism. He felt the world had given in to drudgery and ugliness and he found inspiration in the time before industrialisation, in the medieval life which was about fellowship and association and ways of working which resisted the division of labour and allowed the worker to exercise his or her imagination. Seeing a disconnection between art and society, his solution was revolution which in his view was the only way to reset their relationship."


Explore More Textile Art


For Your Library

Below are some books about May Morris, William Morris, and embroidery. Click on the buttons to see more and to purchase on Amazon. Please note that as an Amazon Associate I earn from qualifying purchases (at no extra cost to you).

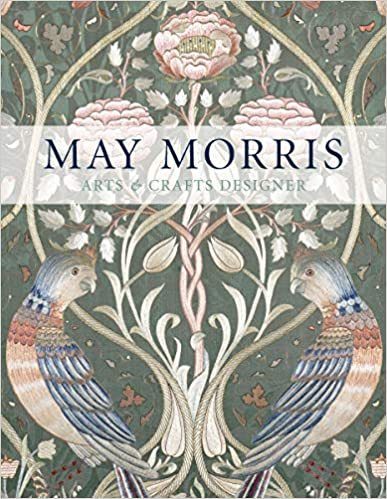
May Morris: Arts & Crafts Designer by Jenny Lister, Jan Marsh, and Anna Mason


Written by curators of the Victoria & Albert and the William Morris Gallery, this is the go-to book for illustrations of May Morris's work. The book is divided into five chapters―Sketches and Watercolors, Wallpapers and Embroidery, Book Covers and Designs, May Morris and the Art of Dress, and Jewelry and Metalwork―each of which opens with an introductory text, followed by catalog entries with extended captions. Interspersed within the chronological arrangement of objects are feature spreads highlighting particular aspects of May Morris’s work. 


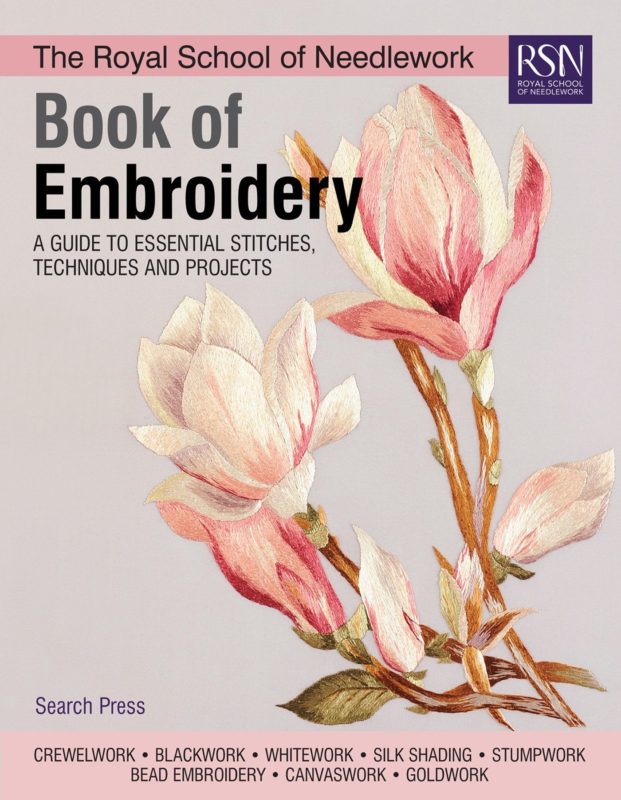
Book of Embroidery: A Guide to Essential Stitches, Techniques and Projects by the Royal School of Needlework


From London's world-renowned Royal School of Needlework, this book is a rich source of embroidery techniques, stitches, and projects. Techniques covered include crewelwork, bead embroidery, stumpwork, canvaswork, goldwork, whitework, blackwork,and silk shading. Contains all the trusted, best-selling content from the RSN Essential Stitch Guide series, plus a new section on mounting your finished work.


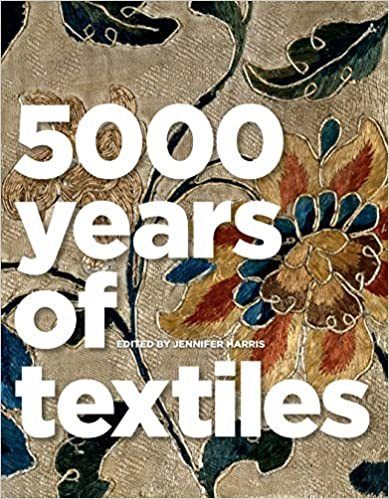
5000 Years of Textiles by Jennifer Harris


5,000 Years of Textiles is an authoritative reference book, with examples from the Far East to the Americas, from Africa to Scandinavia, and from Egyptian artifacts dating from 3000 BC to the most up-to-date modern craftwork and furnishings. The book includes an expert guide to nine fundamental textile techniques, from rug weaving and tapestry to felt and bark cloth. Each is clearly explained, using line drawings and close-up color details from actual textiles, to show how people from many different traditions have made and decorated cloth through the centuries. Illustrations are drawn from major collections all over the world and include costumes, period interiors, archival photographs, and a vast range of fabrics.


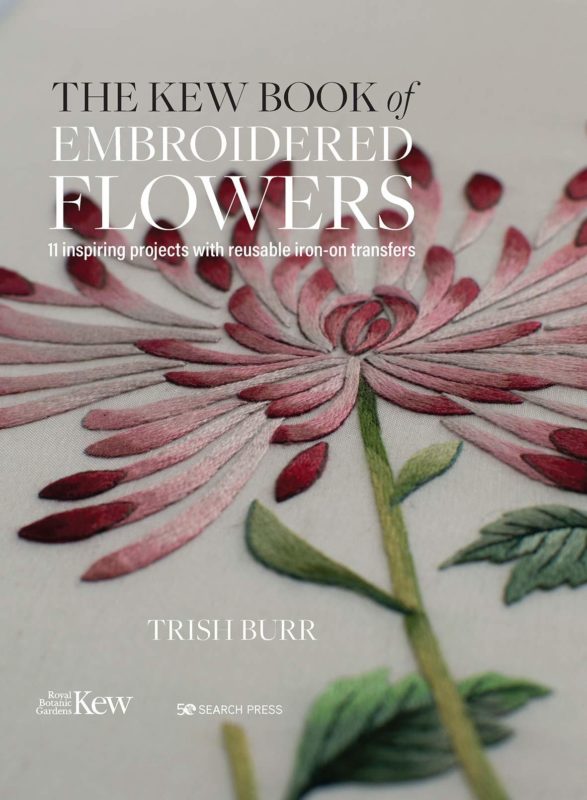
The Kew Book of Embroidered Flowers: 11 Inspiring Projects with Reusable Iron-on Transfers by Trish Burr


Needlework expert Trish Burr's new book contains resuable iron-on transfer papers for embroidery work - just iron onto fabric in preparation to your embroidery project. The embroideries are reworkings of botanical artworks from Kew's Art Collection. There is one 'starter' project to encourage readers to try out the techniques, one large sampler containing eighteen small elements that can be worked individually or as a group, and nine further projects, including a striking spider chrysanthemum, an elegant waterlily and an opulent magnolia. All the projects are shown step by step, with an order of work diagram given where appropriate. The templates are included at full size at the back of the book.


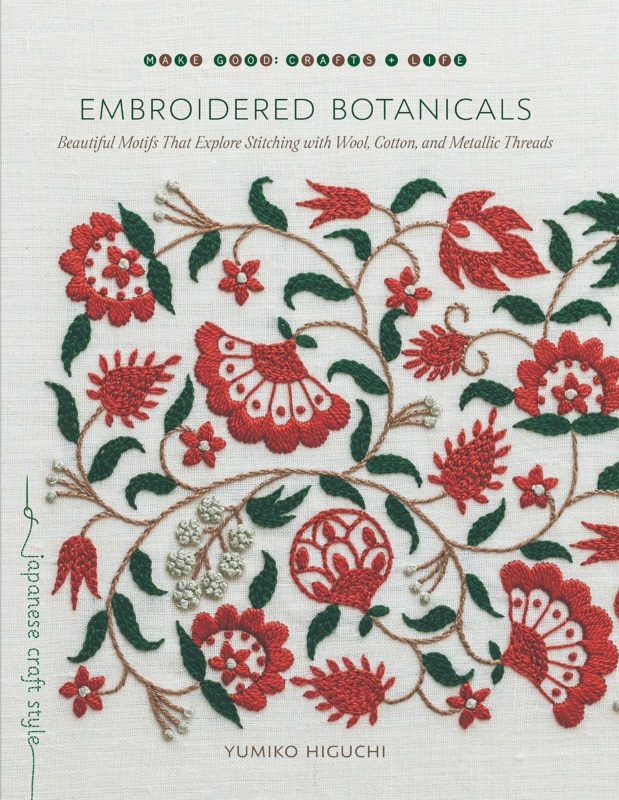
 Embroidered Botanicals: Beautiful Motifs that Explore Stitching with Wool, Cotton, and Metallic Threads by Yumiko Higuchi


Japanese artist Yumiko Higuchi is celebrated for her embroidery designs with a Scandinavian flair. In Embroidered Botanicals, Higuchi offers 39 embroidery projects highlighting the distinctive qualities of different threads - wool, cotton, pearl cotton, and metallic. With beautiful photographs, clear step-by-step instructions, and detailed diagrams, this book will be an inspiring guide for those new to embroidery and a fresh and unique offering for more experienced needle-crafters.


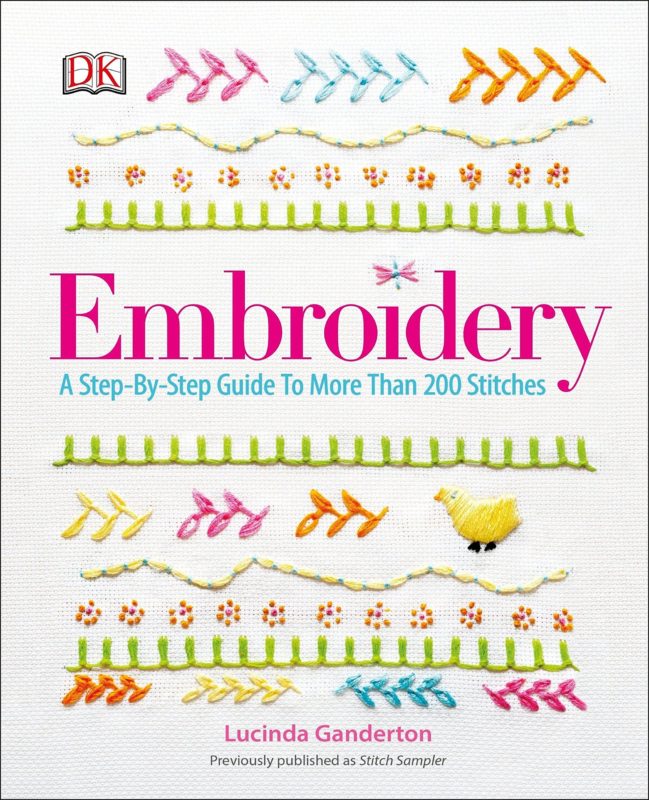
Embroidery: A Step-By-Step Guide to More Than 200 Stitches by Lucinda Ganderton/DK


The perfect reference guide to needlework, Embroidery is a comprehensive guide to inspire and inform sewers of all levels. Find advice on which thread, needles, or fabrics work with which techniques, and take a look at an incredible 200 stitches — with levels of difficulty, step-by-step instructions, and ideas on where and how to use them. This practical guide covers sewing tips for dressmaking, needlepoint, and embroidery stitches, with detailed information simply presented in illustration-rich pages. 


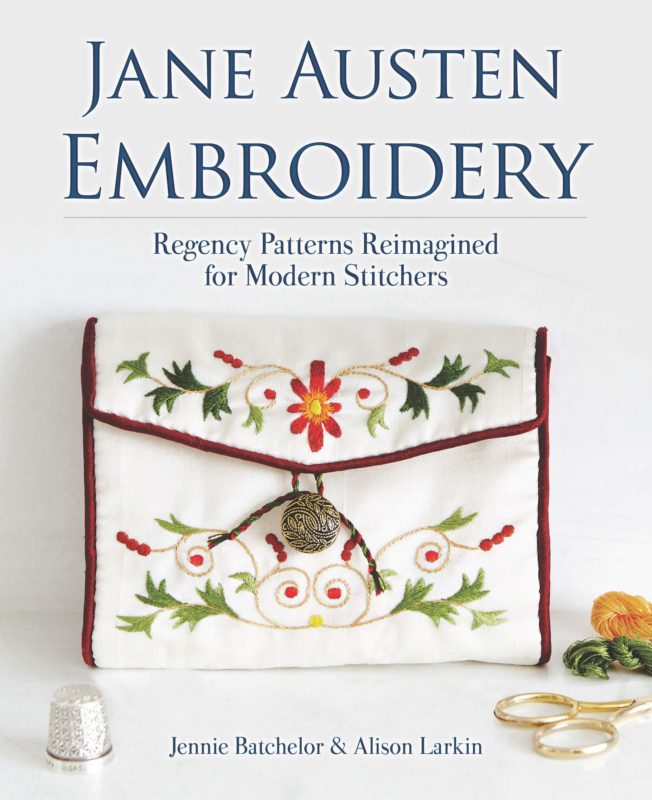
Jane Austen Embroidery: Regency Patterns Reimagined for Modern Stitches by Jennie Batchelor and Alison Larkin


Jane Austen was as skillful with a needle as she was with a pen, and this unique book showcases rare and beautiful embroidery patterns from her era, repurposed into 15 modern sewing projects. Derived from Lady's Magazine (1770–1832), a popular monthly periodical of fashion, fiction, and gossip, the projects consist of embroidered clothes, accessories, and housewares. Designs include an evening bag, a muslin shawl, an apron, a floral napkin set and tablecloth, and other pretty and practical items with timeless appeal.
These authentic patterns — many of which have not been reprinted in more than 200 years—are enlivened by vivid glimpses into the world of Regency women and their domestic lives. A must-have for every Jane Austen fan, this book is suitable for needleworkers at every level of experience.


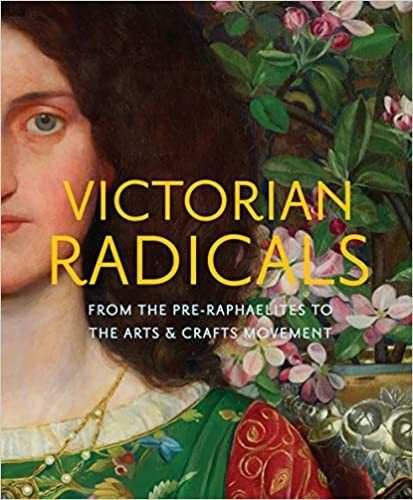
Victorian Radicals: From the Pre-Raphaelites to the Arts & Crafts Movement by Martin Ellis, Timothy Barringer, and Victoria Osborne


Although the word "Victorian" connotes a kind of dry propriety, the artists working in the Victorian era were anything but. Starting with the Pre-Raphaelite Brotherhood and lasting through the dawn of the 20th century, the era's painters, writers, and designers challenged every prevailing belief about art and its purpose. The full spectrum of the Victorian avant-garde is in magnificent display in this book that features nearly 150 works drawn from the city of Birmingham's unparalleled collection. Characterized by attention to detail, vibrant colors, and engagement with literary themes and daily life, the paintings, works on paper, and decorative objects featured reveal the myriad ways Victorian artists and artisans made sense of a rapidly changing world. 


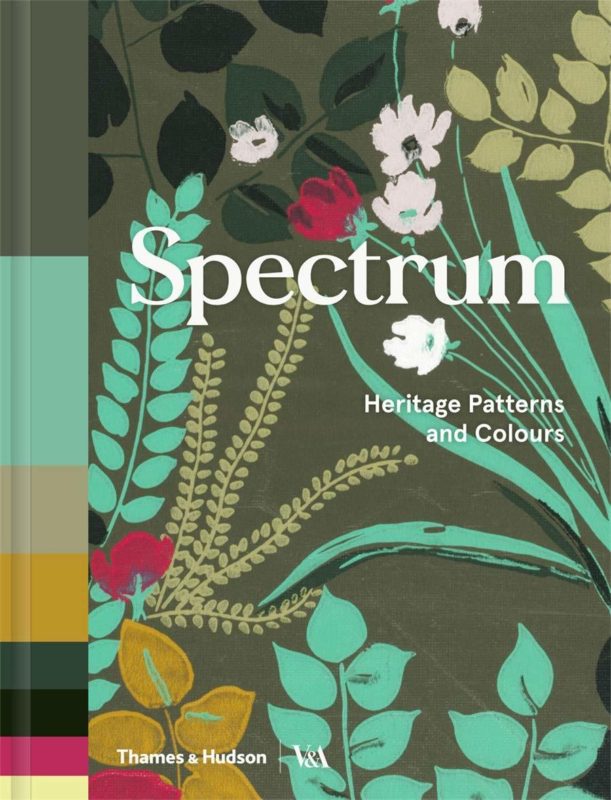
Spectrum: Heritage Patterns and Colours by V&A, Ros Byam Shaw, and Caz Hildebrand


Color palettes from the fifteenth century onward are analyzed and explained by interior design specialist Ros Byam Shaw. Each wallpaper and fabric, carefully selected by Here Design from the V&A’s collection, is arranged chronologically with its own double-page spread, with extended captions that explain the significance of the palette. A color grid is shown beside each pattern, in which the colors in the original piece are shown in proportion to their use, and with their CMYK references to enable designers to replicate these colors in their own work. 


Having fun with new and traditional crafts, art, design, DIY, and freebies.

TRENDING & POPULAR

FREE ART BOOKS ONLINE  Start your own free collection of art books from three major museums.

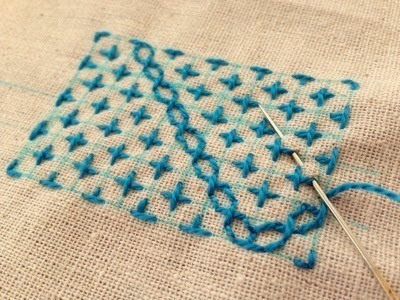
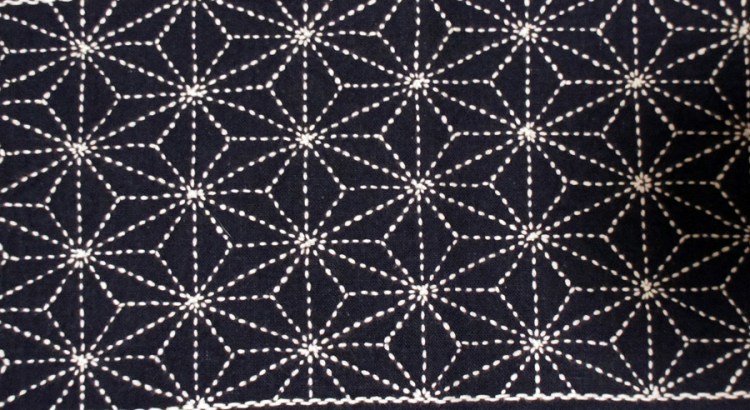
DISCOVER SASHIKO STITCHING  Learn how to make traditional Japanese decorative stitches for quilting, mending, and upcycling.

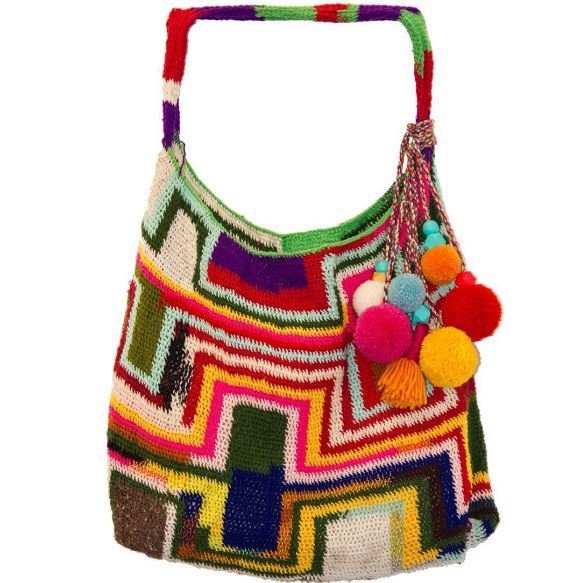
BILUM  Discover a fabric-making technique used in Papua New Guinea that can be used to make bags and dresses.

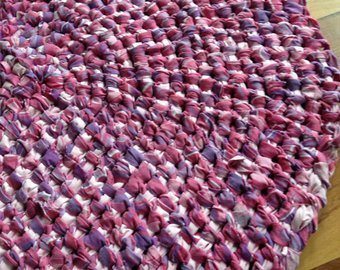
HOW TO MAKE AN AMISH RAG RUG  There's no sewing required to make this traditional homemade crafted item.

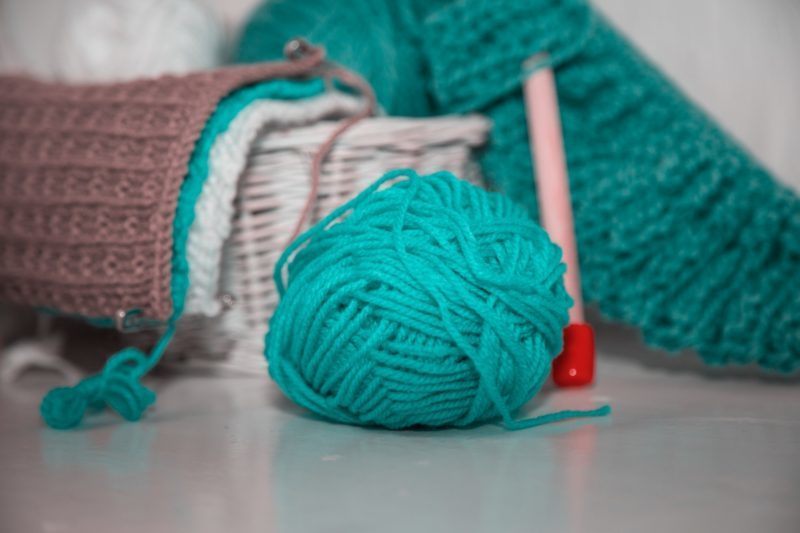
35,000 FREE KNITTING & CROCHETING PATTERNS Use our easily searchable list to find free patterns by Rowan, Vogue, Lion Brand, Berroco, and more.
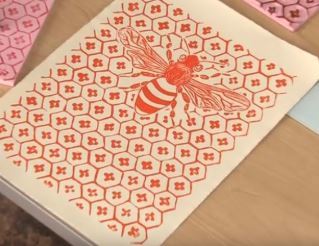
HOW TO MAKE A LINOLEUM BLOCK PRINT  Watch how-to videos for beginners explaining the basic step-by-step process of making a linoleum block print.

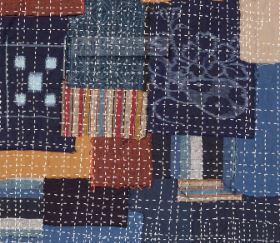
HOW TO MAKE A BORO BAG  Learn how to make a stand-out bag using a Japanese patchwork technique and Sashiko stitching. 

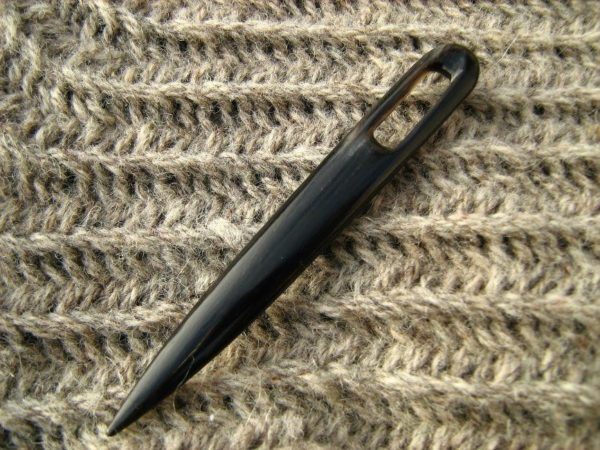
'KNIT' LIKE THE VIKINGS  Discover an ancient fabric-making technique that's still done today, pre-dates knitting, and doesn't unravel.
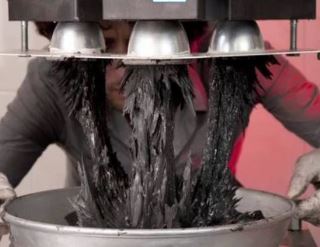
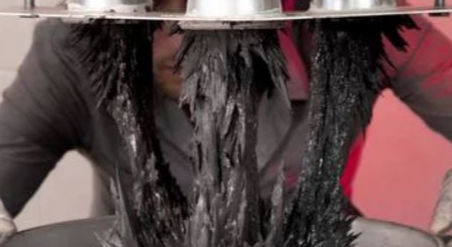
MAGNETIC CLAY CERAMICS Ceramic artists working with magnetic clay can play with the forces of nature to create fantastical structures.

How to Make an 8 Bit Video Game Cross Stitch

cross stitch needel and thread

How to Make an 8 Bit Video Game Cross Stitch

8 bit cross stitch

Photo via Pixelkin's Make Your Own Video Game Cross-Stitch!

Making a cross-stitch picture based on an 8-bit video game character or setting is a perfect project for those who are nostalgic for early video games. 

Imagine a picture made up of little x’s, all the same size, with a color palette that’s as simple or as complex as it needs to be to make the image. A cross stitch picture is made up of a series squares formed by one stitch crossing another stitch. The little ‘x’ squares are stitched with a needle and thread on a piece of woven fabric, which has vertical and horizontal threads – a grid. The weave has obvious openings between the threads, with enough room for the needle and thread to pass through.

8-bit images from early video games are made up of pixelswhich look like little squares. The word 'pixel' was invented from "picture element," and is defined as the basic unit of programmable color on a computer display or in a computer image. 

In the video below, Courtney Holmes of Pixelkin walks us through the process of creating cross-stitch artwork based on your favorite 8-bit game character.

The Steps

Choose a Character – There are so many great characters to choose from! But, you might want to consider a character with few colors and shading for your first project. Keep it simple when you're starting out. With practice, you'll be able to tackle your favorite characters, no matter how complex their designs are. 

Make the Pattern – Print out a character in color. You’re going to create a grid pattern that will translate into your cross stitch. To do that, use a pen or pencil and a ruler, and draw right on your printout. Draw vertical and horizontal lines which map out the edges of the pixel boxes. Then, number the grid boxes, both at the top and on the left hand side.

Assemble your Supplies and Materials - Below is a list of items to get you started (links below are to Amazon. As an Amazon Associate I earn from qualifying purchases - at no extra cost to you):

Embroidery needles or Cross Stitch needles – these needles have bigger eyes to accommodate the embroidery thread thickness.

Embroidery floss – cotton floss is the most commonly used embroidery and cross stitch thread. They are made up of 6 strands that are easily separable and loosely twisted together. It’s easiest to use lengths that are 12 – 14” to prevent knotting. Two companies that have been manufacturing floss since the 1800s, and are considered the best to use, are DMC and Anchor. You can also use silk and metallic thread (for accents, shading, embellishments, and overall sparkly goodness), or hand dyed threads which can create variegated patterns.

Cross stitch fabric – this fabric is stiffer than most fabrics, and has spaces, or holes, between the vertical and horizontal woven threads, allowing for easy and even stitching. Tip: you don’t need to use white fabric. You can choose a color that’s a good contrast for your character. Recommended: 14 count cotton fabric by Aida (Aida cross stitch fabrics are woven with the threads grouped together into bundles – which creates obvious holes for your needle work).

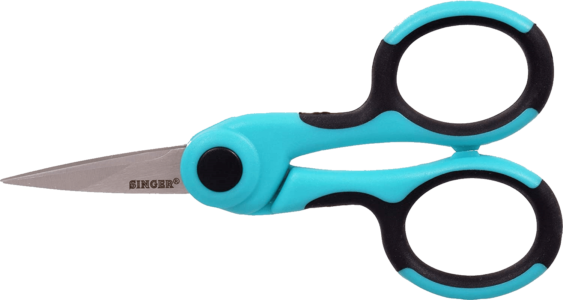
Scissors - you'll want to work with small, precise scissors meant for clipping details, with handles designed for comfort.

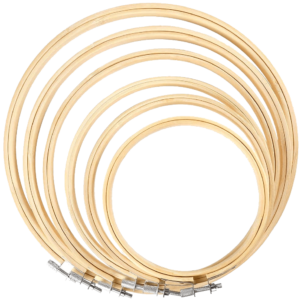
Embroidery hoop - polished bamboo hoops are easy to use, and come in several sizes. It's good to have several sizes on hand if you like to create different sized cross stitch pieces, based on the image you're making.

Below is a video from MadeByMarzipan which details everything you need to know about Cross Stitching for Beginners. 

If you prefer beginner instructions in text and illustrations, click over to Stitched Modern's 'A Beginner's Guide to Cross Stitch' for a great tutorial.

Helpful Tips and Links


For a guide of different cross-stitch pattern-making computer programs, check out Lord Libidan's review page

&

Looking for free online cross stitch generators? Check out patternsforyou.com, myphotostitch.com, and craftdesignonline.com

+

Make Magazine has a tutorial for creating cross-stitch patterns from images using myphotostitch.com

?

Check out Lord Libidan's 500+ free cross stitch patterns, including Video Game characters, TV and Film characters, and Anime Characters.   

!

Use the free-to-use make8bitart to draw your own pixel art, and use to design embroidery or cross stitch patterns. 

&

Use step-by-step pictorial tutorials for embroidery and cross stitching from Shanon Downey.

For your library...

Do you collect crafting books? Check out a page of various cross stitching bookshow-to's, classic designs, subversive designs, feminist-based patterns, miniature designs, and trendy and traditional designs.

Did You Know?

“Cross-stitch is the oldest form of embroidery and can be found all over the world since the middle ages. Many folk museums show examples of clothing decorated with cross-stitch, especially from continental Europe, Asia, and Eastern and Central Europe.

The cross-stitch sampler is called that because it was generally stitched by a young girl to learn how to stitch and to record alphabet and other patterns to be used in her household sewing. These samples of her stitching could be referred back to over the years. Often, motifs and initials were stitched on household items to identify their owner, or simply to decorate the otherwise-plain cloth. The earliest known cross stitch sampler made in the United States is currently housed at Pilgrim Hall in Plymouth, Massachusetts. The sampler was created by Loara Standish, daughter of Captain Myles Standish and pioneer of the Leviathan stitch, circa 1653.

Traditionally, cross-stitch was used to embellish items like household linens, tablecloths, dishcloths, and doilies (only a small portion of which would actually be embroidered, such as a border). Although there are many cross-stitchers who still employ it in this fashion, it is now increasingly popular to work the pattern on pieces of fabric and hang them on the wall for decoration. Cross-stitch is also often used to make greeting cards, pillowtops, or as inserts for box tops, coasters and trivets.

Multicoloured, shaded, painting-like patterns as we know them today are a fairly modern development, deriving from similar shaded patterns of Berlin wool work of the mid-nineteenth century. Besides designs created expressly for cross-stitch, there are software programs that convert a photograph or a fine art image into a chart suitable for stitching. One example of this is in the cross-stitched reproduction of the Sistine Chapel charted and stitched by Joanna Lopianowski-Roberts.

There are many cross-stitching "guilds" and groups across the United States and Europe which offer classes, collaborate on large projects, stitch for charity, and provide other ways for local cross-stitchers to get to know one another. Individually owned local needlework shops (LNS) often have stitching nights at their shops, or host weekend stitching retreats."

Source: Cross Stitch Wiki

Having fun with new and traditional crafts, art, design, DIY, and freebies.

TRENDING & POPULAR

FREE ART BOOKS ONLINE  Start your own free collection of art books from three major museums.

DISCOVER SASHIKO STITCHING  Learn how to make traditional Japanese decorative stitches for quilting, mending, and upcycling.

BILUM  Discover a fabric-making technique used in Papua New Guinea that can be used to make bags and dresses.

HOW TO MAKE AN AMISH RAG RUG  There's no sewing required to make this traditional homemade crafted item.

35,000 FREE KNITTING & CROCHETING PATTERNS Use our easily searchable list to find free patterns by Rowan, Vogue, Lion Brand, Berroco, and more.

HOW TO MAKE A LINOLEUM BLOCK PRINT  Watch how-to videos for beginners explaining the basic step-by-step process of making a linoleum block print.

HOW TO MAKE A BORO BAG  Learn how to make a stand-out bag using a Japanese patchwork technique and Sashiko stitching. 

'KNIT' LIKE THE VIKINGS  Discover an ancient fabric-making technique that's still done today, pre-dates knitting, and doesn't unravel.

MAGNETIC CLAY CERAMICS Ceramic artists working with magnetic clay can play with the forces of nature to create fantastical structures.

How to Make a Journal

a journal

How to Make a Journal 

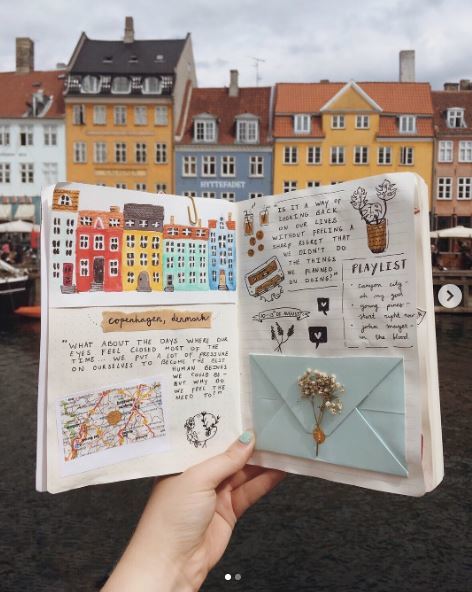
Journal by @mereljournals

Create a Unique Bound Book 

Journals are a great way to:

  • Record a specific event, such as a wedding or a trip
  • Write down ideas, dreams, and memories
  • Write down daily thoughts and events
  • Write down favorite quotes or jokes
  • Turn an idea into an illustrated story
  • Practice drawing skills
  • Write lists
  • Collect favorite stickers
  • Make collages
  • Write about a baby’s first year
  • Commemorate a birthday or other special event
  • Draw designs on graph paper

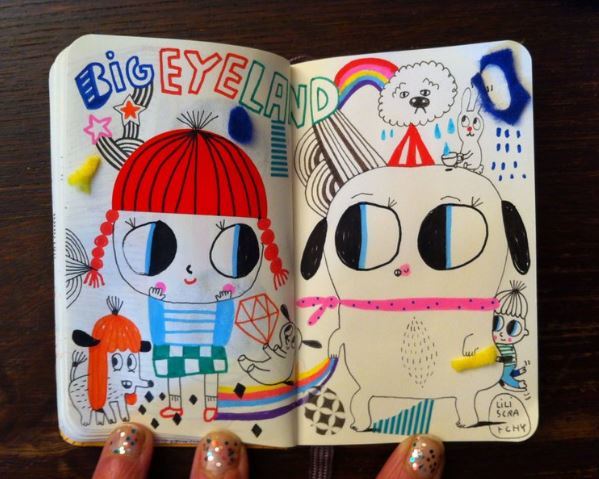
Journal by lili scratchy on flickr

Sewing machines and needles aren’t just for fabric. Making a personalized and hand-crafted journal is a great paper craft project that also incorporates sewing. Once you get the hang of sewing paper, you'll be able to create journals of mixed papers and sizes. 

Your journal can be made with plain paper, graph paper, watercolor paper, rag paper, copy paper, ruled paper, recycled paper, junk paper, brochures, advertisements, and paper from newspapers and magazines. Make a book out of the same type of paper, or mix up types and shapes of paper. 

Would you like to print out some free art images to use in your journal? See the end of this post for helpful links.

Journal by a fabric dyer from @srithreads

Below are videos showing different techniques for making simple journals, zines, or small books – perfect for a beginner. 

Making your own journal from scratch gives you the opportunity to make something a specific size or shape, and to make the cover out of your choice of card stock. It also allows you to include pockets.

The videos below show step-by-step instructions for binding and assembling a journal, by hand and by machine.

  • The first video shows you how to bind a journal. 
  • The second video shows you how to assemble a journal using needle and thread.
  • The third video shows you how to make various journals using a sewing machine.

Sewing a Journal by Hand

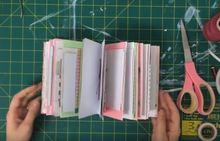
In the first two videos, crafter Johanna Clough uses a needle and thread to stitch together different-sized pieces of paper. She stitches together a series of 'signatures,' or groups of sheets, folded in the middle. 

This is a great project for using up scraps of paper. Having different-sized pieces of paper gives her journal an added layer of surprise. And, pockets within the journal gives you a place to store ephemera.

Do you have a stack of your child's drawings that need to be organized? A hand made journal is a wonderful way to create a keepsake of drawings of various sizes, making a little book that can last for years.

Having fun with new and traditional crafts, art, design, DIY, and freebies.

TRENDING & POPULAR

FREE ART BOOKS ONLINE  Start your own free collection of art books from three major museums.

HOW TO MAKE AN AMISH RAG RUG  There's no sewing required to make this traditional homemade crafted item.

HOW TO MAKE A BORO BAG  Learn how to make a stand-out bag using a Japanese patchwork technique and Sashiko stitching. 

DISCOVER SASHIKO STITCHING  Learn how to make traditional Japanese decorative stitches for quilting, mending, and upcycling.

35,000 FREE KNITTING & CROCHETING PATTERNS Use our easily searchable list to find free patterns by Rowan, Vogue, Lion Brand, Berroco, and more.

'KNIT' LIKE THE VIKINGS  Discover an ancient fabric-making technique that's still done today, pre-dates knitting, and doesn't unravel.

BILUM  Discover a fabric-making technique used in Papua New Guinea that can be used to make bags and dresses.

Sewing a Journal with a Sewing Machine

Dana from Made Everyday has a fun tutorial on sewing paper journals. She uses a standard sewing machine and regular sewing thread. She shows you how to make a simple journal with a card stock cover, how to add pockets to a journal, how to sew with a decorative plastic sheet, how to make rounded corners, and how to add leather ties and elastic.

Note: Before you dive into sewing paper with a machine, you might want to test different stitch lengths to see which is the best for the paper you plan to use.

Journal-Making Supplies

Need supplies to make your own journals? Below is a list of arts and crafts items that are great additions to a maker's nook or studio. [Some of the links below are affiliate links, which means that if you choose to make a purchase, I will earn a commission, at no additional cost to you.  As an Amazon Associate I earn from qualifying purchases.] 

Free Art Images

There are many ways to get free images to print out and use in arts and crafts projects. For creating a journal, you could use a favorite painting or print image for your journal cover, special pockets, or inside pages. Use them as section separators, or add text and images on top of them.

Click on the links below to discover what you can print out and use:

  • Museum Collection Images - In the past few years, many museums, libraries, and corporate collections have uploaded their photo libraries online and made them available to the public. Some have even made their images open to public domain use, with free downloads. Click through for 15+ resources.
  • Vintage Graphics Image Bank - Searching for free images online can be time-consuming and daunting.  The Graphics Fairy site has an image bank of over 5000 images, and is easily searchable by vintage graphics type and theme. Available for free on The Graphics Fairy are vintage stock images, antique graphics, illustrations, and printables that are in the public domain. You can search by themes such as children, advertising, wedding, flowers, postcards, travel, garden, animal, retro, maps, botanicals, natural history, and many more. Hover your mouse over "Categories" in the top menu and you'll see a list of 78 different categories you can dive into.
  • Vintage Maps - If you love using vintage maps in projects, you’re in luck. The Lionel Pincus & Princess Firyal Map Division of the New York Public Library includes more than 20,000 cartographic works, and they’ve been made available as free high resolution downloads. You can view the maps through the New York Public Library’s Digital Collections page. To download the maps you’ll need to create an account, then click a map title and download it through the Map Warper.
  • Free Papercraft Printables for Kids - This blog post includes 6 amazing sites which offer free paper printables.

Want more inspiration and choices for your journal? Find some wonderful arts and crafts supplies and ideas at the Blick Art Store and Joann Fabrics. Or click on the images below to purchase on Amazon. As an Amazon Associate I earn from qualifying purchases (at no extra cost to you). For more about affiliates, please read our disclosure.

Beginner Kits for Crafty Kids


CRAFT KITS for KIDS

Some of my favorite crafting projects as a kid started out with spending several days gathering up supplies - beads, buttons, fabric, shells, paper, pencils. I'd get hold of leftovers or scraps that my parents and siblings were willing to part with, and I'd get some donated supplies that I hadn't expected - which would give me new ideas. What I couldn't get in donations, I'd get at the local discount store - embroidery thread, paint, balsa wood. 

But some of my best memories are of getting crafting kits - boxes that I'd open up and all the items I needed were right there, along with instructions.

If you're a crafter and have lots of goodies to equip your child for their projects, both you and they are lucky! Sometimes you can just set up your pre-teen or teen with the basics and watch them take off. Other times it's nice to provide them with a kit that comes with instructions written specifically for a beginner - and learning to follow written directions is a great skill to conquer. Most craft kits have all the supplies that you need, so you can just jump in and start on a project. 

Below are some of my favorite KITS, ARTS and CRAFTS SUPPLIES, CRAFTING TOOLS, and CRAFTING BOOKS and GUIDES geared for kids aged 7 - 16. (Please note: as an Amazon Associate I earn from qualifying purchases - at no extra cost to you.) 

Crafting is so much fun, and these items will help bring ideas to life. We hope you'll find a kit, supplies, or a book that will spark your daughter or son to create something new on their own, with a friend, or at a get-together!

TECBOSS 3D Pen, Upgraded M1 3D Printing Pen for Kids, 3D Printer Pen

TECBOSS 3D Printer Pen for Kids - Ages 5+ Use this 3D pen to sketch, print, and doodle three-dimensional designs using filament. This pen has a ceramic nozzle for safety, and comes with 2 finger protectors. Price: $40. - $60. *At the time of publishing, the price was $44.

Klutz Stitch and Style Pouches

Klutz Stitch and Style Pouches - Stitch and style seven felt pouches with button or zipper closures. Choose from 20 great designs, keep your earbuds and treasures in them, and attach them to your backpack! Price: $15. - $22.

ALEX Toys Craft Hip to be Square Crochet

ALEX Toys Craft Hip to be Square Crochet Kit - Ages 7+ This beginner kid’s crochet kit has everything you need learn how to crochet colorful squares and turn them into a hat, bag or scarf! Includes 1 finished crochet square, 6 colors of yarn, crochet hook, plastic needle, storage tin, and instructions. Price: Under $13.

ALEX Toys DIY Wear Ultimate Friendship Bracelet Party

ALEX Toys DIY Wear Ultimate Friendship Bracelet Party - Ages 8+ This kit contains everything you need to make 30 friendship and beaded bracelets, using the Friendship Wheel and Loom. Price: $20. - $35. *At the time of publishing, the price was $21.

Klutz Mini Pom-Pom Pets

Klutz Mini Pom-Pom Pets - Make some cute, fuzzy little pom pom pets, and give your mini pets special details when you add eyes, a nose, ears, a tail, and cheeks. Includes a 64-Page Book of Ideas and Instructions. Price: Under $20.

Klutz Circuit Clay Science Kit

Klutz Circuit Clay Science Kit

Combine science and crafting with this Circuit Clay kit. Kit includes 15+ projects (make a robot, flower, shooting star, dragon, and more), special conductive clay, insulating clay, 20 LEDs, battery pack, 50+ paper punch-outs for decorating clay light-up sculptures, and instruction manual. Price: Under $22.

Klutz Make Clay Charms Craft Kit

Klutz Make Clay Charms Craft Kit

Ages 8+ This award-winning kit comes with 9 colors of clay, charm bracelet, clay shaping tool, glaze with brush applicator, jump rings, charm loops, drying and display stand, and instruction book. Make more than 35 charms. Price: $12. - $22.

Loopdedoo Spinning Loom Friendship Bracelet Maker

Loopdedoo Spinning Loom Friendship Bracelet Maker - Ages 8+ Make friendship bracelets, necklaces, anklets, belts, and zipper pulls with this spinning loom. Kit includes loom and 18 skeins of high quality 100% cotton embroidery thread. Price: $20. - $35. *At the time of publishing, the price was $23.

Klutz Finger Knitting Book and Kit

Klutz Finger Knitting Book and Kit - Ages 8+ Create 15 different projects, using fingers to knit – no needles required! Includes instruction book, 4 skeins of yarn, faceted beads, button, lacing tool, and stitch holder. Price: Under $17.

Craftster's Sewing Kits Little Monsters

Craftster's Sewing Kits Little Monsters 

Make up to 5 monster projects. Kit includes: pre-cut monster felt shapes with pre-punched holes, 6 colors of embroidery floss, poly-stuffing, 5 metal needles, 2 needle threaders, scissors, 40 pins, pin cushion, non-toxic glue and easy-to-follow instructions. Price: Under $25.

Craftster's Woodland Animals Craft Sewing Kit

Craftster's Woodland Animals Craft Sewing Kit - Ages 7+ Kit includes: 5 pre-cut animal sewing projects, 6 colors of embroidery thread, 5 sewing needles, 40 straight pins, pin cushion, scissors, non-toxic fabric glue, stuffing, easy-to-follow instructions, and a cute portable carry case. Price: Under $25.

ALEX Toys Craft My First Sewing Kit

ALEX Toys Craft My First Sewing Kit

Ages 7+ This award-winning beginner’s sewing kit includes 28 felt shapes, embroidery floss, stuffing, fabric, ric rac, scissors, measuring tape, pins, needles, thimble, pin cushion, 6 buttons, pom pom strip. Price: $12. - $35. *At the time of publishing, the price was $15.

Melissa & Doug Created by Me! Flower Fleece Quilt No-Sew Craft Kit

Melissa & Doug Created by Me! Flower Fleece Quilt No-Sew Craft Kit - Ages 6+ Make a quilt without any stitching! Make a knotted quilt by tying together 48 - 12 x 12” fleece squares, with slotted fringe for easy tying. Have fun making this comfy fringed blanket! Price: Under $30.

Melissa and Doug Sweet Hearts Wooden Bead Set

Melissa & Doug Sweet Hearts Wooden Bead Set - Design your own jewelry with 150 pretty wooden beads that are heart-shaped and heart-themed. Also included are 5 color-coordinated cords and a wooden storage box. Price: Under $10.

ALEX Toys DIY Wear I Heart Charm Bracelets

ALEX Toys DIY Wear I Heart Charm Bracelets - Ages 8+ This kit comes with enough supplies to create 24 custom beads. Make 2 bracelets loaded with colorful beads and charms - a horse, key, star, guitar, horseshoe, lock, flower, and heart. Price: $10. - $25.

Kid Made Modern Arts and Crafts Library Set

Kid Made Modern Arts and Crafts Library Set - Set of 1250+ arts and crafts supplies: 510 beads and sequins, 348 fuzzy sticks, 105 pom poms, 60 felt pieces, 30 wooden dowels, floss, 102 googly eyes, 40 sticker back jewels, 9 wooden discs, 40 craft sticks, scissors, 2 needles, glue tube. Price: Under $60.

Klutz Sew Mini Animals Toy

Klutz Sew Mini Animals Toy - Ages 8+ Stitch and stuff an assortment of 14 fuzzy animal plushies from felt. No prior sewing experience needed for this award-winning craft. Includes a 48 page instruction book. Price: Under $22.

Harrisville Designs Lap Loom

Harrisville Designs Lap Loom - Ages 7+ Make handmade woven textiles on this 12 x 16 inch lap loom. Includes a tapestry needle, 2 wooden shed sticks, 2 wooden stick shuttles, and illustrated instructions. Price: $30. - $45. For yarn, consider Pack of Lion Brand Yarn in 8 different colors. Price: Under $10.

Kid Made Modern Jewelry Jam Craft Kit

Kid Made Modern Jewelry Jam Craft Kit - Ages 6+ This kit is chock full of beads and art supplies – enough to make many necklaces and bracelets. Includes 8 thread skeins, 40 felt strips, 692 assortments of beads, 120 jump rings, 2 needles, carrying case with handle, and an instruction guide. Price: Under $25.

Creativity for Kids Quick Knit Loom

Creativity for Kids Quick Knit Loom - Ages 7+ This complete knitting loom sets come with everything you need to create a variety of wearable crafts – a hat, purse, bracelet. Includes 3 skeins of colorful yarn, large round knitting loom (7.25"), small double-sided loom (4.75" x 2.5"), 3 needles, buttons, and beads. Price: Under $20.

Melissa and Doug Friendship Bracelet

Melissa and Doug Friendship Bracelet Craft Set - From simple knots to tricky patterns, this activity set guides kids through 10+ cool friendship bracelets. Each style is covered by step-by-step, full-color illustrated instructions. Price: Under $7.

Choose Friendship My Friendship Bracelet Maker Kit

Choose Friendship My Friendship Bracelet Maker Kit - Weave bracelets with this handy thread-weaving tool/thread organizer, and 20 pre-cut Prism threads in 10 great colors. Price: 

Under $20.

KLUTZ Make Your Own Mini Erasers Toy

KLUTZ Make Your Own Mini Erasers Toy - Sculpt creations with eraser clay, then bake them in the oven to make slightly squishy erasers that really work. Comes with 8 bright colors of clay and 35 eraser designs to choose from. Price: Under $25.00

Kid Made Modern Comic Book Kit

Kid Made Modern Comic Book Kit

Ages 6+ This kit includes everything you need to create your own epic superhero stories in comic book form. . Includes a blank comic book, markers, stencil templates, rubber stamps, ink pads, bottles of ink, and a storage box. Price: Under $20.

Klutz Sew Mini Treats

Klutz Sew Mini Treats - This award-winning kit includes everything you need to make 18 food plushies, including an instructional book, felt, floss, needles, filling, patterns, and pre-cut eyes and cheeks. Price: $15. - $25.

L.O.L. Surprise Secret Message Jewelry by Horizon Group USA

L.O.L. Surprise Secret Message Jewelry

Share secret messages with 295 beads, 42 alphabet charms, 2 rotating charms, 30 slider charms, 3 skeins elastic cord, 3 skeins satin cord, 3 bands, sticker sheet, 2 epoxy sticker sheets, 1 decoder, and instructions. Price: $12. - $18.

Melissa and Doug Deluxe Wooden Stringing Beads 200+

Melissa & Doug Deluxe Wooden Stringing Beads - Make gorgeous jewelry with 200+ beads and 8 brightly colored laces and clasps:bracelets, necklaces, backpack tags, bookmarks, and more. Price: $10. - $18.

Harrisville Designs Traditional 7 inch Potholder Loom Kit

Harrisville Designs Traditional 7" Potholder Loom Kit - Clear instructions, a sturdy loom, and a generous supply of custom-made, stretchy loops result in goof-proof potholder perfection. Make a picture frame, a purse, a cute chicken, and more. Price: Under $20.

Sew First Beginner Sewing Kit

Sew First Beginner Sewing Kit - This beginner sewing kit comes in a craft case and includes 4 felt stuffed animal projects, a large-eyed needle, a tape measure, pins, sharp scissors, and an instruction manual for the basics of sewing. Price: Under $30.

Kid Made Modern Journal Craft Kit

Kid Made Modern Journal Craft Kit - Ages 6+ Every creative person needs to make a habit of writing down ideas. Creative ideas can pop into your head at any time – it’s important to write them down and make drawings of them so you can go back to them at a later time! Get started with the habit of journaling with this kit. Price: Under $20.

ART & CRAFT SUPPLIES

3Doodler Start Essentials 3D Pen Set

3Doodler Start Essentials 3D Pen Set - Ages 8+ A child-safe 3D pen – no hot parts. Draw with plastic! The plastic hardens quickly, so kids can draw using one speed and one temperature. Includes 3Doodler Start 3D Pen, 2 Mixed-color Packs of Eco-Plastic (48 Strands), Micro-USB Charger, and an Activity Guide. Price: Under $50.

Schacht 15 inch Cricket Loom

Schacht 15 inch Cricket Loom - For the advanced weaver, this sturdy 15" Cricket is still compact enough to take with you easily. Made of high quality maple, the 15" weaving width offers more flexibility in your choice of weaving projects. Uses the same reeds as the 15" Flip folding rigid heddle loom. Includes 8-dent reed, threading hook, warping peg, table clamps, 2 shuttles, and 2 balls of yarn. Price: $175. - $185.

Speedball 004157 Introductory Screen Printing Kit

Speedball Introductory Screen Printing Kit - This kit includes everything you need for two screen printing methods: paper stencil and drawing fluid/screen filler. Make t-shirts, curtains, pillowcases, stationary, and much more with these high quality products and easy-to-follow instructions. Price: Under $60.

Fujifilm Instax Mini 9 Ice Blue Instant Camera

Fujifilm Instax Mini 9 Ice Blue Instant Camera - Instant photos! This is a great, fun camera that can take either color or black and white filmpacks (sold separately). Camera signals the recommended aperture setting with a flashing LED. Watch the film develop in minutes. Great for parties and special occasions. Price: $55. - $70.

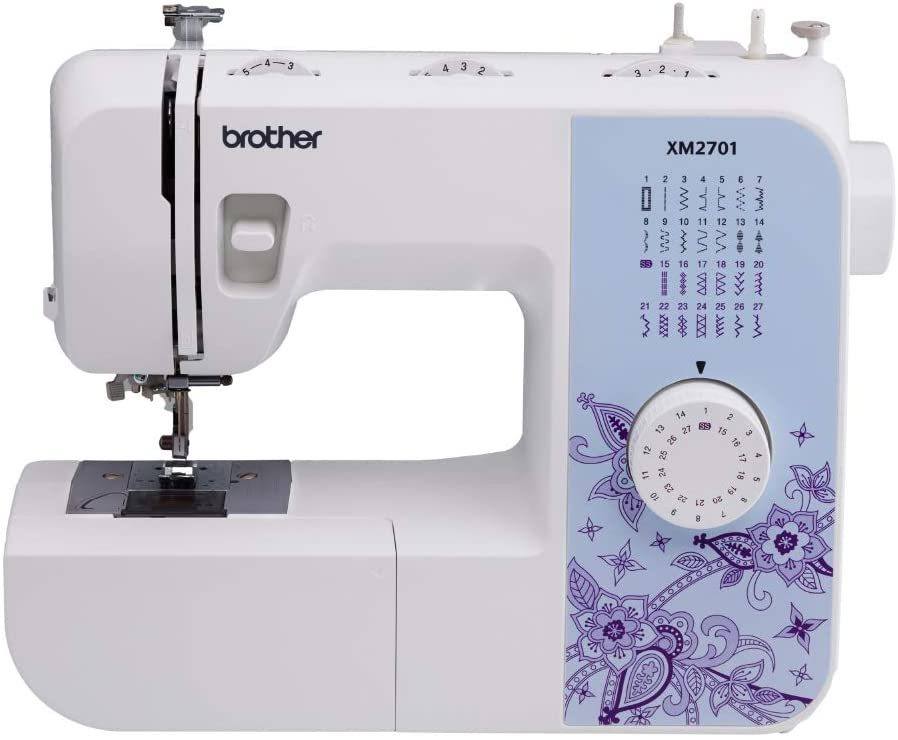
Brother Sewing Machine XM2701

Brother Sewing Machine XM2701 - This machine is perfect for a wide range of everyday sewing projects, for beginners to advanced sewers. It includes decorative, blind hem, zigzag, stretch stitches, and more, and features a jam-resistant drop-in top bobbin, a brightly lit LED work area, 27 stitches, and 63 stitch functions. Price: $90. - $100.

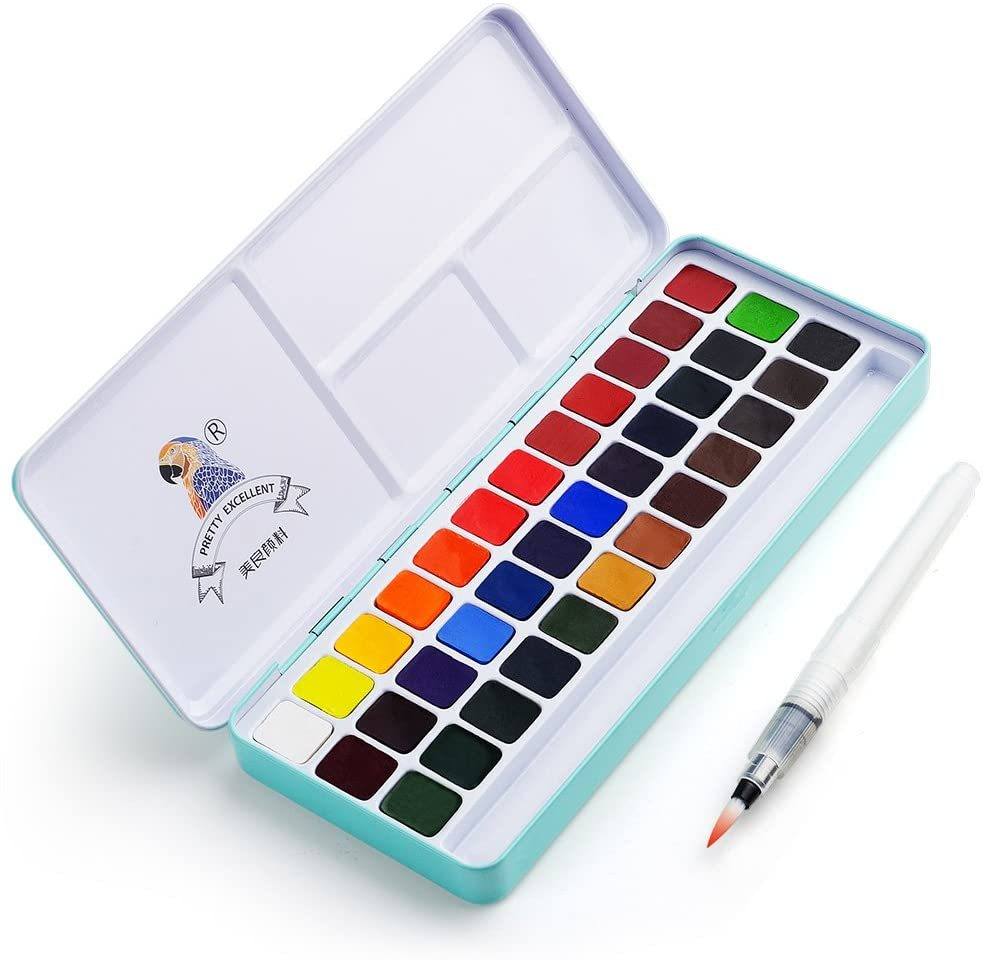
Winsor & Newton Cotman Water Colour Paint Sketchers' Pocket Box Half Pans

Winsor & Newton Cotman Water Colour Paint Sketchers' Pocket Box Half Pans - This cute pocket-sized box from a great art supply manufacturer has a mixing palette in the lid and contains: 1 Pocket brush & 12 Cotman Water Colour half pans. This is a convenient box for beginners and for painting on-the-go. Price: $15. - $25. *At the time of publishing, the price was $17.

Caran d'Ache Fancolor Color Pencils 40 Colors

Caran d'Ache Fancolor Color Pencils 40 Colors - This great set of 40 colored pencils from a top manufacturer gives you a wide range of choices for drawing, cross-hatching, and watercolor effects - they respond like watercolor when wet. A wonderful set for budding artists. Price: $30. - $40. *At the time of publishing, the price was $32.

3Doodler Create+ 3D Pen Set with 75 Filaments

3Doodler Create+ 3D Pen Set with 75 Filaments - Age 14+ Draw and sculpt with plastic! Click to extrude heated plastic which hardens rapidly, allowing you to draw in 3D, freehand, or over stencils. Make art, design wearables, build models, decorate your space, fix things, or just play. Price: Under $80.

Water Coloring Brush Pens Ohuhu Set of 6 Watercolor Painting Brushes

Watercolor Painting Brush Pens Ohuhu Set of 6 - Blend with water or add ink to barrel and enjoy! Great for solid colors or powdered pigment - use with watercolor crayons, markers, and pencils to spread and smooth colors. Made with high quality nylon hair brush tips that holds its shape and does not spray, spread or smear. Price: Under $10.

Holbein Artists' Watercolor 12 Color Set

Holbein Artists' Watercolor 12 Color Set

Holbein makes great watercolors that are highly pigmented. This is an excellent set for a beginner watercolor artist, with colors that retain their brilliance, and are easy to handle and control with brushes. Set includes 12 tubes of 5 ml each. Price: Under $25.

Fujifilm Instax Mini 9 Instant Camera and Accessories Kit

Fujifilm Instax Mini 9 Instant Camera and Accessories Kit - This camera and kit includes an Instax Mini 9 Instant Camera, film twin pack, camera case and strap, 60 Assorted Colorful Mini Film Stickers, 5 Colorful Frames, 4 Colorful filters (Blue, Green, Red and Orange), and an attachment selfie mirror designed for capturing Selfie photos. Price: Under $120.

Singer Start 1304 6 Built-in Stitches Machine

Singer Start 1304 6 Built-in Stitches Machine - This is a great machine for beginners because it has just a few built-in stitches, with pre-set stitch width and length. It’s lightweight and portable. Includes All-Purpose Foot, Zipper Foot, Buttonhole Foot, Darning Plate, Pack of Needles, Bobbins, Needle Plate, Quick Start Guide, an Instruction Manual, and more. Price: $70. - $160. *At the time of publishing, the price was $74.

Winsor & Newton Winton Oil Colour Paint Basic Set

Winsor & Newton Winton Oil Colour Paint Basic Set - 10 Colors - This is a great starter set for painting with oils – Winsor & Newton has developed this line of paints for students and amateur artists – high quality paints with dense pigmentation, at an affordable price. Price: $20. - $40. *At the time of publication, the price was $24.

Kid Made Modern Washable Paint Set Acrylic

Kid Made Modern Washable Paint Set Acrylic - A convenient starter set of acrylic paints that includes 12 washable paints, 2 medium round brushes, a palette, a pad of 10 sheets of sturdy paper, and a storage container. Price: Under $20.

AIO Robotics Full-Metal Premium 3D Printing Pen for 3D Modeling, Education, PLA Filament Support, Bright OLED-Display

AIO Robotics Full-Metal Premium 3D Printing Pen - For the advanced 3D pen user who wants precision, adjustable material flow, and temperature control in 1 degree increments.  Extra-bright OLED display allows you to monitor flow speed and temperature of material. Includes slim, ergonomic touch pen, 2 colors of PLA plastic filament, manual, cable, and A/C adapter. Price: Under $60.

Kid Made Modern Studio in a Box Set

Kid Made Modern Studio in a Box Set - Includes 60+ items to get you started creating paintings and watercolors: washable markers, acrylic paints, watercolor paints, crayon discs, paint brushes, canvas boards, paper pads, and carrying case. Price: Under $40.

XP-PEN Artist15.6 15.6 Inch IPS Drawing Monitor Pen Display Graphics Digital Monitor with Battery-Free Passive Stylus (8192 Levels Pressure)

XP-PEN Digital Monitor with Battery-Free Passive Stylus - If you want to draw on a tablet, this might be the one for you. Functions allow users to sketch, paint, design and edit directly from the tablet screen, with 8192 levels of pressure sensitivity. It’s compatible with Photoshop, Painter, Illustrator, Clip Studio, Krita, Gimp, SAI and more. Price: Under $360.

Faber-Castell Albrecht Durer Watercolor Pencil Wood Case, Set of 120 Colors (FC117513)

Faber-Castell Albrecht Durer Watercolor Pencil Wood Case, Set of 120 Colors - These 24 watercolor pencils can be completely dissolved, and will then behave in the same way as classic watercolor paints. They are the same color whether wet or dry, become permanent when dry, and are fade-resistant. Price: Under $42.

Crayola Light-Up Tracing Pad Blue

Crayola Light Up Tracing Pad - Ages 6+ 

This tracing pad locks paper into a frame so you can easily trace drawings. An LED illuminates the tracing sheets so you can easily see what you’re tracing. Includes Coloring Board, Graphite Pencil, 12 Short Colored Pencils, 10 Tracing Sheets, and 10 Blank Sheets. Price: Under $25.

Winsor & Newton Watercolor Markers Set of 13

Winsor & Newton Watercolor Markers - Set of 12 highly pigmented lightfast markers in a lightweight metal case. Twin-Tipped with a fine point and flexible brush nib, perfect for multiple line thickness and superior detailing. Create art with the water color markers dry, wet, or blended with a brush. Price: $25. - $40. *At the time of publishing, the price was $29.

US Art Supply 20 Piece Artist Pack

US Art Supply 20 Piece Artist Pack

A great starter set that includes 9" x 12" Premium Extra Heavy-Weight Watercolor Painting Paper Pad, 8.5" x 11" Premium Hardbound Sketch Book, 5.5" x 8.5" Premium Heavy-Weight Paper Spiral Bound Sketch Pad, 15 Piece Multi-Purpose Brush Set, painting palette, and a color mixing wheel. Price: Under $20.

CRAFTING BOOKS

For more curated books and crafting supply suggestions, explore our Crafting Resources, The Brooklyn Refinery Shop, and our Materials Source List. The Brooklyn Refinery is reader-supported. When you buy through links on our site, we may earn an affiliate commission. Thank you!

Having fun with new and traditional crafts, art, design, DIY, and freebies.

TRENDING & POPULAR

FREE ART BOOKS ONLINE  Start your own free collection of art books from three major museums.

DISCOVER SASHIKO STITCHING  Learn how to make traditional Japanese decorative stitches for quilting, mending, and upcycling.

BILUM  Discover a fabric-making technique used in Papua New Guinea that can be used to make bags and dresses.

HOW TO MAKE AN AMISH RAG RUG  There's no sewing required to make this traditional homemade crafted item.

35,000 FREE KNITTING & CROCHETING PATTERNS Use our easily searchable list to find free patterns by Rowan, Vogue, Lion Brand, Berroco, and more.

HOW TO MAKE A LINOLEUM BLOCK PRINT  Watch how-to videos for beginners explaining the basic step-by-step process of making a linoleum block print.

HOW TO MAKE A BORO BAG  Learn how to make a stand-out bag using a Japanese patchwork technique and Sashiko stitching. 

'KNIT' LIKE THE VIKINGS  Discover an ancient fabric-making technique that's still done today, pre-dates knitting, and doesn't unravel.

MAGNETIC CLAY CERAMICS Ceramic artists working with magnetic clay can play with the forces of nature to create fantastical structures.
For the Love of Cross Stitch

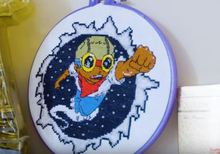
Cross-stitching project of a rocket boy super hero by Emma McKee

Redefining Cross-Stitching

“Cross stitch for rappers? Are you joking? I’m an anomaly in this scene, for sure…I create custom, one-of-a-kind cross-stitch jackets for Chicago’s creative class.”   Emma McKee

After making a cross stitch present for her mother, Emma McKee was drawn to the technique and compelled to do more. So, she taught herself the cross-stitch process, including how to create a pattern from an idea and sketches.

Emma has made her mark on the art and craft of cross-stitching, putting her own spin on pieces which incorporate what gives her inspiration - art, poetry, and music.

In a span of four years of focusing on creating cross-stitch items, she’s worked with a team of 7 – 14 Chicago-based artists, and has created close to 135 pieces, spending anywhere from 50 – 60 hours on making each item.

“My inspiration usually will come complete, finished, everything - from a person. It arrives fully formed in my head, and that’s it. I have no idea how we get there. I don’t sit around and think about it for somebody....To see something that you’ve made effect somebody in what seems to be a meaningful way is a pretty emotional thing.”

Watch the video below from Great Big Story to see what happened when she tweeted a photo of a jacket she cross-stitched, getting her start into making a living doing what she loves.

· Don't miss: You might like our blog posts American Crafters, Subway Yarn Bombing, and Altered Book Sculptures.

You can find books about subversive, feminist, mini-, and classic cross-stitching here

The Brooklyn Refinery is reader-supported. When you buy through links on our site, we may earn an affiliate commission. Learn more 

POPULAR POSTS

Make a Boro Bag

Follow a tutorial for making a patchworked bag with Sashiko topstitching.

Sashiko Videos

Follow tutorials for how to create traditional Japanese embroidery stitching.

Vintage Maps

Explore a library's digitized vintage maps, which you can download for free. 

How to Care for Quilts

Learn from a museum textile curator how to best care for your quilts.

Photo of a sewing foot and fabric

Make a Scappy Quilt

Learn to make a basket weave pattern quilt from scraps of fabric.

yarn bombed bike

Yarn Bombing Sisters

Sisters Lorna and Jill Watt create amazing yarn bomb installations .

Magnetic Ceramics

Ceramic artists create fantastical structures using magnetic clay.

Knit Like the Vikings

Learn about a Viking fabric-making technique which pre-dates knitting.

Make a Bilum Bag

Follow a tutorial for making a bilum bag - PNG's traditional fabric.

Home made DIY Pinhole camera

Make a Pinhole Camera

Learn to make a pinhole camera; develop paper film with common items.

What is Nalbinding?

Learn about a stretchy fabric made with connected loops.

Cartoon drawing of a Woman knitting

Digitized Knitting Magazines

Free digitized knitting magazines 1800 - now.

The Brooklyn Refinery Header Logo

Preserving Textiles

Preserve textiles such as Historical quilts

Preserving Textiles

Learn from conservation experts a number of ways you can protect and preserve your fabric pieces so you can maximize their lifespans.

In addition to general wear, textiles are vulnerable to deterioration due to pests, light, temperature, humidity, mold, mildew, improper repairs, and stressful handling.

The textiles of blankets, quilts, embroidered pieces, and clothing can benefit from certain positive environmental conditions. And, you can take steps to avoid certain negative environmental conditions so your textiles will last well into the future.

The Government of Canada offers advice for caring for and preserving textiles via its Conservation Institute website. Text-based information is available through them online and in .pdf form.

For in-depth video instructions for textile conservation, check out the 6-part series Conservation and Preservation of Heirloom Textiles from the Minnesota Historical Society’s textile conservator, Ann Frisina.

Watch all 6 parts in order, below, or skip around for specific information: Materials You Need; How to Make a Padded Hanger; Storing Costumes in Boxes; Storage of Flat Textiles in Boxes; Storage of Quilts and Coverlets; and Rolling Textiles on a Tube.

Materials You Need:

How to Make a Padded Hanger:

Storing Costumes in Boxes:

Storage of Flat Textiles in Boxes:

Storage of Quilts and Coverlets:

Rolling Textiles on a Tube:

POPULAR POSTS

Make a Boro Bag

Follow a tutorial for making a patchworked bag with Sashiko topstitching.

Sashiko Videos

Follow tutorials for how to create traditional Japanese embroidery stitching.

Vintage Maps

Explore a library's digitized vintage maps, which you can download for free. 

How to Care for Quilts

Learn from a museum textile curator how to best care for your quilts.

Photo of a sewing foot and fabric

Make a Scappy Quilt

Learn to make a basket weave pattern quilt from scraps of fabric.

yarn bombed bike

Yarn Bombing Sisters

Sisters Lorna and Jill Watt create amazing yarn bomb installations .

Magnetic Ceramics

Ceramic artists create fantastical structures using magnetic clay.

Knit Like the Vikings

Learn about a Viking fabric-making technique which pre-dates knitting.

Make a Bilum Bag

Follow a tutorial for making a bilum bag - PNG's traditional fabric.

Home made DIY Pinhole camera

Make a Pinhole Camera

Learn to make a pinhole camera; develop paper film with common items.

What is Nalbinding?

Learn about a stretchy fabric made with connected loops.

Cartoon drawing of a Woman knitting

Digitized Knitting Magazines

Free digitized knitting magazines 1800 - now.

Ari Embroidery

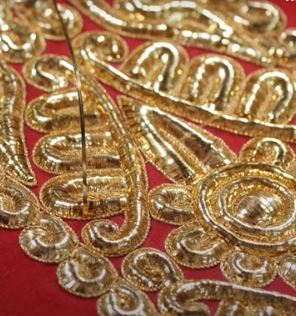
A close up of gold threaded ari embroidery on red fabric

Ari Embroidery

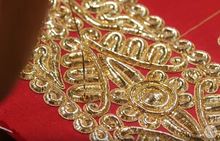
Ari embroidery, also known as ari work, is a type of decorative needlework which produces a chain stitch.

This embroidery technique began in India. It was adopted by Europeans by the eighteeneth century, where it is known as tambour work, tambour embroidery, and Luneville embroidery.

Ari embroidery can be done on woven and un-woven materials, including paper and leather. The material which is the base for embellishment can be stretched over a frame or held in the hands.

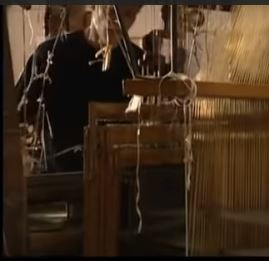
The Victoria and Albert Museum's short documentary (below) shows craftsmen at work on an ari embroidery piece at the Sankalan Embroidery Design and Production House in Jaipur, India.


We see the embroidery design first taking shape as a drawing made on tracing paper, and then making its way to fabric stretched tightly on a frame via a paper and plastic stencil that’s been pricked with holes all along the drawn lines.

A liquid Chalk solution is applied to the pin-pricked plastic, and rubbed  through the tiny holes, making an outline of the drawing onto the fabric.

      · Don't miss: For the Love of Cross-Stitching, Soumak Weaving, Jacquard Weaving, and Tapestry Weaving.  Find best-selling Embroidery books here. [As an Amazon Associate I earn from qualifying purchases (at no extra cost to you).]

Embroidery thread is held underneath the fabric, while a thin hook is poked through the top, catching and pulling the thread and bringing it through to the top of the piece, making a loop.

Each new loop is pulled through the previous one, making a continuous chain-stitch, following the dotted outline of the drawing.

After the ari work is finished, the embroiderer holds a piece of wood on the underside of the fabric as they use a wooden hammer to pound the threads flat on the upper side.

           · You might find helpful: Crafting Resources.

Screen grabs from the Victoria and Albert Museum's video How Was it Made? Ari Embroidery.

POPULAR POSTS

Make a Boro Bag

Follow a tutorial for making a patchworked bag with Sashiko topstitching.

Sashiko Videos

Follow tutorials for how to create traditional Japanese embroidery stitching.

Vintage Maps

Explore a library's digitized vintage maps, which you can download for free. 

How to Care for Quilts

Learn from a museum textile curator how to best care for your quilts.

Photo of a sewing foot and fabric

Make a Scappy Quilt

Learn to make a basket weave pattern quilt from scraps of fabric.

yarn bombed bike

Yarn Bombing Sisters

Sisters Lorna and Jill Watt create amazing yarn bomb installations .

Magnetic Ceramics

Ceramic artists create fantastical structures using magnetic clay.

Knit Like the Vikings

Learn about a Viking fabric-making technique which pre-dates knitting.

Make a Bilum Bag

Follow a tutorial for making a bilum bag - PNG's traditional fabric.

Home made DIY Pinhole camera

Make a Pinhole Camera

Learn to make a pinhole camera; develop paper film with common items.

What is Nalbinding?

Learn about a stretchy fabric made with connected loops.

Cartoon drawing of a Woman knitting

Digitized Knitting Magazines

Free digitized knitting magazines 1800 - now.

How to Make a Boro Bag

Close up of boro bag

How to Make a Boro Bag: A Japanese Textile Tradition

A New Approach to Stitches

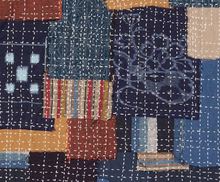
To appreciate sashiko stitches ("little stabs" or "little pierce" stitches) and boro clothes (meaning tattered or repaired), we need to put aside the idea of always trying to hide our stitches, and explore the elegance of having our construction be bold and in plain sight. Long, decorative reinforced thread can be incorporated into any number of fabrics that make up clothes, bedding, and accessories.

Boro Tradition

Boro is Yuyo-no-Bi, or the Beauty of Practicality, found in the traditional Japanese patchwork technique of piecing together and mending fabric.

Boro is a traditional Japanese form of repairing clothes, where layers upon layers of fabric and stitches make up a multi-layered patchworked piece of clothing, accessory, or bedding. Boro pieces were created from years-worth, even generations-worth, of repairs being made to a jacket or bedcover.

Japanese indigo cotton Boro jacket circa 1900. Image from https://www.kimonoboy.com

Before cotton was introduced in Japan, fabric was hand-made, hand-spun, and hand-dyed linen, hemp, and ramine. When a piece of clothing or bedding began to fall apart they would be pieced, patched, and stitched back together. Sashiko stitches would bind the many layers together, like a quilt.

Long running sashiko stitches traditionally give new life to cloth items, strengthening the fabric and adding warmth.

When clothes started to fall apart for good, and were beyond repair even with more layering and sashiko stitches, they’d be repurposed and turned into smaller items such as aprons, bags, and cleaning cloths.

Making a Boro Bag with Sashiko Stitches

Screen grab from Bebe Bold. Follow BeBe Bold on Facebook.

Making a boro bag is a great way to try out sashiko stitching - having fun pairing contrasting colored stitches throughout an item, making dramatic marks with thread that take on a life of their own.

You'll need some simple sewing items to start, which we've listed below with links to Amazon. You can also jump in and see some Sashiko Kits available for purchase online, or purchase some Sashiko items separately. (As an Amazon Associate I earn from qualifying purchases - at no extra cost to you.) 

Having fun with new and traditional crafts, art, design, DIY, and freebies.

TRENDING & POPULAR

FREE ART BOOKS ONLINE  Start your own free collection of art books from three major museums.

HOW TO MAKE AN AMISH RAG RUG  There's no sewing required to make this traditional homemade crafted item.

DISCOVER SASHIKO STITCHING  Learn how to make traditional Japanese decorative stitches for quilting, mending, and upcycling.

35,000 FREE KNITTING & CROCHETING PATTERNS Use our easily searchable list to find free patterns by Rowan, Vogue, Lion Brand, Berroco, and more.

'KNIT' LIKE THE VIKINGS  Discover an ancient fabric-making technique that's still done today, pre-dates knitting, and doesn't unravel.

BILUM  Discover a fabric-making technique used in Papua New Guinea that can be used to make bags and dresses.

BeBe Bold’s video instructions below are helpful in learning an easy way to create a Boro Bag. To get a download of Bebe Bold's pattern, you’ll need to go to the website and purchase it. 

If you’re a thrifty crafter or on a budget, you can follow directions, including a free pattern, from Indigobird Design, or from Fabrice Editions to make a loop bag, and adapt it to be a boro bag. 

Photo via Hanmadiya Japanese Boro Bag Tutorial

You can find a Japanese Boro Bag Tutorial with photos at Handmadiya.com, as well as .pdf downloadable step-by-step directions for another type of Boro Bag Tutorial via  London's Victoria & Albert Museum.

         · Don't miss: Sashiko Stitching and Sashiko Videos.

You can adapt bag projects to make a boro bag, using hand stitches (sashiko), machine stitching, or a combination of both. All People Quilt's messenger bag would look great as a boro bag - you'll have to create a free account to download free patterns.

If you want to see how boro tradition and techniques are inspiring contemporary designers, keeping traditional craftsmanship alive, have a look at Kapital and Kiriko.

Susan Briscoe Designs is a great place to start for putting together a sashiko kit. Click here for a one-stop convenient resource for needles, threads, fabric, books, patterns, and instructional videos.

For more about the Sashiko tradition and written tutorials, consider some helpful books we've curated below. 

SASHIKO, JAPANESE QUILTING, MENDING, and SLOW STITCHING BOOKS

The Ultimate Sashiko Sourcebook

The Ultimate Sashiko Sourcebook by Susan Briscoe Explore the origins of Sashiko, and what you need to get started. Ten project chapters show how easy it is to use sashiko patterns to make beautiful items for the home. *At the time of publishing, the price was $21.

Make and Mend: Sashiko-Inspired Embroidery Projects to Customize and Repair Textiles and Decorate Your Home

Make and Mend: Sashiko-Inspired Embroidery Projects to Customize and Repair Textiles and Decorate Your Home by Jessica Marquez

This book includes 15 projects, including mending clothes and home goods. *At the time of publishing, the price was $13.

Japanese Sashiko Inspirations: 25 Ways to Explore a Traditional Technique

Japanese Sashiko Inspirations: 25 Ways to Explore a Traditional Technique by Susan Briscoe

Experiment with 12 essential sashiko techniques. Each chapter includes a beginner's project,  and a more intricate design. *At time of publishing, the price was $22.

Japanese Quilting: Sashiko

Japanese Quilting: Sashiko by Hiromitsu Takano This book includes 30 designs, each accompanied by a full drawing, ranging from the Ougi (Fan) to Sayagata (Buddhist symbols). *At the time of publishing, the price was $19.

The Geometry of Hand-Sewing: A Romance in Stitches and Embroidery from Alabama Chanin and The School of Making (Alabama Studio)

The Geometry of Hand-Sewing by Natalie Chanin This book features more than 100 stitches—from the most basic straight and chain to the more fanciful feather and herringbone, with photos of both right and wrong sides. *At the time of publishing, the price was $17.

Japanese Country Quilting: Sashiko Patterns and Projects for Beginners

Japanese Country Quilting-Sashiko Patterns and Projects for Beginners by Karen Kim Matsunaga  Instructions for stitching patterns inspired by natural motifs, including 60 traditional patterns. *At time of publishing, the price was $24.

How to Felt a Wool Sweater

Washing machine picture for sweater felt article

How to Felt a Wool Sweater


If you’ve thrown a sweater into the wash thinking it will survive the machine's tossing and turning without too much shrinkage, and then been surprised by the pint-sized sweater that you pull out after the final rinse cycle, then you know how to make your own felted wool.

I’ve learned from my washing mistakes, and now I look at my aging sweaters and determine whether they can be rehabilitated into a new life through the magic of shrinkage.

Wool that's been agitated in hot water changes its characteristic stretchiness, as the fibers tighten and become matted together. The resulting dense felted fabric is no longer a sweater that can unravel.

Rather, It's felted wool that can be cut and sewn together without fear of fraying. It’s got a new life as a stronger, more durable and warmer fabric that's now ready to be turned into mittens, scarves, hats, skirts, slippers, ponchos, capes, shawls, and quilted bedcovers.

Washing machine picture showing hot temperature needed to felt a sweater


After you intentionally shrink your first sweater, you'll begin to see the possibilities of working with this fabric, and you might end up collecting sweaters for future projects just like you'd do with fabric for quilting, building an inventory of different colors, weights, and stitch patterns.

When searching for sweaters to felt, keep in mind that you want the wool content to be at least 80%. Every sweater with at least 80% wool is brimming with possibilities. Men's Size XXL sweaters will give you larger pieces of felt post-washing. Baby and kids sweaters might come in patterns you wouldn't find in adult sweaters. And sweaters with extra long ribbing might come in handy for making mittens.

          · Don't miss: American Crafts, Preserving Textiles, and Crafting Resources.

Tips for felting:

  • Wash like colors together
  • Set machine to the highest hot setting
  • Add a small amount of laundry liquid
  • Check on the sweater every 5 minutes or so 
  • Remove the sweater from the machine when the shrinkage is just right - if it's balled up and won't lie flat, it's been shrunk too much
  • Lie the sweater flat for air drying
  • If you want more shrinkage, put the damp sweater in the dryer, and check on it frequently

You can also felt sweaters by hand:

  • Fill up a basin with hot water and a little liquid soap 
  • Add the sweater to the water
  • Scrub and agitate the sweater until it shrinks
  • Make sure you rinse all the detergent out
  • If necessary, toss it in the dryer for more shrinkage - be sure to check on the shrinkage every few minutes so it doesn't over-shrink
Photo of scissors to cut sweaters to turn into felt

Once the sweater is dry, disassemble it:

  • Cut off buttons
  • Turn the sweater inside-out so the seams are exposed
  • With a good pair of scissors, cut close to a side seam all the way up to the sleeve
  • Cutting close to the shoulder seam, cut the sleeve off
  • Cut along the shoulder seams
  • Cut the other sleeve off
  • Don't cut the second side seam
  • Leave the main body of the sweater as one piece - you might want a big section for a project
  • On each sleeve, cut down the sleeve seam, giving you a flat piece of felted wool
  • As you're cutting the sweater apart, keep an eye out for moth holes and stains
  • Put a piece of paper tape over any holes and stains you find, so you can make sure to cut around the blemishes.

More tips:

If you need to store your felt, make sure you put your pieces in a dry, covered container, away from moths and other bugs.

To keep bugs away, you can add a couple of drops of Rosemary, Cedarwood, or Thyme essential oil to cotton balls and add them to your felt storage container. You can also add a lavender sachet.

If you’d like a more detailed explanation of turning sweaters into felted material with before-and-after photos, Make Magazine offers some advice and a felting how-to article.

Sweaters that are partial wool can also be upcycled, but won't be fray-proof like felted wool. To deconstruct the sweater, cut into pieces by following the seams. 

In the making of any project with non-felted sweaters, you'll need to stop any potential fraying by machine stitching zig-zags on all the raw, cut edges.

Next, watch a thrifty knitter source sweaters to be deconstructed for their yarn at DIY Mindset

Below are three books about working with sweaters and felted wool. Click on a link to see them or purchase them on Amazon. [As an Amazon Associate I earn from qualifying purchases (at no extra cost to you).]

POPULAR POSTS

Make a Boro Bag

Follow a tutorial for making a patchworked bag with Sashiko topstitching.

Sashiko Videos

Follow tutorials for how to create traditional Japanese embroidery stitching.

Vintage Maps

Explore a library's digitized vintage maps, which you can download for free. 

How to Care for Quilts

Learn from a museum textile curator how to best care for your quilts.

Photo of a sewing foot and fabric

Make a Scappy Quilt

Learn to make a basket weave pattern quilt from scraps of fabric.

yarn bombed bike

Yarn Bombing Sisters

Sisters Lorna and Jill Watt create amazing yarn bomb installations .

Magnetic Ceramics

Ceramic artists create fantastical structures using magnetic clay.

Knit Like the Vikings

Learn about a Viking fabric-making technique which pre-dates knitting.

Make a Bilum Bag

Follow a tutorial for making a bilum bag - PNG's traditional fabric.

Home made DIY Pinhole camera

Make a Pinhole Camera

Learn to make a pinhole camera; develop paper film with common items.

What is Nalbinding?

Learn about a stretchy fabric made with connected loops.

Cartoon drawing of a Woman knitting

Digitized Knitting Magazines

Free digitized knitting magazines 1800 - now.

Sashiko Videos

Long white sashiko stitches on a quilt top

Sashiko Videos

Below are videos that support our post Sashiko Stitching.

First are Kimonomomo's 3-part tutorial on sashiko, followed by a video about handling and organizing sashiko thread.

The final video, from Sashi.co, instructs how to transfer a sashiko pattern to fabric.

   · Don't miss: You can find instructional sashiko books, threads, needles, and templates here. More books are listed below. [As an Amazon Associate I earn from qualifying purchases (at no extra cost to you).]

Kimonomomo has an Etsy store that's chock full of gorgeous Japanese fabrics for sale. 

  · Don't miss more about Boro, Sashiko, and crafting materials: Sashiko Stitching, How to Make a Boro Bag, and Crafting Resources.

Below are book cover thumbnail pics of some best-selling books on sashiko,  the Slow Stitch Movement, varieties of stitches, and visible mending. Click through for more information or to purchase on Amazon, and have some fun! 

FOR YOUR LIBRARY

The Ultimate Sashiko Sourcebook

The Ultimate Sashiko Sourcebook by Susan Briscoe describes everything you need to begin sashiko stitching, and includes Ten project chapters.

Simple Sashiko: 8 Sashiko Sewing Projects for the Modern Home

Simple Sashiko: 8 Sashiko Sewing Projects for the Modern Home by Susan Briscoe. Projects include a tote bag, greetings cards, cushion, table mats, coaster, pocket hanging, and a long sampler.

The Geometry of Hand-Sewing: A Romance in Stitches and Embroidery from Alabama Chanin and The School of Making (Alabama Studio)

The Geometry of Hand Sewing by Natalie Chanin. Chanin presents instructions for more than 100 stitches—from the most basic straight and chain to the more fanciful feather and herringbone.

Mending Matters: Stitch, Patch, and Repair Your Favorite Denim & More

Mending Matters: Stitch, Patch and Repair Your Favorite Denim and More by Katrina Rodabaugh. Includes 20+ projects that showcase current trends in visible mending that are edgy, modern, and bold.

Japanese Quilting: Sashiko

Japanese Quilting: Sashiko by Hiromitsu Takano. A practical guide covering the basics, plus 30 designs [including Ougi (Fan), Ume (plum blossom), Shippu (seven treasures), and Sayagata (Buddhist symbols)], plus 10 projects. 

Visible Mending

Visible Mending: Artful Stitchery to Repair and Refresh Your Favorite Things by Jenny Wilding Cardon. Includes 35 examples of both hand-mending methods (boro, embroidery, patching, and darning), and machine mending.

Japanese Country Quilting: Sashiko Patterns and Projects for Beginners

Japanese Country Quilting: Sashiko Patterns and Projects for Beginners by Karen Kim Matsunaga. Step-by-step instructions for stitching patterns inspired by natural motifs, including 60 traditional patterns, and suggestions for basic sewing projects. 

Traditional Sashiko Inspirations

Japanese Sashiko Inspirations: 25 Ways to Explore a Traditional Technique by Susan Briscoe. 12 chapters cover essential sashiko techniques, and include beginner and intermediate level projects for each technique.

Make and Mend: Sashiko-Inspired Embroidery Projects to Customize and Repair Textiles and Decorate Your Home

Make and Mend: Sashiko-Inspired Embroidery Projects to Customize and Repair Textiles and Decorate Your Home by Jessica Marquez shows readers how to apply sashiko stitching to a variety of craft projects - repairing torn jeans, and making decorative pillows, napkins, a tablecloth, and a totebag.

Slow Stitch: Mindful and Contemplative Textile Art

Slow Stitch: Mindful and Contemplative Textile Art by Claire Wellesley-Smith introduces a range of ways in which you can slow your textile work down, including using hand-stitch techniques , and reusing and re-inventing materials.

Paradise Stitched

Paradise Stitched - Sashiko and Applique Quilts by Sylvia Pippen includes Hawaiian-inspired applique quilts with Sashiko directions and patterns. 

Stitch Fabric & Thread

Stitch, Fabric & Thread: An Inspirational Guide for Creative Stitchers by Elizabeth Healey includes 40 practical exercises, slow sewing ideas, and insights into sewing movements such as Boro textiles, Gee's Bend quilting, and Dorset buttons.

POPULAR POSTS

Make a Boro Bag

Follow a tutorial for making a patchworked bag with Sashiko topstitching.

Sashiko Videos

Follow tutorials for how to create traditional Japanese embroidery stitching.

Vintage Maps

Explore a library's digitized vintage maps, which you can download for free. 

How to Care for Quilts

Learn from a museum textile curator how to best care for your quilts.

Photo of a sewing foot and fabric

Make a Scappy Quilt

Learn to make a basket weave pattern quilt from scraps of fabric.

yarn bombed bike

Yarn Bombing Sisters

Sisters Lorna and Jill Watt create amazing yarn bomb installations .

Magnetic Ceramics

Ceramic artists create fantastical structures using magnetic clay.

Knit Like the Vikings

Learn about a Viking fabric-making technique which pre-dates knitting.

Make a Bilum Bag

Follow a tutorial for making a bilum bag - PNG's traditional fabric.

Home made DIY Pinhole camera

Make a Pinhole Camera

Learn to make a pinhole camera; develop paper film with common items.

What is Nalbinding?

Learn about a stretchy fabric made with connected loops.

Cartoon drawing of a Woman knitting

Digitized Knitting Magazines

Free digitized knitting magazines 1800 - now.

Sashiko Stitching

An example of Sashiko, a Japanese style of top stitching on quilted fabric

Sashiko Stitching

Photos via Harujion Design

Sashiko (pronounced shash-ko) is a Japanese technique of needlework quilting stitchery which has endured through the centuries, beginning in the Edo Era (early modern Feudal Society) of 1615-1868.

The stitching technique is an artful way to decorate and sustain fabric which needs to be repaired in order to continue to be useful. Sashiko, meaning ‘pierce, or stab,’ are simple running stitches made using undyed threads.

Sashiko originated as a darning technique for mending and reinforcing boro clothing, among Japan's working class poor in the countryside. Japanese farmers' clothes and household items were made of dark indigo cloth – homespun and handwoven linen, hemp, and ramie. 

As the cloth on a piece of clothing wore out, new pieces of cloth were added with stab stitches. Durability of fabric was of the essence – fabric had to last as long as possible, and was repurposed as needed in order to keep using it until it was totally worn out and unable to be stitched back into usefulness.

"Beyond the warmth and protection provided by the garments, the patterns embroidered onto the blue cloth where also believed to offer spiritual protection to the wearer:

- Designs placed around the hem of a garment, its sleeve openings and the neckline were believed to prevent evil spirits from entering the human body.

- Kimonos for babies had stitching applied to the back neckline as a talisman and to safeguard a vulnerable area.

- Vulnerable parts of the body were protected by small stitched symbols hidden in the inside of the garment.

- The cross-over of stitches, called 'me' (目) in Japanese and meaning 'eye' in English, were believed to have strong protective powers. Some patterns had thousands of cross over stitches."

Working Class Sashiko by Pamela Ravasio via Hand/Eye Magazine

Layer upon layer of fabric and stitches made a piece of clothing warmer and more stable. The undyed stitches were not sewn randomly - they were sewn in straight lines or shapes which made distinctively decorative patterns.

As a larger piece of clothing wore down to the point of no longer being salvageable with sashiko stitching, it would be repurposed into smaller useable items.

Work jackets and half jackets were repurposed as shoe insoles, floor cushions, quilts, bedcovers, futon covers, drawstring bags, rice bags, door curtains, and cleaning cloths. This repurposing and non-wastefulness comes from the idea of "mottainai," meaning "too good to waste."

Some sashiko-stitched clothes and household items have been passed down for generations, sometimes within the same family.

Thrift and sustainability in maintaining home textiles transposed into an aesthetic that is appreciated and celebrated today. 

“By the 1950s, increased prosperity and the introduction of man-made fibres began to change the way country people dressed, and sashiko declined. Old, worn sashiko garments were not always valued and many were thrown away. Modern redevelopment has taken a toll on the old kura (family storehouses) where sashika were stored, as have fires and earthquakes.

Fortunately, the respect for old cloth led some people to carefully preserve old sashiko and other textiles, which re now prized by museums and collectors as examples of mingei (folk art).

A sashiko revival began in the 1970s, parallel to the rise in Western quilting in Japan. As the role of sashiko as a frugal necessity has disappeared, people are appreciating stitching sashiko for its creative, relaxing and even therapeutic qualities. In the 21st century, sashiko continues to evolve.”

The Ultimate Sashko Sourcebook by Susan Briscoe

Getting Started with Sashiko

If you like the look of sashiko stitches, grab your worn-out items and stitch some visible life back into them.

Add patterned stitches to jeans or pants, skirt, dress, quilt, coat, scarf, bag, pillowcase, shirt, hat, gloves or mittens. Head over to Pinterest and look at examples of visible stitching to find one you’d like to emulate.

A good sashiko tutorial can be found at Upcycle Stitches. Our curated selection of excellent video tutorials can be found at Sashiko Videos. If you'd like to try sashiko stitching on a gorgeous boro patchwork project, check out How to Make a Boro Bag.

What you need

Below is a list of items that will help you get started. Click through to see the items on Amazon. [As an Amazon Associate I earn from qualifying purchases (at no extra cost to you).]

Some More Thoughts

Today, examples of sashiko are preserved in museums, and the technique is celebrated and appropriated by designers, including Louis VuittonHiroyuki Horihata, Makiko Sekiguchi, Joseph Altuzarra, and Junya Watanabe.

Fortunately for us, ethnologist and author Chuzaboro Tanaka amassed a collection of boro clothing which is now permanently housed in Tokyo’s Textile Culture and Ukiyo-e Art Museum – Amuse Museum. Click on the Museum link to check out their collection.

If you’d like to read a short history of clothes worn by different classes in Japan, read Japanese Textiles of Daily Life by Iwao Nagasaki Tokyo National Museum.

And, to read more about the history of sashiko and various sashiko stitches, we highly recommend The Ultimate Sashiko Sourcebook by Susan Briscoe.

Below are some best selling books on sashiko. Click on a book cover thumbnail photo or button for more information on Amazon.

For more curated books and crafting supply suggestions, explore our Crafting Resources, The Brooklyn Refinery Shop, and our Materials Source List.

Sashiko Stitching was published by thebrooklynrefinery.com April, 2018.

POPULAR POSTS

Make a Boro Bag

Follow a tutorial for making a patchworked bag with Sashiko topstitching.

Sashiko Videos

Follow tutorials for how to create traditional Japanese embroidery stitching.

Vintage Maps

Explore a library's digitized vintage maps, which you can download for free. 

How to Care for Quilts

Learn from a museum textile curator how to best care for your quilts.

Photo of a sewing foot and fabric

Make a Scappy Quilt

Learn to make a basket weave pattern quilt from scraps of fabric.

yarn bombed bike

Yarn Bombing Sisters

Sisters Lorna and Jill Watt create amazing yarn bomb installations .

Magnetic Ceramics

Ceramic artists create fantastical structures using magnetic clay.

Knit Like the Vikings

Learn about a Viking fabric-making technique which pre-dates knitting.

Make a Bilum Bag

Follow a tutorial for making a bilum bag - PNG's traditional fabric.

Home made DIY Pinhole camera

Make a Pinhole Camera

Learn to make a pinhole camera; develop paper film with common items.

What is Nalbinding?

Learn about a stretchy fabric made with connected loops.

Cartoon drawing of a Woman knitting

Digitized Knitting Magazines

Free digitized knitting magazines 1800 - now.

Charitable Crafters

A blue and white striped bknitted baby hat representing charitable crafting items

Giving Back: Sewing, Knitting, and Crocheting for Charities

Upcycling, recycling, repurposing, and creating new items for charity is one way crafters spread their love.

Crafters of all levels can give back and give a boost to those in need. Whether you’re a newbie or can knit with your eyes closed...prefer to knit in the cozy confines of your living room...enjoy getting together and chatting with knitting circle buddies, people of all ages and levels of proficiency can create items that will be cherished and appreciated.

Knitting, crocheting, and sewing for charity is a great way to put your creative juices and handiwork talents to work for a good cause. Doing good through crafting is a wonderful way to share with others.

There are all sorts of organizations, both local and across the globe, which look for donated pieces from crafters to distribute to those in need – from birds needing a nest to families who are experiencing homelessness.

Donating your handmade items made with care for others is a great service, and much appreciated by the charitable organization and the ultimate receiver.

Your handiwork might even inspire others to learn a new craft, paying forward the creative process that’s so rewarding.

If keeping costs of raw materials to a minimum is a consideration for whether you can contribute, you can take a page from super-thrifters. You can re-use sweaters if you like – unwind them to reuse the wool, buy discounted yarn, or purchase it at a thrift store. You could even put out a plea on local forums seeking donations of yarn for your donate projects.

Below are some Charitable Organizations that look for sewers, knitters, and crocheters for their giving programs. Some of the programs have specific needs, and they’ll supply you with directions and free patterns.

Some have specific time frames for delivering the handmade items to their offices. So, be sure to check charitable websites for any particular instructions.

All will want you to use clean yarn from a smoke-free environment.

If you’ve got some spare time for making something to donate, I hope you find an organization and cause that matches the time and effort you can put in.

You might make new friends along the way!

A blue and white striped bknitted baby hat representing charitable crafting items

You can read about the social platform for knitters, or you can head straight over to Ravelry and search for a group to join. Or, perhaps you'd like to start your own by reaching out to knitters in your locale.

If you're in the UK, you can search for a group near you on the UK Hand Knitting site.

“We knitters work a powerful magic when we knit for others. By doing so…we can build bridges between warring nations, help to heal deep wounds, offer a primal sort of comfort, and create peace - however small, and in whatever way that may be - for others and for ourselves.”

Knitting for Peace: Make the World a Better Place One Stitch at a Time by Betty Christiansen and Kiriko Shirobayashi.  

If you'd like to put some time and effort into charitable craftivism, check out sewmamasew's curated list of charitable programs, Mental Floss's list, and visit the website links below to find a good fit for how you'd like to help out. 

List of suggested charities

1 Million Pillowcase Challenge lists charities to contact to see if they need pillowcases for their organizations. All People Quilt offers free pillowcase patterns for this challenge. Be sure to scroll down to the bottom of the page for access to all the .pdf pillowcase patterns.

afghans for Afghans  "...is a humanitarian and educational people-to-people project that sends hand-knit and crocheted blankets and sweaters, vests, hats, mittens, and socks to the beleaguered people of Afghanistan. This grassroots effort is inspired by Red Cross volunteers who made afghans, socks, slippers, and other items for soldiers and refugees during World Wars I and II and other times of crisis and need. Read about the Red Cross knitting tradition.”

Binky Patrol "...is an all-volunteer non-profit organization dedicated to making blankets and giving them away to children who are ill abused in shelters, hospitals, and experiencing any type of trauma. Blankets can be sewn, quilted, crocheted, knitted, or tied." 

Bundles of Love Charity  "...partners with community service agencies to assist Minnesota families in need by providing handmade baby clothing, bedding and basic care items for their newborns. Our vision is to gather communities to support a parent and newborn. We offer peace of mind for families and provide important, essential and practical supplies to show that someone cares.”

Care Wear "...is a nationwide group of volunteers who knit, crochet, and/or sew, providing handmade baby items directly to hospitals. All Care Wear items are distributed by hospital staff (free) to infants, children and their parents.”

Dressed in Hope "...is a charity whose goal is to help impoverished girls around the world. We recognize the critical need that must be met in order for these girls—not only to survive—but to thrive as well. By sewing and delivering simple, hand-made dresses and small "pocket dolls" to these deserving girls, we send the message that all girls are worthy of love and respect.

Hats 4 the Homeless “...distributes knitted goods to the homeless population in New York City every winter. You don’t have to be in NYC to donate; they have an address where you can mail your goods. It’s not just hats, either — they’ll also take scarves, socks, and gloves.”

Knitting 4 Peace – Women 4 Women “The tangible items we create are personally delivered to women, teens, children, infants, and families in global areas of conflict, including our own neighborhoods and countries around the world.”

Knots of Love “Our mission at Knots of Love is to warm the hearts and heads of those experiencing traumatic hair loss. Our volunteers lovingly hand-knit and crochet caps for those struggling with treatment-induced hair loss and tiny Neonatal blankets for fragile new lives in incubators. Knots of Love caps and blankets server as a constant reminder to the patient and their loved ones that they are not alone. All Knots of Love handmade creations are distributed free of charge to hospitals and treatment centers throughout the country -- and most importantly at no cost to the patient receiving the caps.”

Milk Bags Unlimited (Canada) “The milk bag mats offer people without beds, an invaluable, durable and washable alternative to sleeping on the often cold and damp ground. Not only can these milk-bag mats provide comfort as a bedding alternative, but have been used by health-care professionals as a make-ready substitute for an operating bed/table where resources are scarce. It takes approximately 400 milk bags to make an adult sized mat. For quite some time, all across Canada, a community of volunteers, schools, churches and businesses have been collecting milk bags. The milk bags used are the ones that hold the three smaller bags of milk. The bags are cut into strips, tied together, and then woven or crocheted into mats.”

Mother Bear Project "...is dedicated to providing comfort and hope to children affected by HIV/AIDS in emerging nations, by giving them a gift of love in the form of a hand-knit or crocheted bear. The simple gift of a hand-knit bear with a tag signed by the knitter has touched children with the message that they are unconditionally loved.”

Project Linus  “...Provide(s) love, a sense of security, warmth and comfort to children who are seriously ill, traumatized, or otherwise in need through the gifts of new, handmade blankets and afghans, lovingly created by volunteer “blanketeers.”

Quilts of Valor  "cover(s) service members and veterans touched by war with comforting and healing Quilts of Valor.”

Red Scarf Project “Foster Care to Success helps young adults who have aged out of the government support system. FCS helps to support approximately 5,000 young people every year with various programs – scholarships for college, care packages, academic and personal mentoring, and help with readiness skills for internships and employment. They receive financial support, career coaching, and care packages. Each year, The Red Scarf Project sends Valentine’s Day care packages to foster students in need of encouragement as they graduate from high school and move on to college. Nothing shows someone you care like a handmade item, even if that someone is a stranger. See the red scarf guidelines and start knitting or crocheting a scarf for the next cycle of care packages, then browse Craftsy’s knitted neckwear and crocheted neckwear patterns to find one you’d like to make.”

Snuggles Project "...is well-known as a multi-beneficial project. The first, and most important, benefit is to the animals. After being given a Snuggle, a frightened and/or difficult to handle animal is able to become calm. This calming effect gives the animal and the caregiver time to learn how to handle the situation. We believe that this calming effect has saved the lives of many newly-sheltered animals. The Snuggles Project remains a very popular program of Hugs Society (formerly Hugs for Homeless Animals). Its popularity is worldwide. People from all around the world make Snuggles and donate them to their local animal shelters and rescues. Since its inception we have provided more than a million Snuggles to shelter animals around the world. And that number continues to grow.”

Teddies for Tragedies “When tragedy strikes somewhere in the world, the first members of society to suffer are the children. Teddies for Tragedies works to alleviate some of the stress that prevails when these catastrophes occur. The simple gift of a hand-knitted teddy bear sends these children the message that someone in the world cares for them and that they are loved. You can help. Volunteers are the essential ingredient of Teddies for Tragedies. Follow our patterns to crochet or knit a bear or bears, and then send them to us. If you can’t crochet or knit, sew a bag or bags for the bears, or help us with donations of yarn and stuffing.”

The Dulaan Project “Dulaan is the Mongolian word for warm. This project seeks to inspire the generous spirit of the knitting community to help meet the needs of Mongolia’s impoverished people. Mongolia’s winter is extreme. It rarely gets above freezing temperatures on winter days, and can often plunge to -40°F at night. The capital city, Ulaanbaatar, is the coldest capital in the world. Warm, well-made clothing can allow a child to go to school or an adult to go to work; restore a sense of dignity; and, in some cases, literally save a life. This project was started in 2005 at the height of FIRE’s aid distribution project.  

UK, Australia, and South Africa

Knitters in the UK can visit the UK Hand Knitting's site, and Australian knitters can visit Knitters Guild NSW and Knitting-and, where they'll find links to organizations that ask for donated knitted projects.

South Africa's Knit A Square "...program has inspired volunteers in more than 54 countries to knit and crochet 8”x 8"(20 cm) blanket squares, hats, vests and sweaters....South Africa has an estimated 1.9 million orphans and abandoned children...For these children, a blanket can be the difference between life and death. Between hope and despair."

Local Charitable Crafting

There are many ways to help others with your crafting skills. You can work on your own at your own pace, you can join a group, or you can form a group.

There are local hospitals or charitable organizations which would welcome donated handmade knitted or sewn items - childrens' wings of hospitals, homeless shelters, and animal rescue shelters.

A group you join or organize might get inspiration from a national program, which you could use to focus an idea locally. You'll be helping people in your local community, and can be more involved in direct needs and how to help individuals in need.

You might choose to make pillowcases for a local hospital, or quilts for relief for hurricane victims or other natural disasters.

You can also teach your skills. Some after school programs and some homeless shelters welcome volunteers who can teach knitting and crocheting. You could be the spark that introduces someone to a new passion and teaches them skills which can be used to make or sell things. 

Using the list of organizations above, or a local search, make sure to research deadlines for projects, and any changes in what they require or need.

Free Patterns for Charitable Crafters

Bev’s Country Cottage "provides free patterns for crafters who love to make warm, needed items for humanitarian purposes. She offers patterns for all kinds of items: cancer hats, preemie hats and booties, senior citizen lapghans and slippers, kids mittens, cat blankets, leprosy bandages and much more. Check out the charity listings on this site."

Ravelry has patterns offered by different charitable organizations looking for knitted donations

Videos You Might Like

Below are two videos about crafting for charity.

Next, check out Bob Makes Socks to see how a group of pals makes a big difference.

If you know of a charity looking for crafted donations, please let us know at hello@thebrooklynrefinery.com, and we’ll add it to the list!

POPULAR POSTS

Make a Boro Bag

Follow a tutorial for making a patchworked bag with Sashiko topstitching.

Sashiko Videos

Follow tutorials for how to create traditional Japanese embroidery stitching.

Vintage Maps

Explore a library's digitized vintage maps, which you can download for free. 

How to Care for Quilts

Learn from a museum textile curator how to best care for your quilts.

Photo of a sewing foot and fabric

Make a Scappy Quilt

Learn to make a basket weave pattern quilt from scraps of fabric.

yarn bombed bike

Yarn Bombing Sisters

Sisters Lorna and Jill Watt create amazing yarn bomb installations .

Magnetic Ceramics

Ceramic artists create fantastical structures using magnetic clay.

Knit Like the Vikings

Learn about a Viking fabric-making technique which pre-dates knitting.

Make a Bilum Bag

Follow a tutorial for making a bilum bag - PNG's traditional fabric.

Home made DIY Pinhole camera

Make a Pinhole Camera

Learn to make a pinhole camera; develop paper film with common items.

What is Nalbinding?

Learn about a stretchy fabric made with connected loops.

Cartoon drawing of a Woman knitting

Digitized Knitting Magazines

Free digitized knitting magazines 1800 - now.

5 Ways to Repurpose T-Shirts

T-shirts made into shopping bags

How to Not Let Go...

There comes a time when we have to face the facts about our favorite cotton t-shirts – they just don’t last forever, no matter how much we love them. Cotton has a life-span, and a t-shirt’s lifespan gets a little shorter every time it gets sent through the washer and dryer, or suffers the injustices of stains and holes.

But, just because they're not in top form doesn’t mean we’re ready to let them go. They hold our memories - concerts, schools, favorite bands, hobbies, sports teams we love, vacations, travel.

It’s hard to give them up!

How do you deal with that pile of guilt-by-association cloth? The sentiment attached to these objects runs high. 

So, you don't have to toss your sentimental t-shirts. You can keep the memories close to you, in something other than t-shirt form. Why not turn them into something that's utilitarian?

Below are some fun ideas for re-purposing t-shirts, with links to clever crafters (from as far away as Australia!) who know how to recycle and upcycle with style. There a a lot of links below that'll take you to projects for making bags, quilts, blankets, pillow covers, scarves, beach bags, and market totes.

I hope you find a project you'd like to try - to breathe some new life into your old cotton friends.

1. Quilts

Turn t-shirts into a quilt. A keepsake memory quilt would make a wonderful gift, a great wall-hanging, a couch throw, a homemade sleeping bag, or a cozy bed cover.

You can treat the t-shirts just like you would any other fabric. Stitch together large squares and add borders, or make a patterned quilt.

Head over to National Quilters Circle for Samantha Miller’s Quick and Easy T-Shirt Quilt Tutorial.

2. Blankets

Gather your t-shirts and cut them into the size squares you want, and then stitch them together. Skip the inner batting that would make a quilt, and just add a backing. Depending on the size and shape, you’ll end up with a blanket, couch throw, beach blanket, picnic blanket, kid’s tent, dog blanket, or car blanket.

Justine Stuckenschneider has a wonderful T-Shirt Blanket Tutorial over at You’re So Martha.

If you like lots of textures, consider checking out the Instructables site for easy lessons on making a No Sew T-Shirt Blanket. You'll see how to cut the edges of t-shirt squares into strips that can be knotted with other squares to make a blanket without stitching pieces together. You’ll end up with a lot of knots and fringe and a really unique looking blanket.

3. Pillow Cover

Turn some favorite t-shirts into a pillow cover - for a bed, a chair, a couch, a playroom, or a pet’s bed.

The DIY Network shows you How to Make Throw Pillows Out of Old T-Shirts.

The DIY Mommy has a quick tutorial for How to Sew an Easy Pillow Cover. She uses regular fabric in her tutorial, but you can certainly use favorite t-shirts and sew a no-frills (no buttons, no zipper) pillow cover by following her instructions and stitching it up with a simple slipstitch. Watch how she does it below!

Australian crafters at Fiskars Craft (photo below) have shared a tutorial on making a T-Shirt Rag Quilt Pillow. It looks like a vintage piece, turning favorite t-shirts into a patchwork pillowcase, with fringe added for extra coziness. 

Faith Rim at The Mod Girl shares a tutorial on making a no-sew pillow cover, cutting strips into the edges of two t-shirts and then tying the strips together to create a front and back for the cover.

4. Memory Scarf

What a great way to keep your favorite memories alive, and close. You can share your sentiments while keeping warm! Makezine has a tutorial for a T-Shirt Memory Scarf.

This would be a great project for two friends to do together, sharing parts of t-shirts so they end up with similar scarves.

5. Tote, Beach, or Grocery Bags

This project is so fast and simple that it would be a great beginner’s sewing project. You re-purpose a t-shirt by cutting off the sleeves, cutting a scoop at the neckline, and stitching the front and back panels together at the hem. It can easily be folded up to tote around until you need to use it, and then it’s super stretchy for conveniently carrying groceries or gear home.


Sewmargaretsew at The Instructables has a wonderful tutorial (photo above via sewmargaretsew) for making a quick and easy bag. 

Heather at mommypotamus has a written step by step tutorial on how to make a no-sew t-shirt tote bag, using the cutting and knotting technique we’ve seen before. This is a great project for a beginner.

And...

If you prefer watching video tutorials, check out The Smithsonian American Art Museum's video Handi-hour Crafting: T-shirt Bags.

Burda Style takes the t-shirt bag idea and expands on it. They show how to make a Net Bag DIY project, where making horizontal snips at regular intervals creates a super-stretchy bag that can help you de-sand your clothes at the beach, or give your veggies some breathing room.

It flips the previous t-shirts so that the hemmed bottom of the t-shirt becomes the top of the carry bag. With a curved cut and stitch, you’ve got a chic bag. 

There’s a tutorial from the blog betweenthelines where the cuts are made vertically rather than horizontally. Gorgeous!

You might also want to check out Recycling and Upcycling for Crafts, How to Felt a Wool Sweater, How to Make a Plarn Bag, and DIY Mindset.

Above photo via Delia Creates. Main post photo via Instructables.

POPULAR POSTS

Make a Boro Bag

Follow a tutorial for making a patchworked bag with Sashiko topstitching.

Sashiko Videos

Follow tutorials for how to create traditional Japanese embroidery stitching.

Vintage Maps

Explore a library's digitized vintage maps, which you can download for free. 

How to Care for Quilts

Learn from a museum textile curator how to best care for your quilts.

Photo of a sewing foot and fabric

Make a Scappy Quilt

Learn to make a basket weave pattern quilt from scraps of fabric.

yarn bombed bike

Yarn Bombing Sisters

Sisters Lorna and Jill Watt create amazing yarn bomb installations .

Magnetic Ceramics

Ceramic artists create fantastical structures using magnetic clay.

Knit Like the Vikings

Learn about a Viking fabric-making technique which pre-dates knitting.

Make a Bilum Bag

Follow a tutorial for making a bilum bag - PNG's traditional fabric.

Home made DIY Pinhole camera

Make a Pinhole Camera

Learn to make a pinhole camera; develop paper film with common items.

What is Nalbinding?

Learn about a stretchy fabric made with connected loops.

Cartoon drawing of a Woman knitting

Digitized Knitting Magazines

Free digitized knitting magazines 1800 - now.

DIY Mindset

A cup of coffee and a knitting project,, illustrating a way to repurpose yarn.

A DIY Mindset

Resourceful and thrifty crafters have always seen the possibilities in donated, discarded, and under-utilized materials.

An astounding amount of items end up being discarded – while still having lots of “life” left in them.

Cotton and wool have natural life spans. You can feel with your fingers how far along a natural fiber is in its lifespan – the cotton is either worn thin or gets too rough-feeling. Aged wool starts to lose its shape.

If you’re a recycler or an up-cycler, then you’ll want to give your clothes a boost every time they need it – stitching on a new button, or making a weaving repair of a hole. You’ll be keeping old traditions alive, such as darning and fine stitching, and you’ll be able to keep your favorite clothes for a little longer.

From Old to New Again

But when clothes finally lose their oomph – their youthful elasticity - and are beyond repair, then we can repurpose them. We can turn them into patches for pants, fabric for quilts, or even yarn to be knitted, crocheted, or woven into a rug.

You loved your clothes for their color or pattern, or because they reminded you of a time and place. So, why not give them another life in another form?

I’ve sourced fabric from all but one of these:

  • From around our house
  • From friends and family
  • Thrift stores
  • Church sales
  • Auctions
  • Swap meets
  • Craigslist
  • Local offer-ups
  • Curb alerts
  • Online auctions
  • Library sales
  • Estate sales
  • Flea markets
  • Police auctions

Okay, not police auctions. I was just kidding about that one.

Church sales, flea markets, auctions, and thrift stores are American as apple pie. Our thrifty ancestors took old wool blankets and turned them into hooked rugs, and turned old shirts and sheets into quilts and rag rugs.

A DIY Mindset in Action

While recycling and repurposing aren’t uniquely American, it seems like hunting down bargains and, at the same time, keeping items from going to the incinerator is a pastime that many of us are passionate about.

Below is a video about a thrifty knitter who sources for yarn at thrift stores—but he’s looking for sweaters, not balls of yarn. I don't think anyone would be able to tell that the sweaters he knits started out as sweaters picked up for pennies on the dollar. Watch the video and see if you agree with me!

When you unravel a sweater to reuse the wool, you’ll most likely have a lot of kinks that you’ll want to get out. Staci from Very Pink Knits lets us in on her process of preparing salvaged yarn for re-use.

If you're just getting started with knitting, you might want to check out Yarn and Knitting Basics and How to Knit. Finally, you'll find free patterns here: 35,000 Free Knitting and Crocheting Patterns.

BOOKS

Below are some books about repurposing wool and cotton into new projects. Click through to see the books on Amazon. [As an Amazon Associate I earn from qualifying purchases (at no extra cost to you).]

The Sweater Chop Shop: Sewing One-of-a-Kind Creations from Recycled Sweaters by Crispina Ffrench

The ReFashion Handbook: Refit, Redesign, Remake for Everybody by Beth Huntington

Sweater Surgery: How to Make New Things With Old Sweaters by Stefanie Girard

Sewing Green: 25 Projects Made With Repurposed & Organic Materials Plus Tips & Resources for Earth-Friendly Stitching by Betz White

POPULAR POSTS

Make a Boro Bag

Follow a tutorial for making a patchworked bag with Sashiko topstitching.

Sashiko Videos

Follow tutorials for how to create traditional Japanese embroidery stitching.

Vintage Maps

Explore a library's digitized vintage maps, which you can download for free. 

How to Care for Quilts

Learn from a museum textile curator how to best care for your quilts.

Photo of a sewing foot and fabric

Make a Scappy Quilt

Learn to make a basket weave pattern quilt from scraps of fabric.

yarn bombed bike

Yarn Bombing Sisters

Sisters Lorna and Jill Watt create amazing yarn bomb installations .

Magnetic Ceramics

Ceramic artists create fantastical structures using magnetic clay.

Knit Like the Vikings

Learn about a Viking fabric-making technique which pre-dates knitting.

Make a Bilum Bag

Follow a tutorial for making a bilum bag - PNG's traditional fabric.

Home made DIY Pinhole camera

Make a Pinhole Camera

Learn to make a pinhole camera; develop paper film with common items.

What is Nalbinding?

Learn about a stretchy fabric made with connected loops.

Cartoon drawing of a Woman knitting

Digitized Knitting Magazines

Free digitized knitting magazines 1800 - now.

How to Sew a Simple Quilt

A workshop table with tools for making a quilt

Getting Started with Quilting

Detail of a nine patch quilt

You know that feeling when you snuggle up in something handmade? It just feels better, cozier, and warmer...

Quilted patchwork is designed to last and to have a visual impact. It's maker intentionally cut pieces apart, arranged them into a graphic pattern, and stitched them together to make a strong visual statement.

You can picture the thoughts and steps that go into this process of tearing down and building back up. When you see a handmade quilt, you appreciate all the choices that went into the making of the patchwork, and all the stitching that will hold it together for years to come.

You can imagine someone saving parts of beloved but old clothes that they can't quite toss or donate.

And you know that this has been going on for generations - salvaging, upcycling, and recycling -  keeping patterns and memories alive.

A quilt is a one-of-a-kind creation. It comes from a lot of thought and a lot of playing around with colors and patterns. It brings warmth, protection, design, and history into our lives.

The Process

Making a Simple Block Quilt

​Cutting up and then reconstructing patches of differently colored and patterned fabric into something new is a satisfying creative endeavor.

You get to play around with contrasting and complimentary colors, and patterns and themes of whatever is printed on the fabric. Then you get to organize your patches into simple grids or complex patterns - it can be as bold or subtle as you want.

What kind of fabric makes you happy? Micro-prints of flowers in shades of green, or tiny pandas holding loaves of bread? It’s time to indulge yourself, and combine your favorite fabrics together into a simple block quilt that will hopefully be your first of many.

After gathering all the materials we need, we’re going to go through 6 steps to make a simple quilt.

[Note: this post includes links to sewing tools and accessories available through Amazon.  As an Amazon Associate I earn from qualifying purchases (at no extra cost to you). Clicking through will take you to an Amazon page with several best-selling choices.]

For the basic basics, you need fabric for the front, fabric for the back, batting for the middle, scissors, pins, a ruler, a quilting needle (for hand quilting), hand quilting thread (as well as regular needle and thread if you baste), and a thimble. Expanding the list are a sewing machine, a rotary fabric cutter, and a cutting mat.

Do all colors go together well?

Sure - you can do anything you like with combining colors! 

Treat your quilt like it’s a picture. It could be an abstract picture, like a block quilt or a crazy quilt. Or it could tell a story, like a quilt with embroidery, or a quilt made of themed t-shirts. You could even make a Landscape Quilt.

You can play around and pre-view your quilt by laying out pieces on a floor, table, or bed and stepping back to see what it looks like.

Lay out enough pieces to give you a sense of what the combined fabrics will look like – and then experiment with other fabrics until you get combinations you like.

Or, you can give in to a sense of randomness. Take your cut pieces, toss them into a pile on the table, and build blocks from whichever fabric pieces you happen to pick up next.

Go with your gut - with the combinations that are pleasing to your eye and get you excited about the project.

For a first quilt, sew with cotton (let’s leave wool quilts, or even upcycled sweater quilts, for another time).

STEP 1

As you go through fabric to choose for your project, make sure each piece of fabric still has some life in it.

There are many sources for fabrics. Quilt-making is a way to recycle fabrics from clothing, blankets, etc. that are too worn in some places but still have some life left. 

If you’ve got a favorite fabric but it’s worn pretty thin, now’s the time to baste another piece of fabric underneath it so it can be included in this quilt.

Of course, you can also use new fabric.

You should make sure all the fabric you're going to use - new and old - is clean and pre-shrunk. Wash brand new fabric to remove sizing and chemicals, and wash old fabric to remove stains. 

I like to make a quilt that can be thrown in the washer and dryer, so I also prepare all my fabric by washing it in warm water and then throwing it in the dryer. That way, fabric that hasn’t been pre-shrunk won’t suddenly cause puckering at the seams the first time it’s thrown in the dryer.

Using vintage fabrics? Here's a tip:

Evelyn Siefert Kennedy, an expert textiles preservationist, outlined some advice in an interview about preserving vintage fabrics:

 ...(she) uses distilled war to ensures that there are no mineral deposits, and a fiberglass screen to support large pieces when she hand-washes them. "It helps you lift the piece without damaging the fabric," she says. 
She recommends that once you determine that a vintage fabric is washable, you follow this procedure: Soak the fabric in cold water for 20 minutes. Drain. You may need to soak again if the water is dirty. Then soak it again in a mixture of 4 tablespoons of baking soda per quart of water. The baking soda breaks down the pollutants in the stain. It is excellent for getting rid of mud or ink. You may need to repeat this process. If you need to remove grease, use Murphy's Oil Soap. If you need to remove rust, use Whink, a commercial soap. A paste of lemon juice and salt will also remove rust. 
If you need to do general washing, use Woolite. Do not use bleach. If you must whiten the fabric, use a 3 percent solution of hydrogen peroxide mixed with cold water in a 50-50 ratio. Do not use bleach with metal or metallic fabrics. Do not put precious pieces in a washing machine or dryer. Wrap the washed piece in a towel to blot-dry it. Then lay it out flat on a towel and let it air-dry. "

STEP 2

The next step is cutting fabric into usable pieces.

You need to understand fabric bias and make sure to avoid cutting your fabric on the bias. There are times when you want your fabric to be stretchy, and that’s when you cut it on the bias. But for this project, you’ll want to cut it on the grain.

Here’s a good explanation with helpful photos of selvedge, bias, and grain

Is some of your fabric wrinkly and going to be hard to cut and sew? Then now’s the time to plug in the iron and wrangle the wayward cotton into ideal flatness!

Our first, simple quilt is going to be same-size squares sewn together.

How big do you want your quilt to be? How big do you want your squares to be? If you want your squares to be 9 x 9, and you want your quilt to be for a twin size bed, you’re going to want a finished product that’s close to 39” x 80”. So, you’ll have 5 squares across, and 9 squares down, for a total of 45 squares.

When we stitch squares together, we generally stitch a ¼” seam, so when figuring out the math, if you want your squares to be 9” in the finished quilt, then you’ll cut the squares to be 9.5” square.

Once you’ve plotted out the size square you want, and figured out how many squares you need to make the quilt the size you want – counting the ¼” seams in the equation – then you’ll cut your prepped fabric.

Use a rotary cutter and cutting mat (or just a pair of scissors) and a good ruler. Then, cut your fabric into the pieces you’ll need, making sure that you’re cutting parallel to the selvedge.

STEP 3

Time to get stitching!

Lay out the fabric in a grid – just the way you want your quilt to be when it’s finished.

I suggest you sew the squares of the top row together – working left to right until you’ve got the 5 squares all stitched together in a row. Then sew the squares the same way for the remaining rows.

Then iron the seams open, one row at a time. If your quilt is 5 x 9 squares, then you’ll have 9 rows of 5 stitched-together squares.

Now, stitch the rows together, starting with the top two. Iron the seams open as you go.

When you’re finished, step back and admire your quilt top!

STEP 4

Assembling the 3 pieces, aka the quilt sandwich.

Because you’re working with fabric that can slip and slide, you’ll want your batting and back to be bigger than your quilt top. That way, if it sides a bit one way or another, you’re covered. So, cut a piece of batting for the middle – and make sure it’s about 2” wider and longer than your quilt top.

Batting can be wool, cotton, or poly, in sizes from 45 x 60 (crib) to 120 x 120 (King).

Next, you’ll need to cut a piece of fabric for the back – or piece together some fabric for the back. Make sure this bottom layer is 1” wider and longer than the batting layer – just so you don’t run into shortage problems if the quilt top shifts a bit. (Note: if you’re sending your quilt of to a company that will do the stitching for you, using a long arm stitching machine – then check in with them about how much extra they’d like on the middle and bottom layers.)

Lay the three pieces, one on top of the other, on a table or on the floor. Smooth everything out so there are no puckers or ridges.
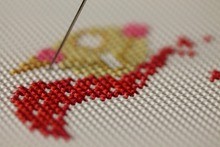
Now you have to baste the quilt sandwich together – by stitch basting, by spray-basting, or by pin-basting.
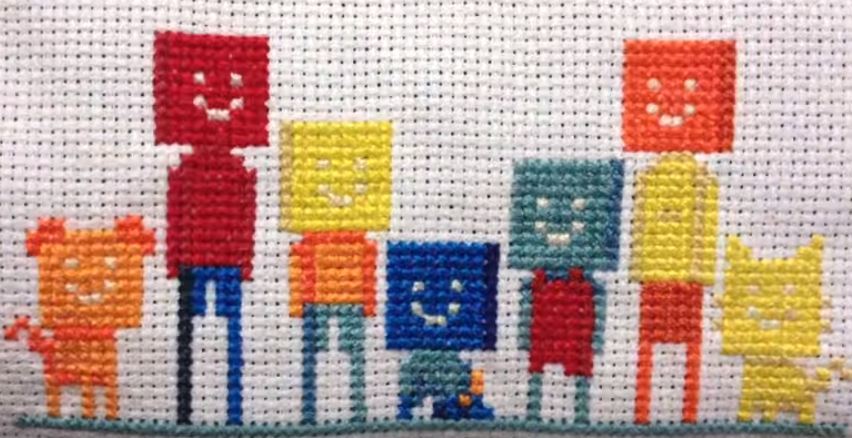
Then, baste stitch down the middle of the pieces, securing them together. Run some additional basting top to bottom and side to side. You want the quilt pieces secure enough so you can do your top stitching.

Alternatively, you could secure the layers together with safety pins, pin-basting the layers together.

STEP 5

Putting it all together.

You’ve got several choices here. You could just tack down the three pieces in several spots, or tack down with buttons, hand stitch, machine stitch, or pack it up and ship it off to a company which you can pay to do machine top-stitching for you.

If you’re finishing your quilt with hand stitching, you may want to use a round embroidery hoop, a craft frame, or a square Q-Snap frame. Stitch in a grid pattern, diamond pattern, swirls, or any way you’d like; you could purchase quilting paper or a quilting template, use tailor’s chalk or a disappearing ink marking pen to map out where you’re going to stitch.

Superior Threads has helpful descriptions of the qualities of different quilting threads

Here you have a choice: do you want your stitches to be more functional than decorative? Then you’d choose a color that’s close to your fabric. But you may want to use a contrasting color – or colors - to add a layer of design to your quilt. You may even want to go big with some sashiko - or big - stitching (more on that below).

You can also machine stitch the quilt layers together. The thread chart below (screen grab from superiorthreads.com) shows approximate amounts of thread needed for machine sewing the three layers of a quilt together, for the top feed only. If you want to use the same thread for the machine's bottom feed, you'll need to double the amount.

Screen grab and how to estimate your explanation below from Superior Threads:

Use a running stitch, using the rocking technique. I try and keep my stitches as regular and consistent as possible, about 1/8” in length.  I like to have my rows of stitches about 2” apart – that way, I know that when I throw the quilt in the washer/dryer, the 3 layers are tacked together enough that the batting won’t clump.

Start your stitching at the center of your quilt and work your way to the edges.

You’ll want to use quilting thread and quilting needles. Coats & Clark sells Hand Quilting thread which is cotton-covered poly; Gutermann sells Quilting thread which is 100% cotton.

Quilting thread is heavier and stiffer than regular thread. It’s a bit wire-y, so it doesn’t knot up as you’re doing your stitching.

Professor Pincushion has a wonderful tutorial on hand-quilting your layers together.

You don’t have to do small stitches – you can stitch your quilt layers together using big stitches – stitches that measure ¼ to 3/8 inches in length, rather than 1/8 of an inch in length.

Screen grab from Wendi Gratz’s Big Stitch Quilting post at Shiny Happy World:

Here’s a tutorial from Wendi Gratz which walks you through how to sew big stitches.

STEP 6

The final step is edging your quilt, adding a bias strip to all four sides, and mitering the corners.

Let's look at a couple of super-helpful videos that show how to finish a quilt, both from Rebecca Mae Designs:

How to make bias binding. 

How to bind a quilt.

Time to pat yourself on the back – especially if your mitered corners turned out well! You did it! 

You're a quilter now, and I'm super-proud of you! You want to make another one, right?

Photo via Victoria & Albert Museum: Applique cotton coverlet. England, circa 1851

Links to Free patterns and Instructions

You might want to try a simple 9 patch block quilt next, or a simple square quilt with half square triangles, featured on Sew Mama Sew.   

How about a quicker project, like a baby quilt, from Diary of a Quilter?  

Free downloadable quilt patterns and instructions can be found at Fabrice Editions and AccuQuilt.

There’s another way to create a quilt, called Quilt As You Go. Rather than creating the quilt top, and then putting it together with the middle and bottom layers, you create the three layers for sections of your quilt, and then join the separate quilt blocks into a whole.

Abby Holverson has uploaded a free tutorial for Instructables, called Quilt-As-You-Go.  Thank you, Abby!

Below are some super-helpful quilting books that will help you get started. Click through to Amazon for more information. [As an Amazon Associate I earn from qualifying purchases (at no extra cost to you).]

Next, check out How to Make a Quilt from Fabric Scraps and Sashiko Stitching. See some amazing quilts we've pinned to our Quilting Pinterest Board.

POPULAR POSTS

Make a Boro Bag

Follow a tutorial for making a patchworked bag with Sashiko topstitching.

Sashiko Videos

Follow tutorials for how to create traditional Japanese embroidery stitching.

Vintage Maps

Explore a library's digitized vintage maps, which you can download for free. 

How to Care for Quilts

Learn from a museum textile curator how to best care for your quilts.

Photo of a sewing foot and fabric

Make a Scappy Quilt

Learn to make a basket weave pattern quilt from scraps of fabric.

yarn bombed bike

Yarn Bombing Sisters

Sisters Lorna and Jill Watt create amazing yarn bomb installations .

Magnetic Ceramics

Ceramic artists create fantastical structures using magnetic clay.

Knit Like the Vikings

Learn about a Viking fabric-making technique which pre-dates knitting.

Make a Bilum Bag

Follow a tutorial for making a bilum bag - PNG's traditional fabric.

Home made DIY Pinhole camera

Make a Pinhole Camera

Learn to make a pinhole camera; develop paper film with common items.

What is Nalbinding?

Learn about a stretchy fabric made with connected loops.

Cartoon drawing of a Woman knitting

Digitized Knitting Magazines

Free digitized knitting magazines 1800 - now.

>
Skip to content